


In this tutorial, we'll see how to use a Movie Texture in Blender. Among other things, we'll see how to preview the different frames of the movie directly in the 3D Viewport and how to set its starting frame within our Timeline.
Video Transcript
Hello everyone! In this tutorial, we'll see how to use a Movie Texture in Blender. Among other things, we'll see how to preview the different frames of the movie directly in the 3D Viewport and how to set its starting frame within our Timeline.
Before we begin, I'd like to remind you that, as with my other videos, the text version of this tutorial and other resources are available on my website, also in other languages, at the link in the description.
In the project I'm using for this tutorial, I've placed a 3D Viewport and a Timeline on the left, while in the center we have a UV Editor for Texture mapping and a Material editor. Finally, on the right, we have the usual Outliner and Properties Editor. The 3D model of the computer screen has its own dedicated Material and already has a UV mapping suitable for the Texture.
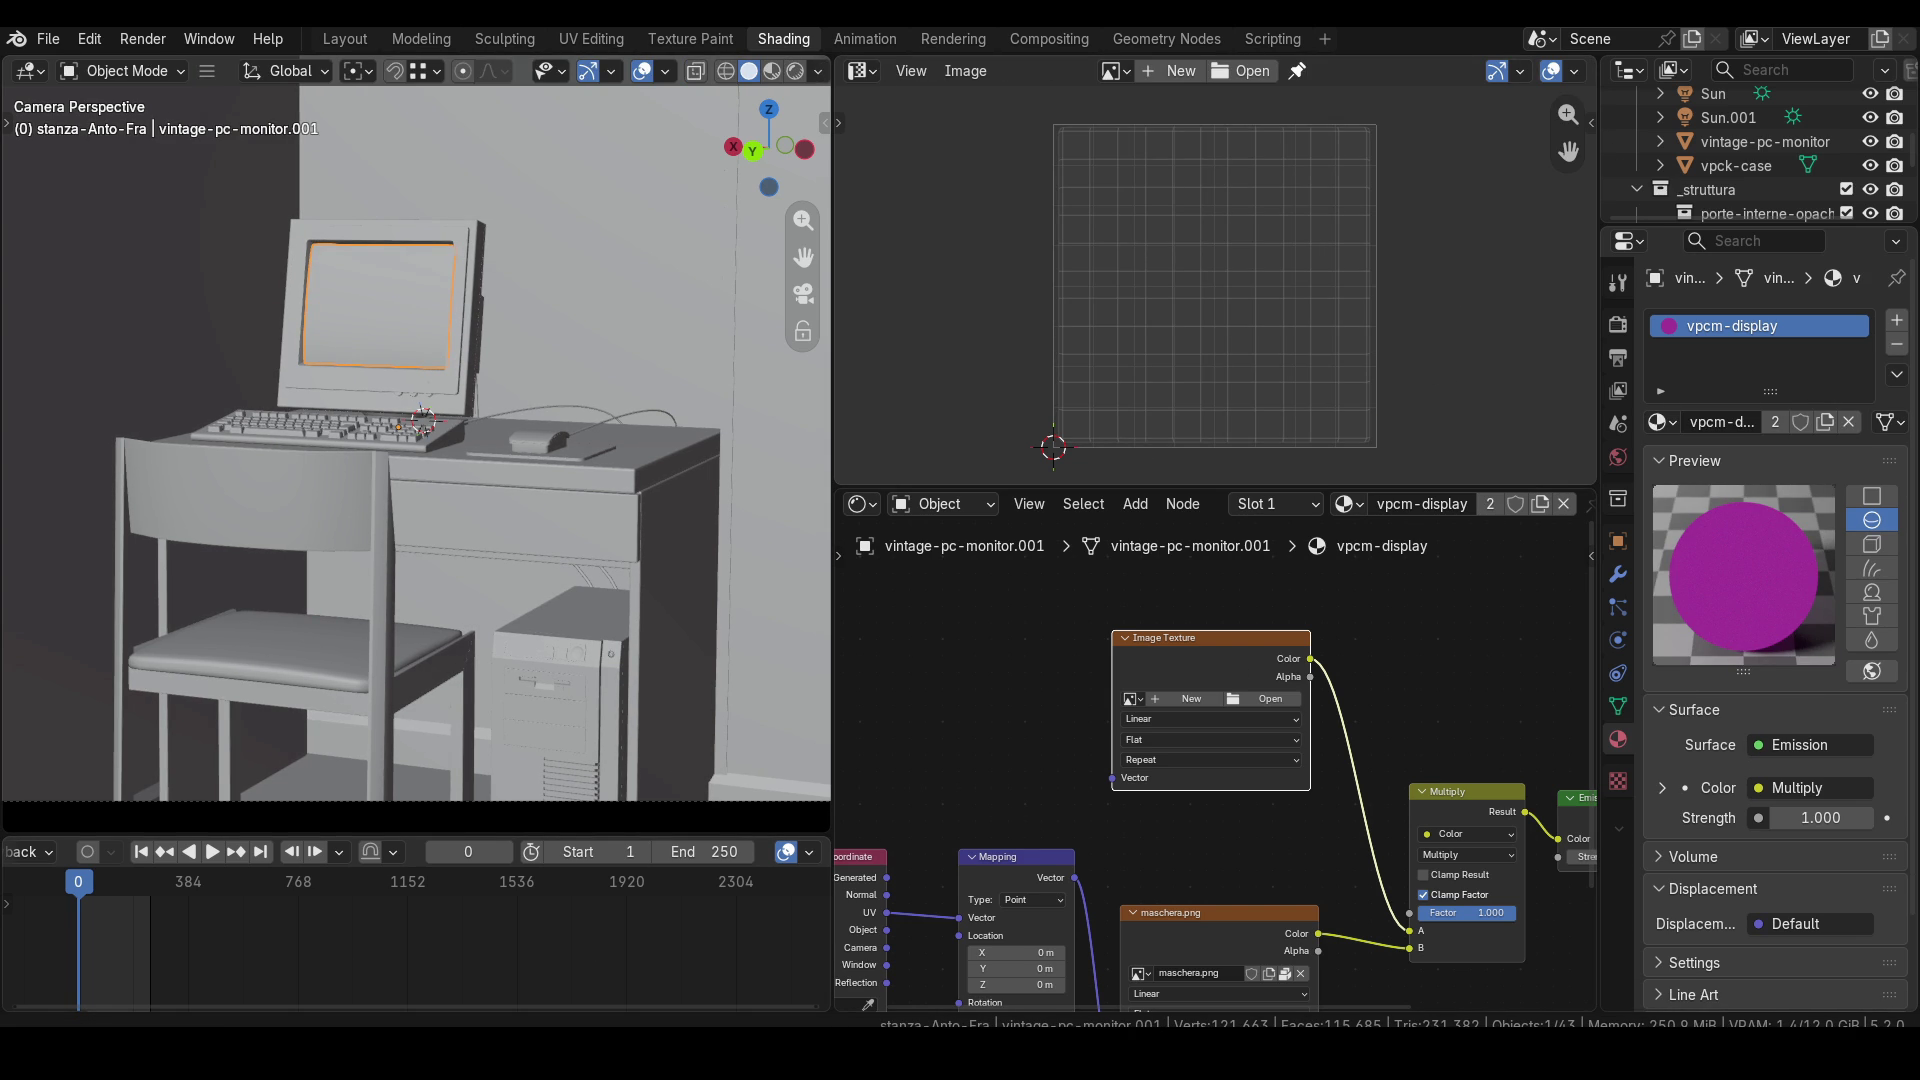
In particular, the Material is created by multiplying the image or movie we want to display by a mask representing colored circles. This multiplication helps simulate the appearance of old CRT monitors. I discussed this technique in a tutorial previously published on the channel and on my website.
The movie can be imported using a standard Image Texture node, or by dragging its file directly into the Material editor, which will automatically create an Image Texture node in Movie mode.
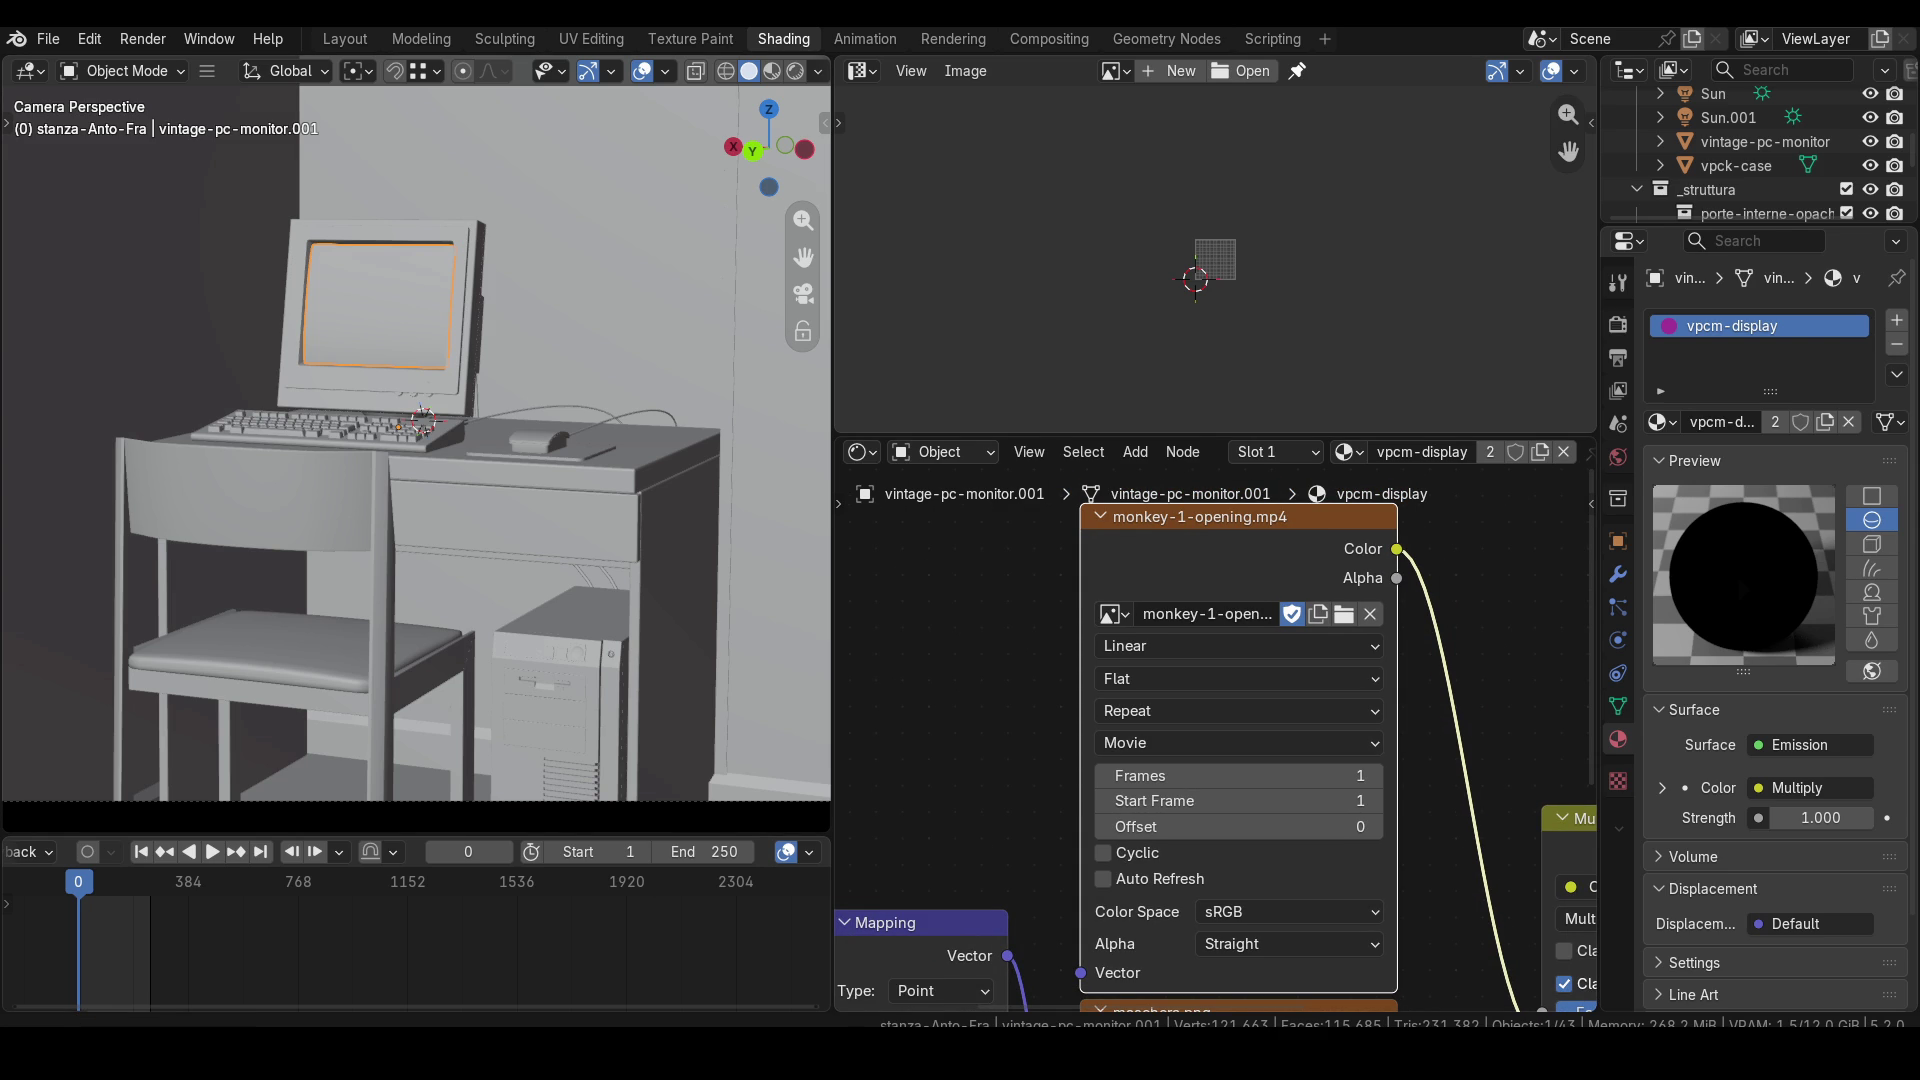
In the Texture settings, we're mainly interested in the Extension menu, the three numerical parameters Frames, Start Frame, and Offset, and the Auto Refresh option.
The Auto Refresh option is useful if we want to see the movie play directly in the Rendered preview of the 3D Viewport as we move from one frame to another on the Timeline. However, if we go, for example, to frame 200 on the Timeline, even after enabling Auto Refresh, we won't see any change in the Texture in the Rendered preview of the 3D Viewport.
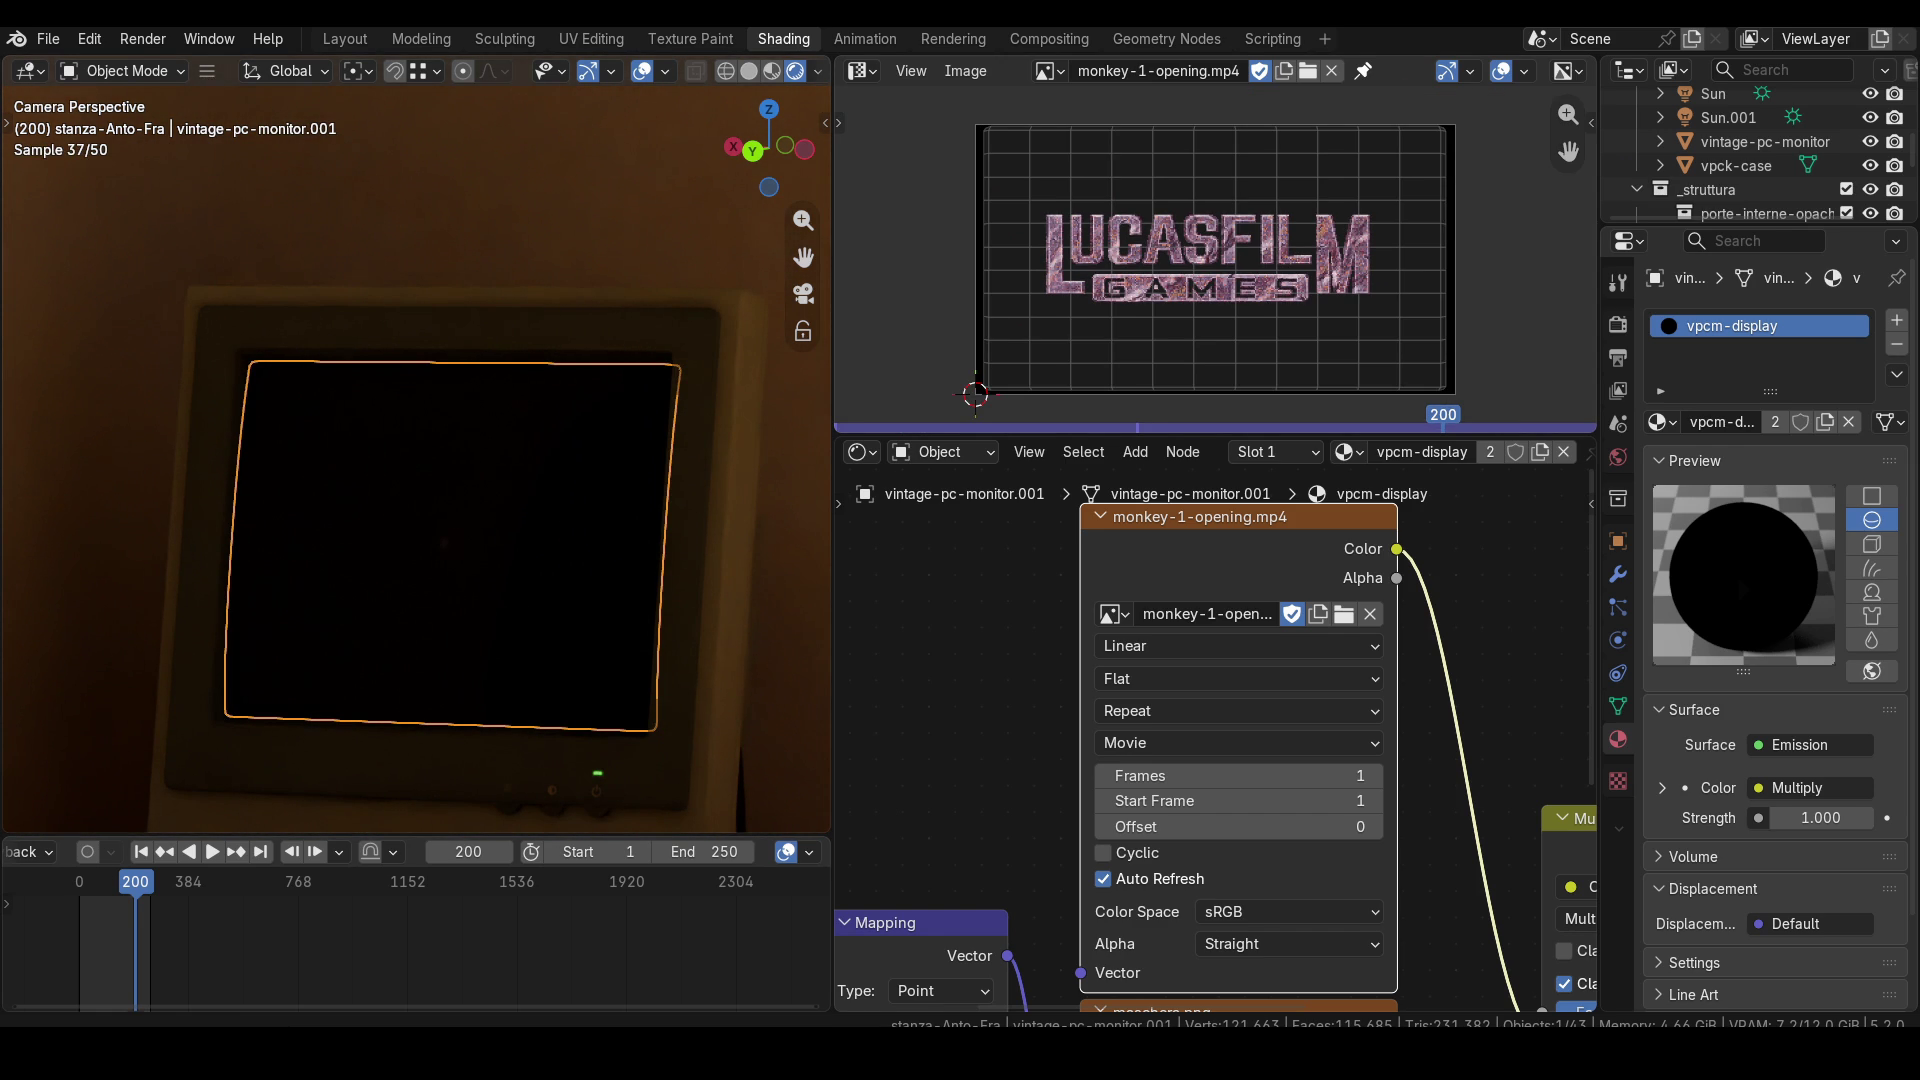
This is because, in addition to Auto Refresh, we also need to set the correct value for the Frames field in the Texture node, which specifies how many frames of the movie we want to be able to play. To find out how many frames the clip contains, we can open the clip in the UV Editor and open the Sidebar by pressing N. In the Image tab, we'll find the value we need, which in my case is 2843. Once we've set this parameter as well, we'll be able to see the correct preview in the 3D Viewport.
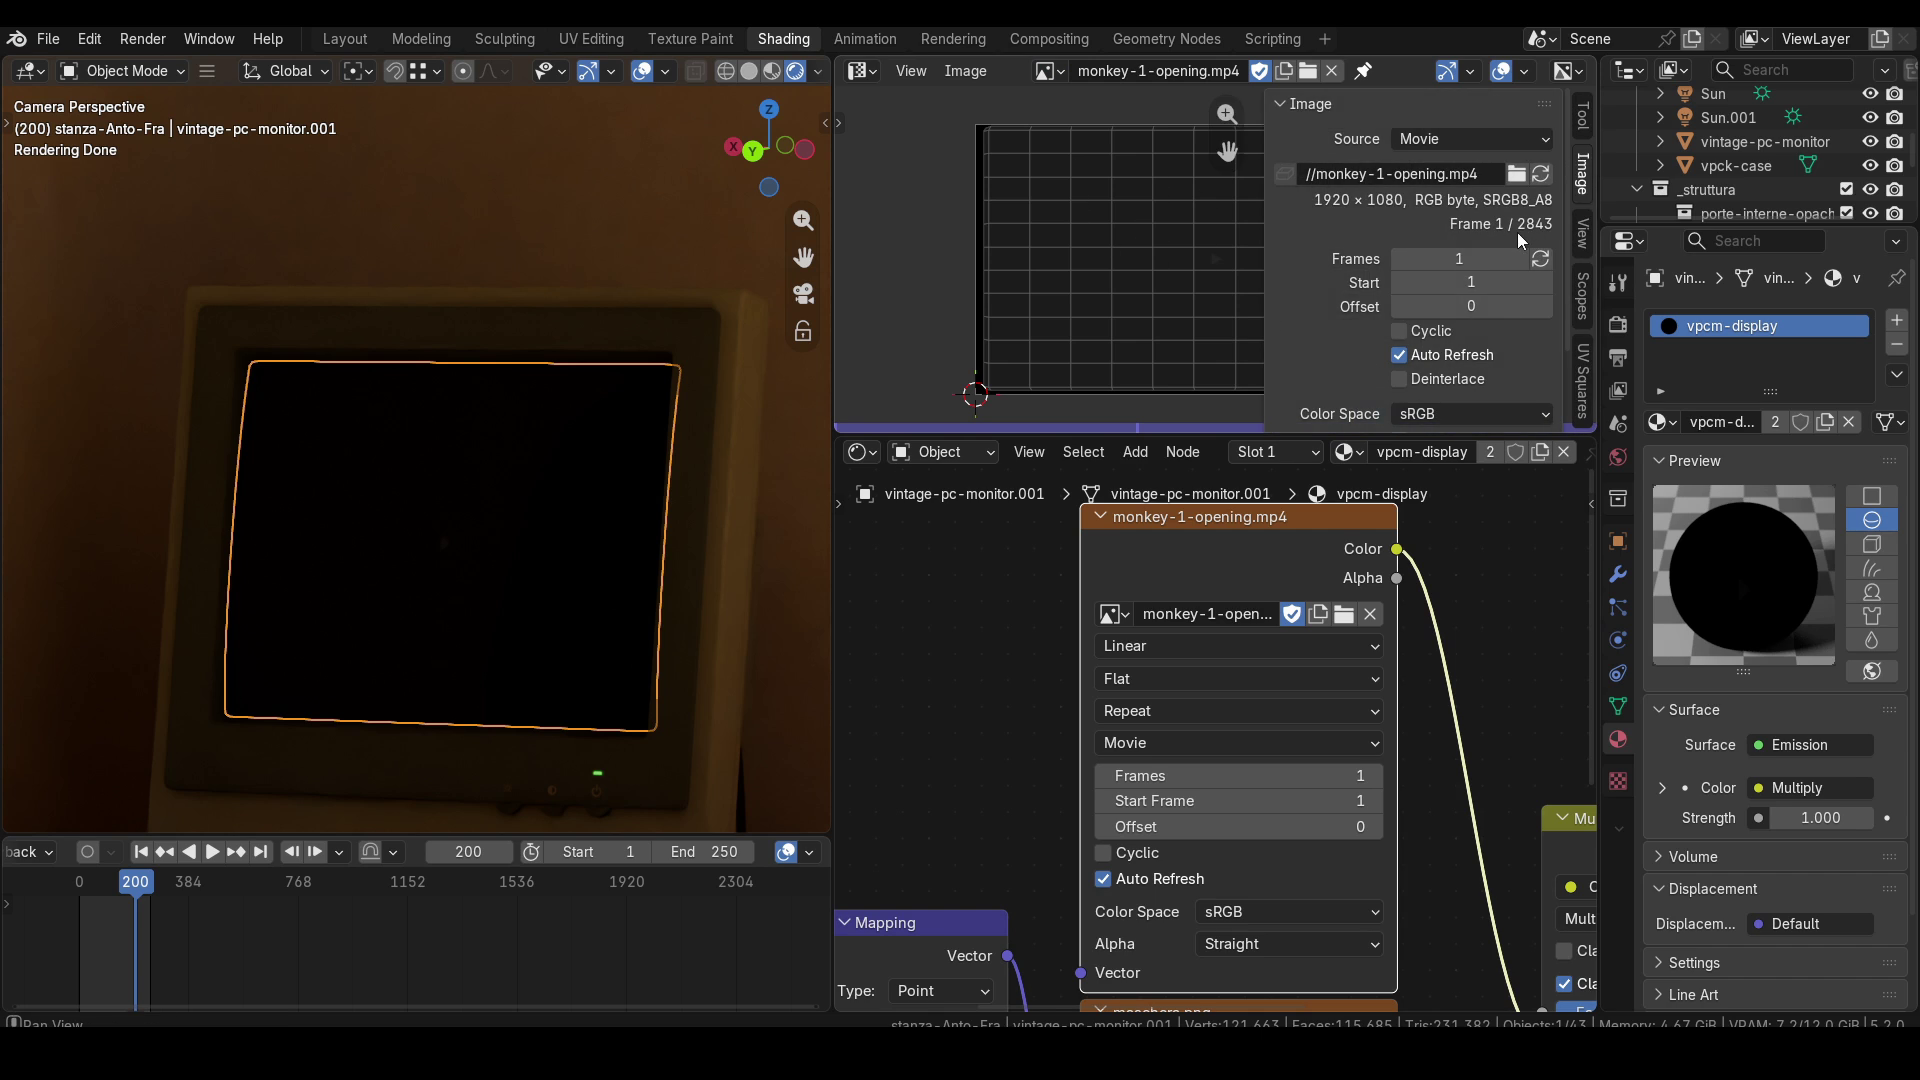
Notice that the preview in the 3D Viewport is now updated correctly, but the one in the UV Editor is not! This is because, in the UV Editor as well, specifically in the Image tab of its Sidebar, we need to set the number of movie frames to display in the Frames field. Fortunately, in the Image tab there's a Match Movie Length button next to the Frames field, which lets us quickly set this value.
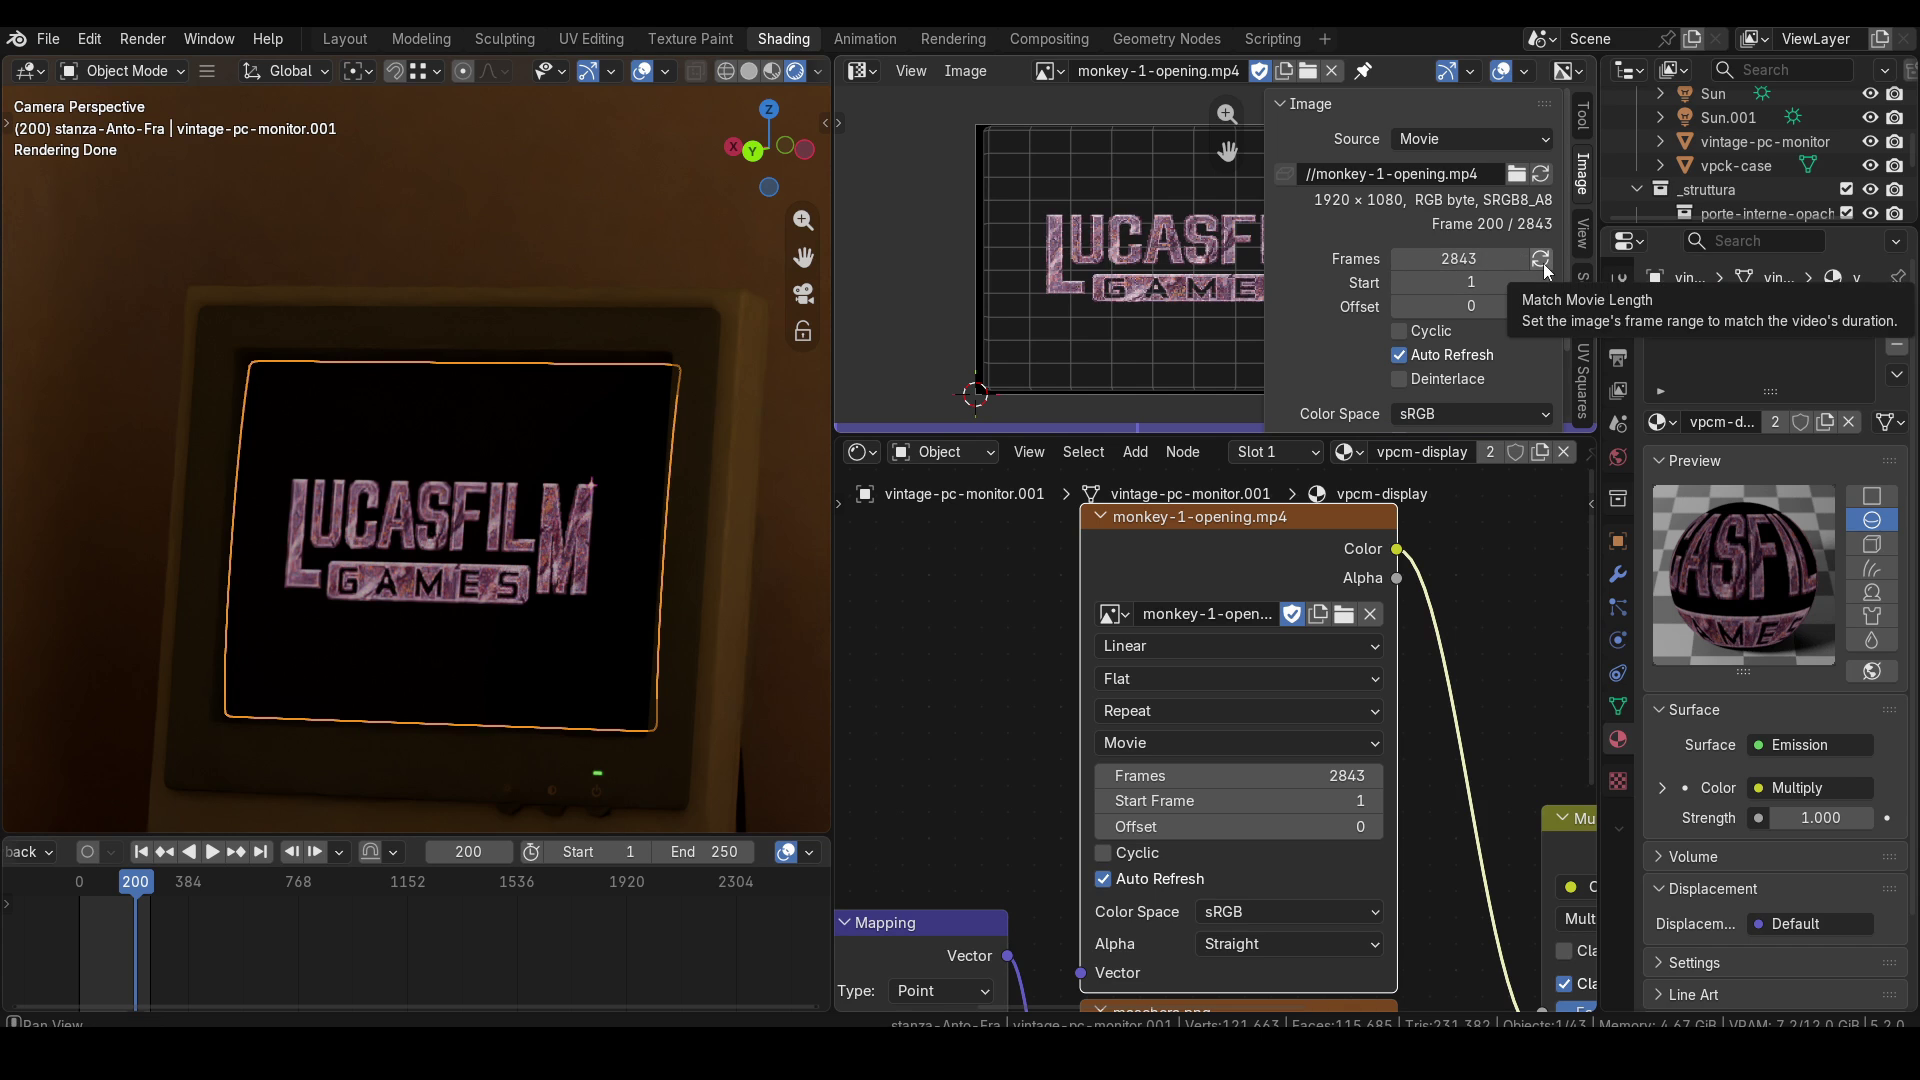
Being able to see the current frame in both the 3D Viewport and the UV Editor will also help us set up the UV mapping correctly, just as we would for any image Texture. This is where the Extension menu becomes especially important. By default, it's set to Repeat. With this mode, if the UV island is larger than the frame, the frame image will be repeated multiple times across the geometry.
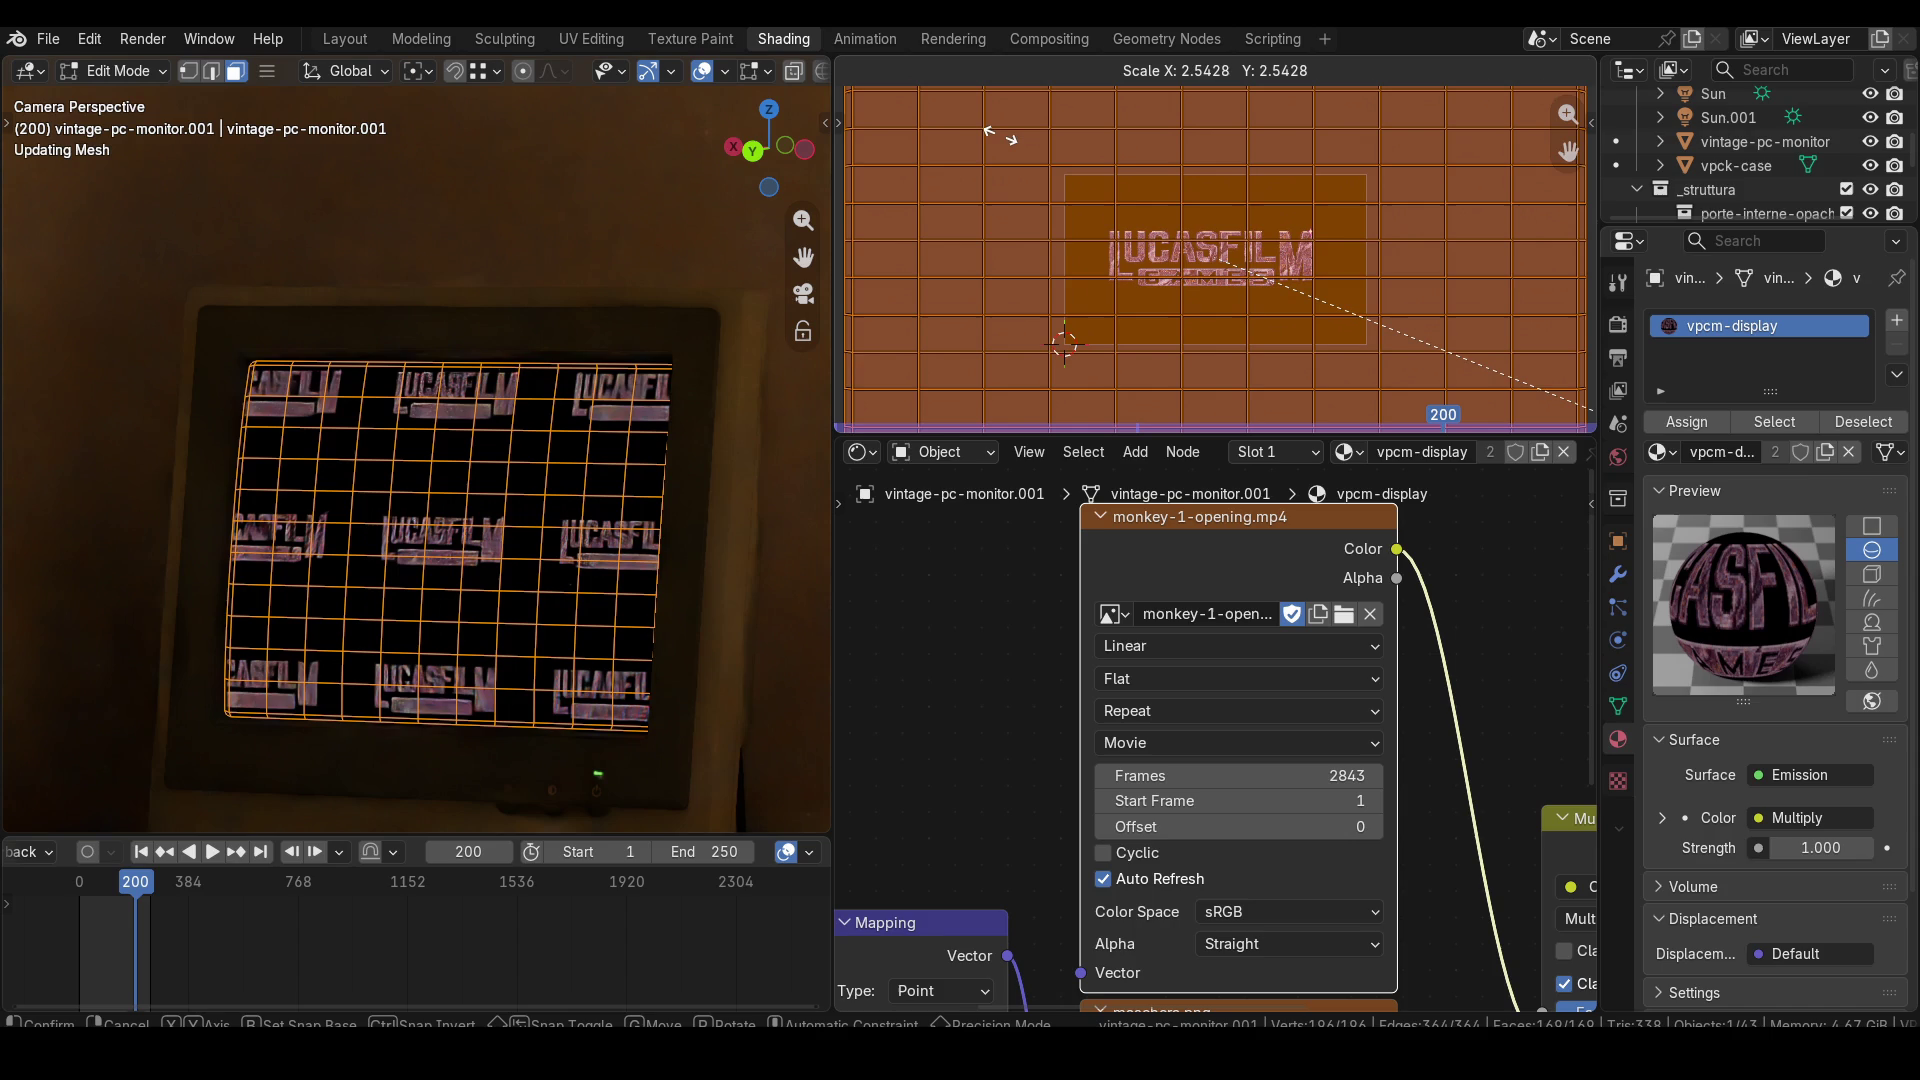
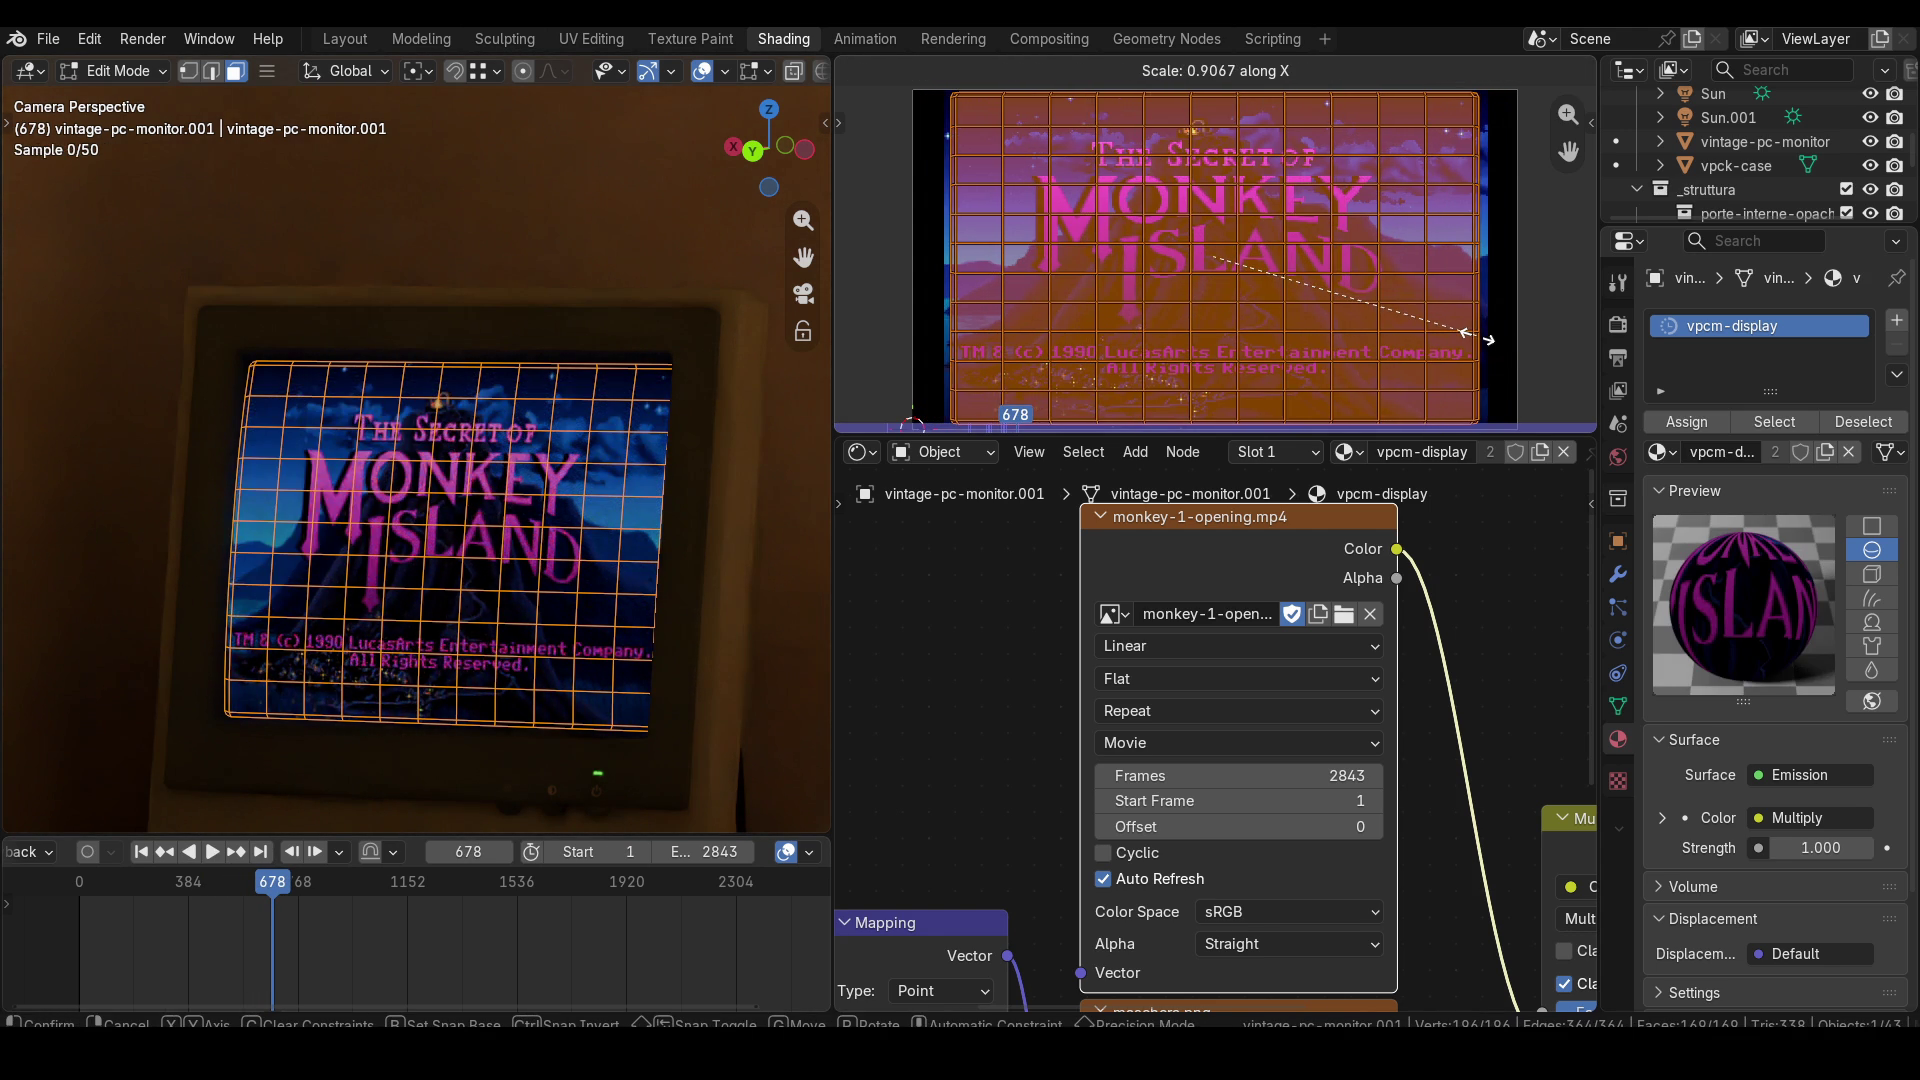
In my case, the UV island will actually be smaller than the frame, so the default setting is fine. If necessary, however, you can change the Extension mode to Clip, which will prevent the Texture from being repeated in the other areas. I'll move forward a few frames to adjust the UV island so that it works better for the rest of the movie.
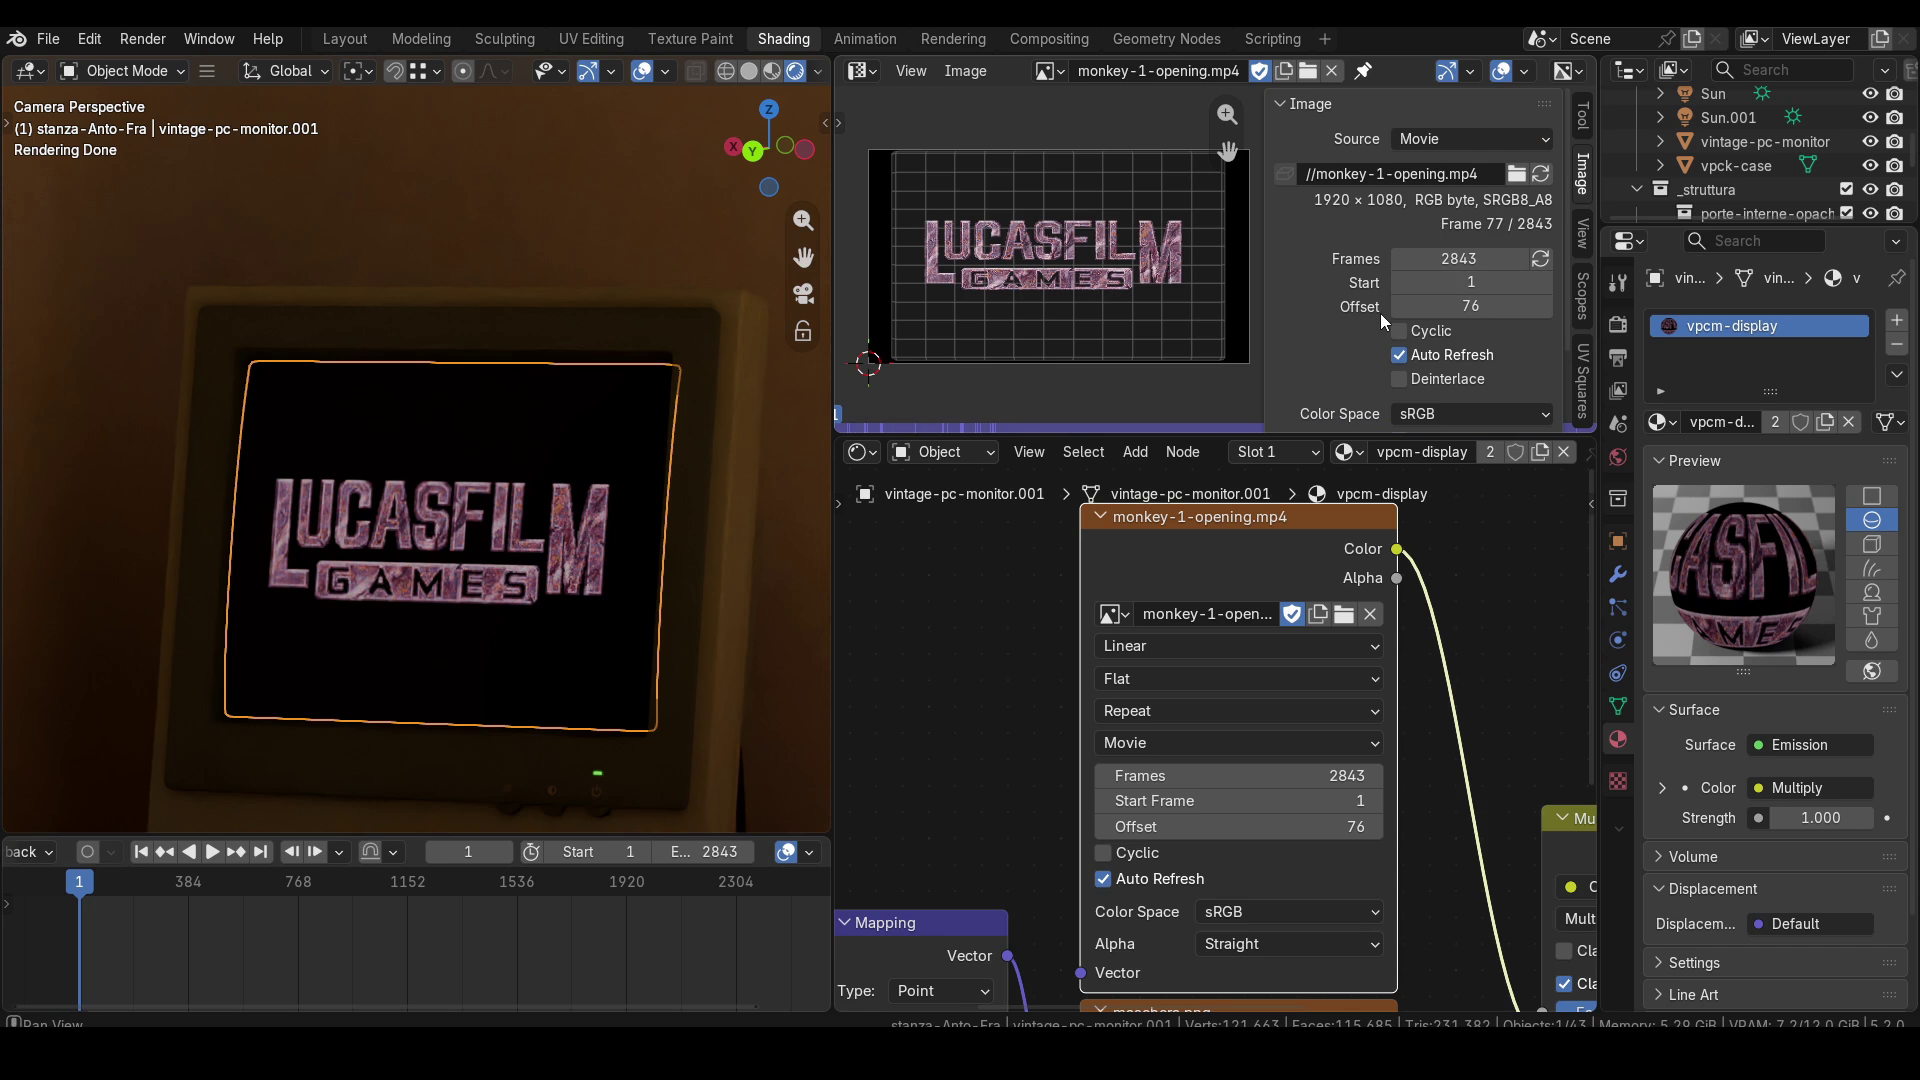
Now let's take a look at the Start Frame and Offset parameters. Let's start with Offset. As you can see, in my case the Lucasfilm Games logo appears at frame 77 on the Timeline. To make it appear immediately at the first frame of the Timeline, we need to enter 76 in the Offset field. This tells the Texture node containing the movie to skip directly to frame 77 of the movie.
Keep in mind, however, that the values are separate for the Rendered preview and the UV Editor in this case as well. So, to get a consistent result in the UV Editor, we'll also need to change the Offset value there to 76.
Let's set Offset back to 0 in both the Image Texture node and the UV Editor, so we can now talk about the Start Frame parameter, which has a default value of 1.
In this case, we're telling Blender to start playing the movie at a specific frame on the Timeline of the overall animation. By default, this value is 1 because movie Textures will normally start playing on the first frame of the Blender animation. Suppose, however, that you want the movie to start playing at frame 100 on the Timeline because, for example, during the first 100 frames you want to move the camera closer to the screen and only then start playing the movie. We said that the Lucasfilm Games logo appears at frame 77 of the Texture, right? Well, if we enter 100 in the Start Frame field of the node, the logo will now appear at frame 176 on the Timeline because we've delayed the start by 100 frames. Again, to get a consistent result in the UV Editor, we'll also need to change the Start Frame value in the Image tab. Notice that, in this tab, Blender tells you that you're at frame 77 of the movie because it's taking the 100-frame offset into account, even though we're at frame 176 on the Timeline.
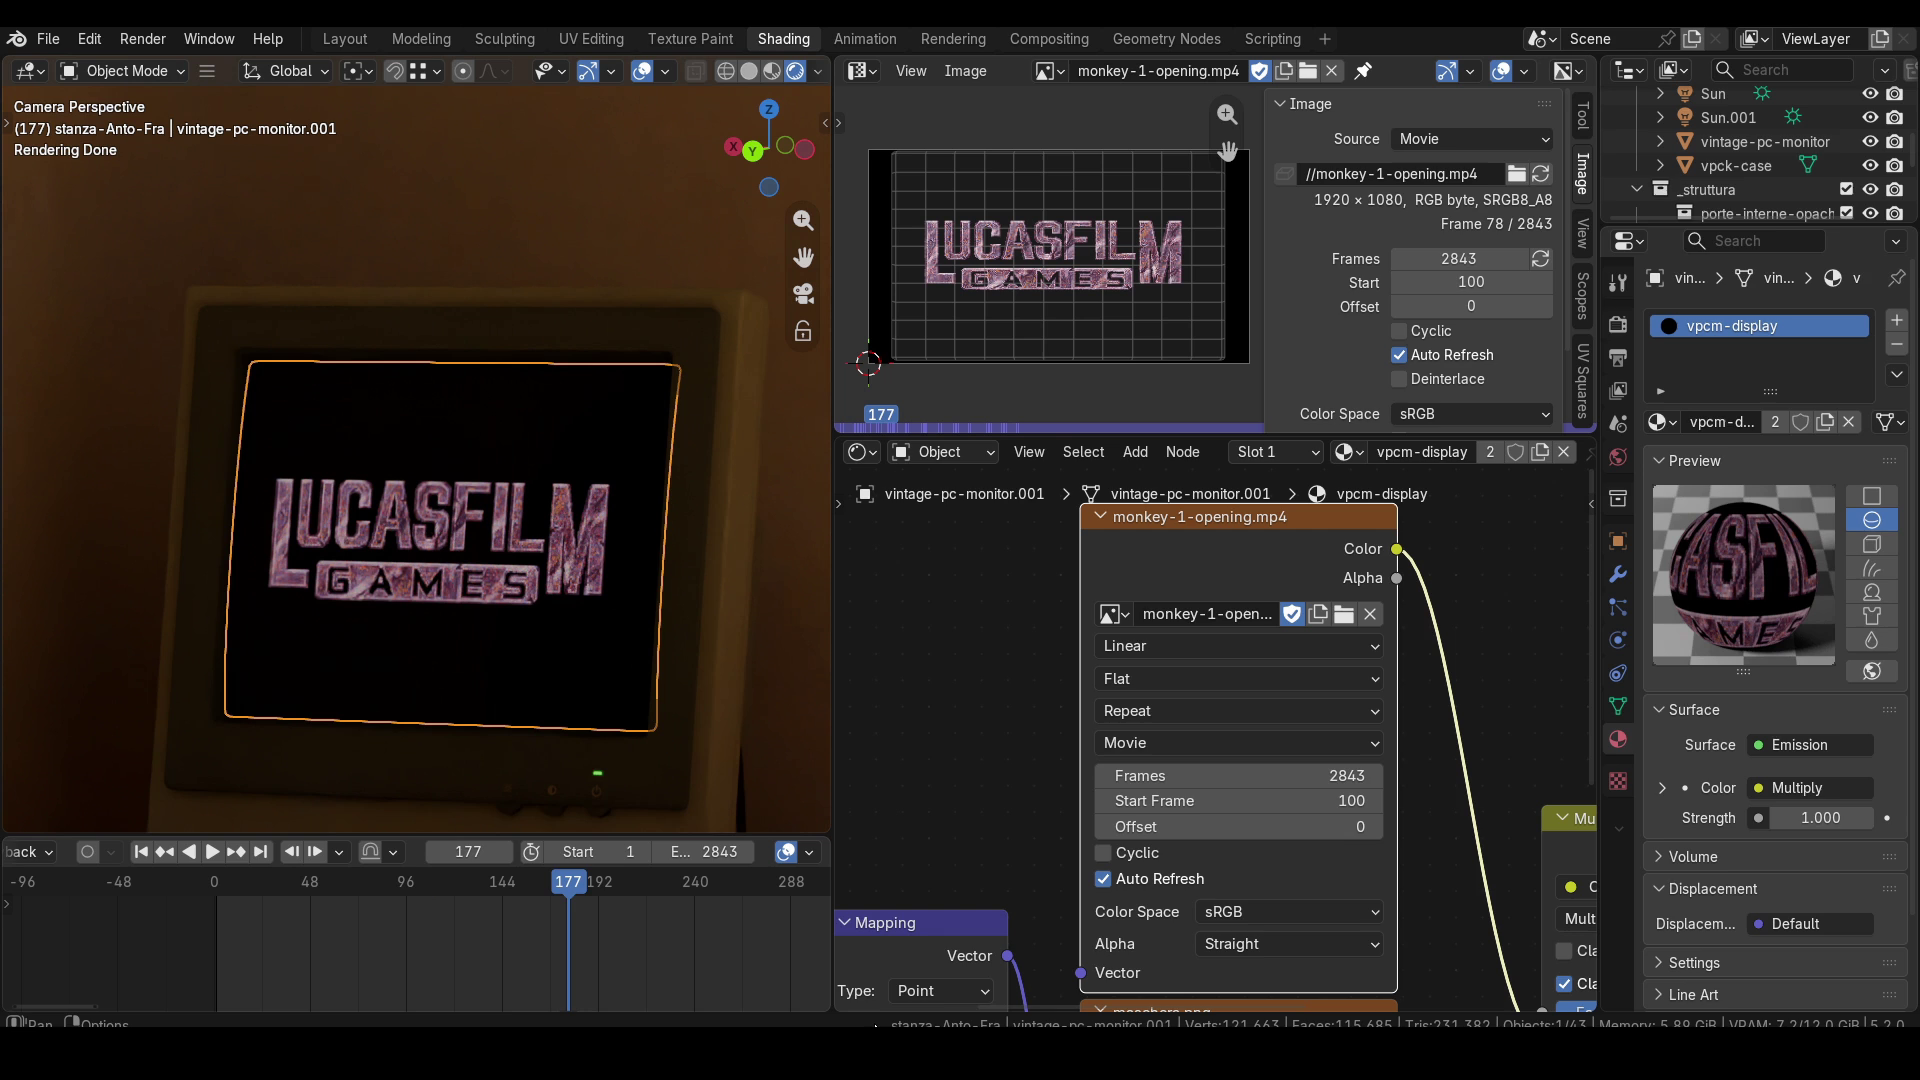
So, the difference between Start Frame and Offset is this: with Start Frame, we make the movie in the Image Texture node start playing at a different point relative to the first frame of Blender's Timeline, and we can even use negative values. With Offset, on the other hand, we can skip some frames of the movie in the Image Texture node and start playback from a different point in the movie.
Let me show you one final practical example. First, I'll reset the Start Frame and Offset values of the node to 1 and 0, respectively. For convenience, I'll focus on the Rendered preview, but remember that to see the same result in the UV Editor, you'll need to change the values there as well.
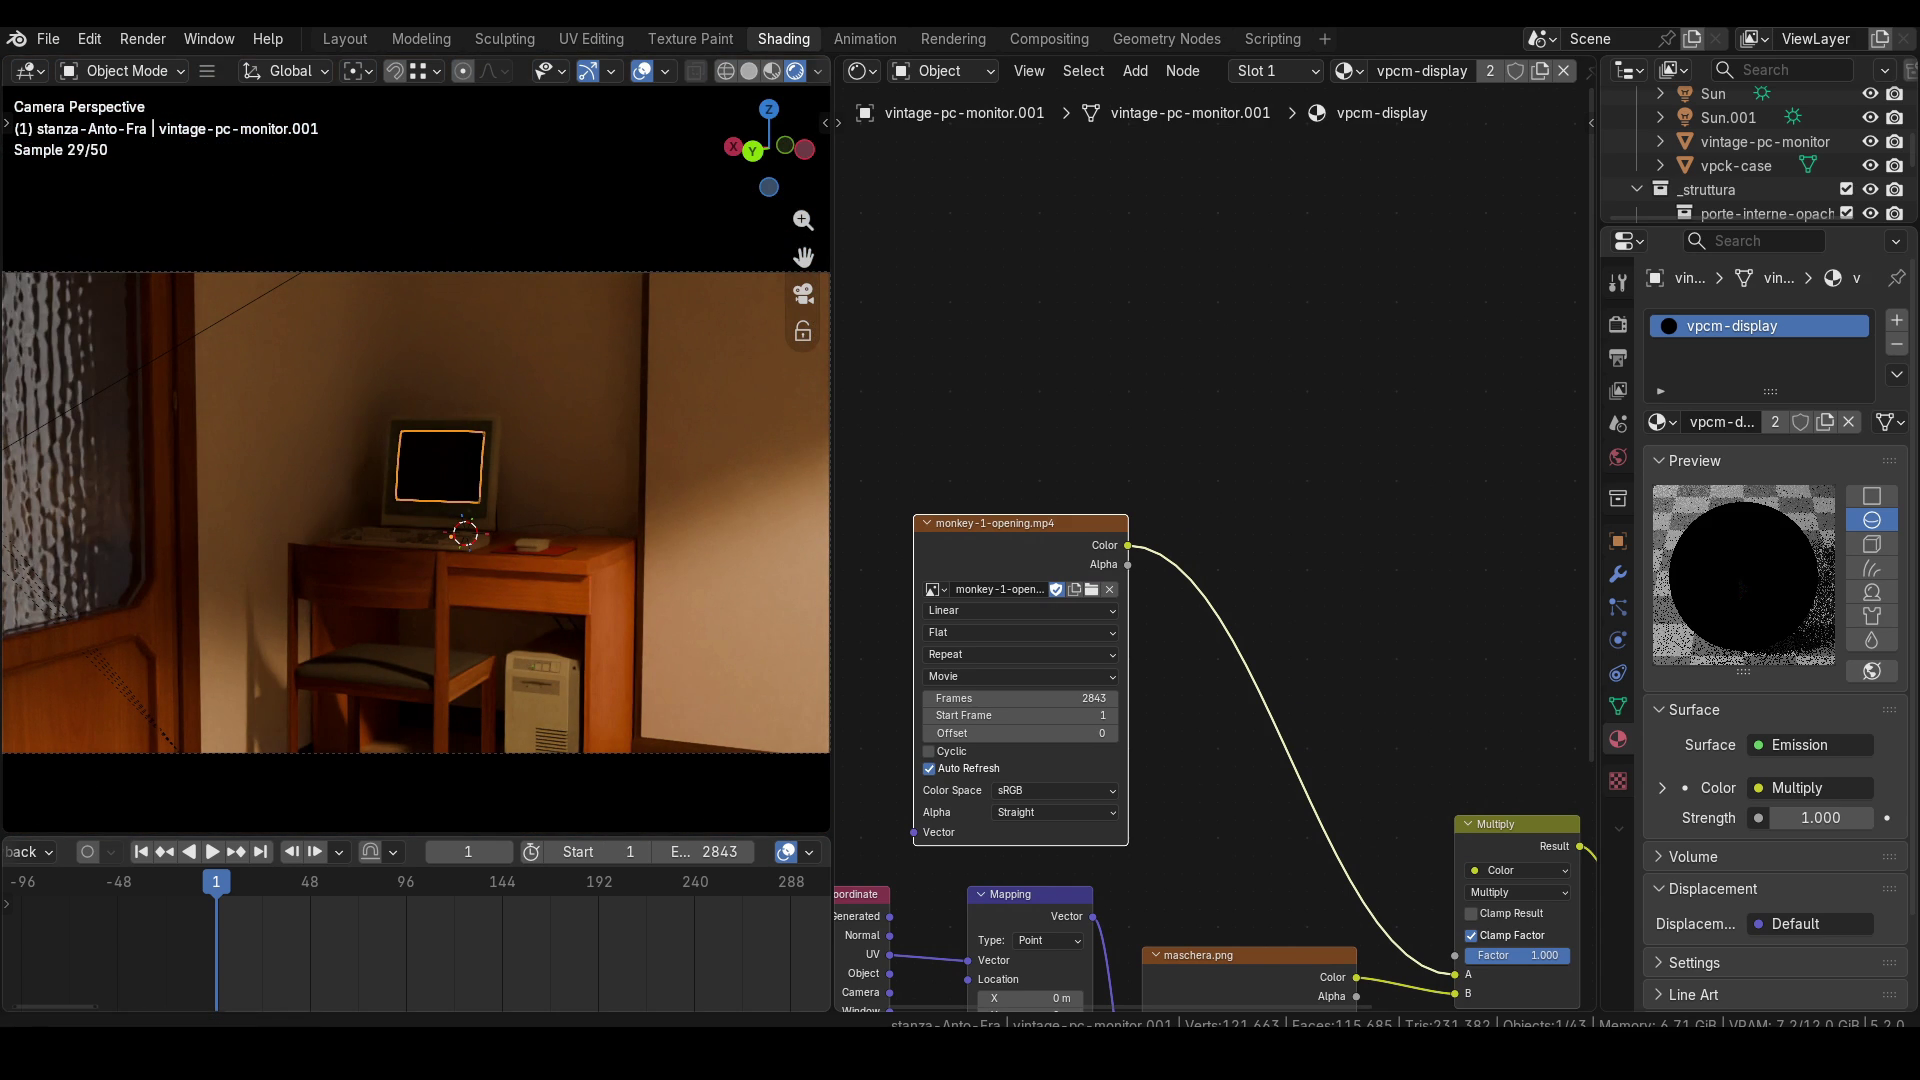
We know that the Lucasfilm logo appears at frame 77 of the Texture, while the first screen of the actual The Secret of Monkey Island intro appears at frame 281. We want to create an animation where the camera moves closer to the screen during the first 100 frames. During this time, the intensity of the light in the room decreases to 0 and the screen must remain black. Then, the intro screen should appear immediately, skipping the Lucasfilm Games logo section. I'll create the camera movement and the lighting change by inserting the necessary Keyframes.
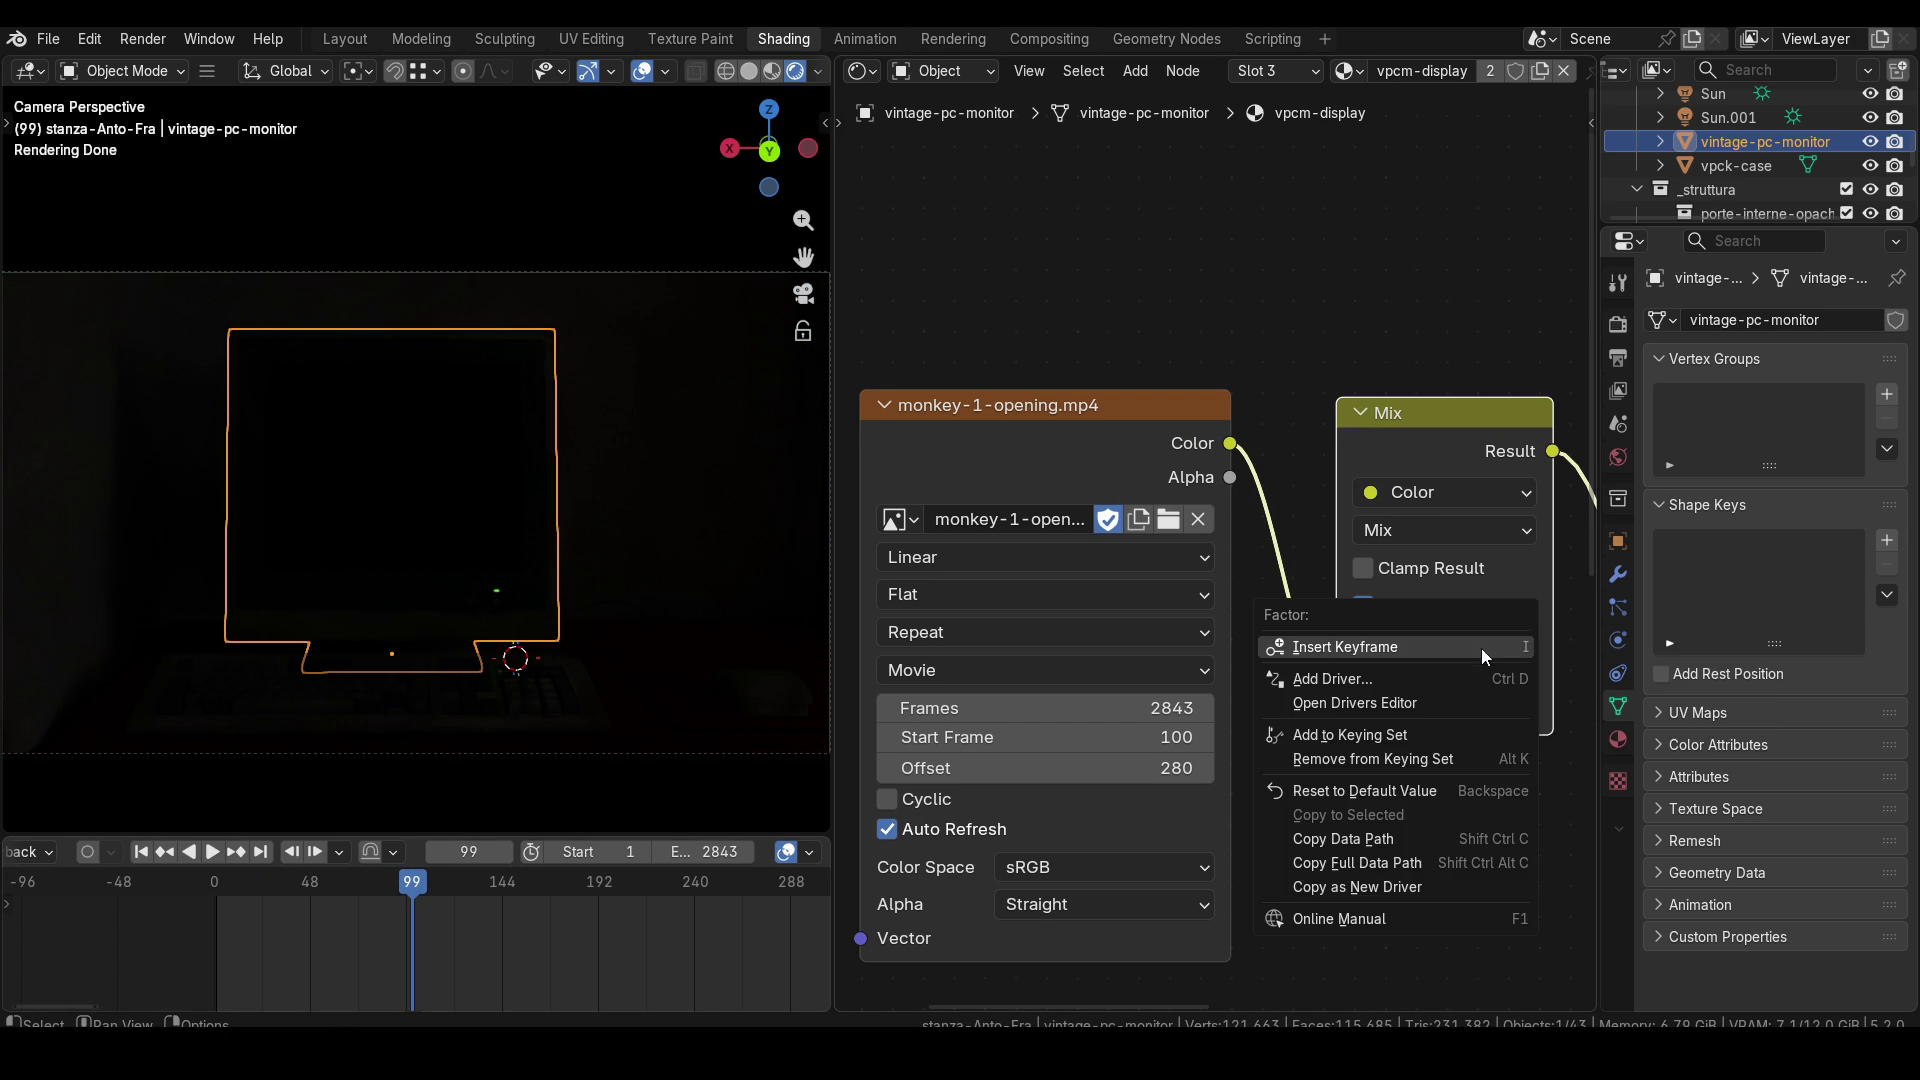
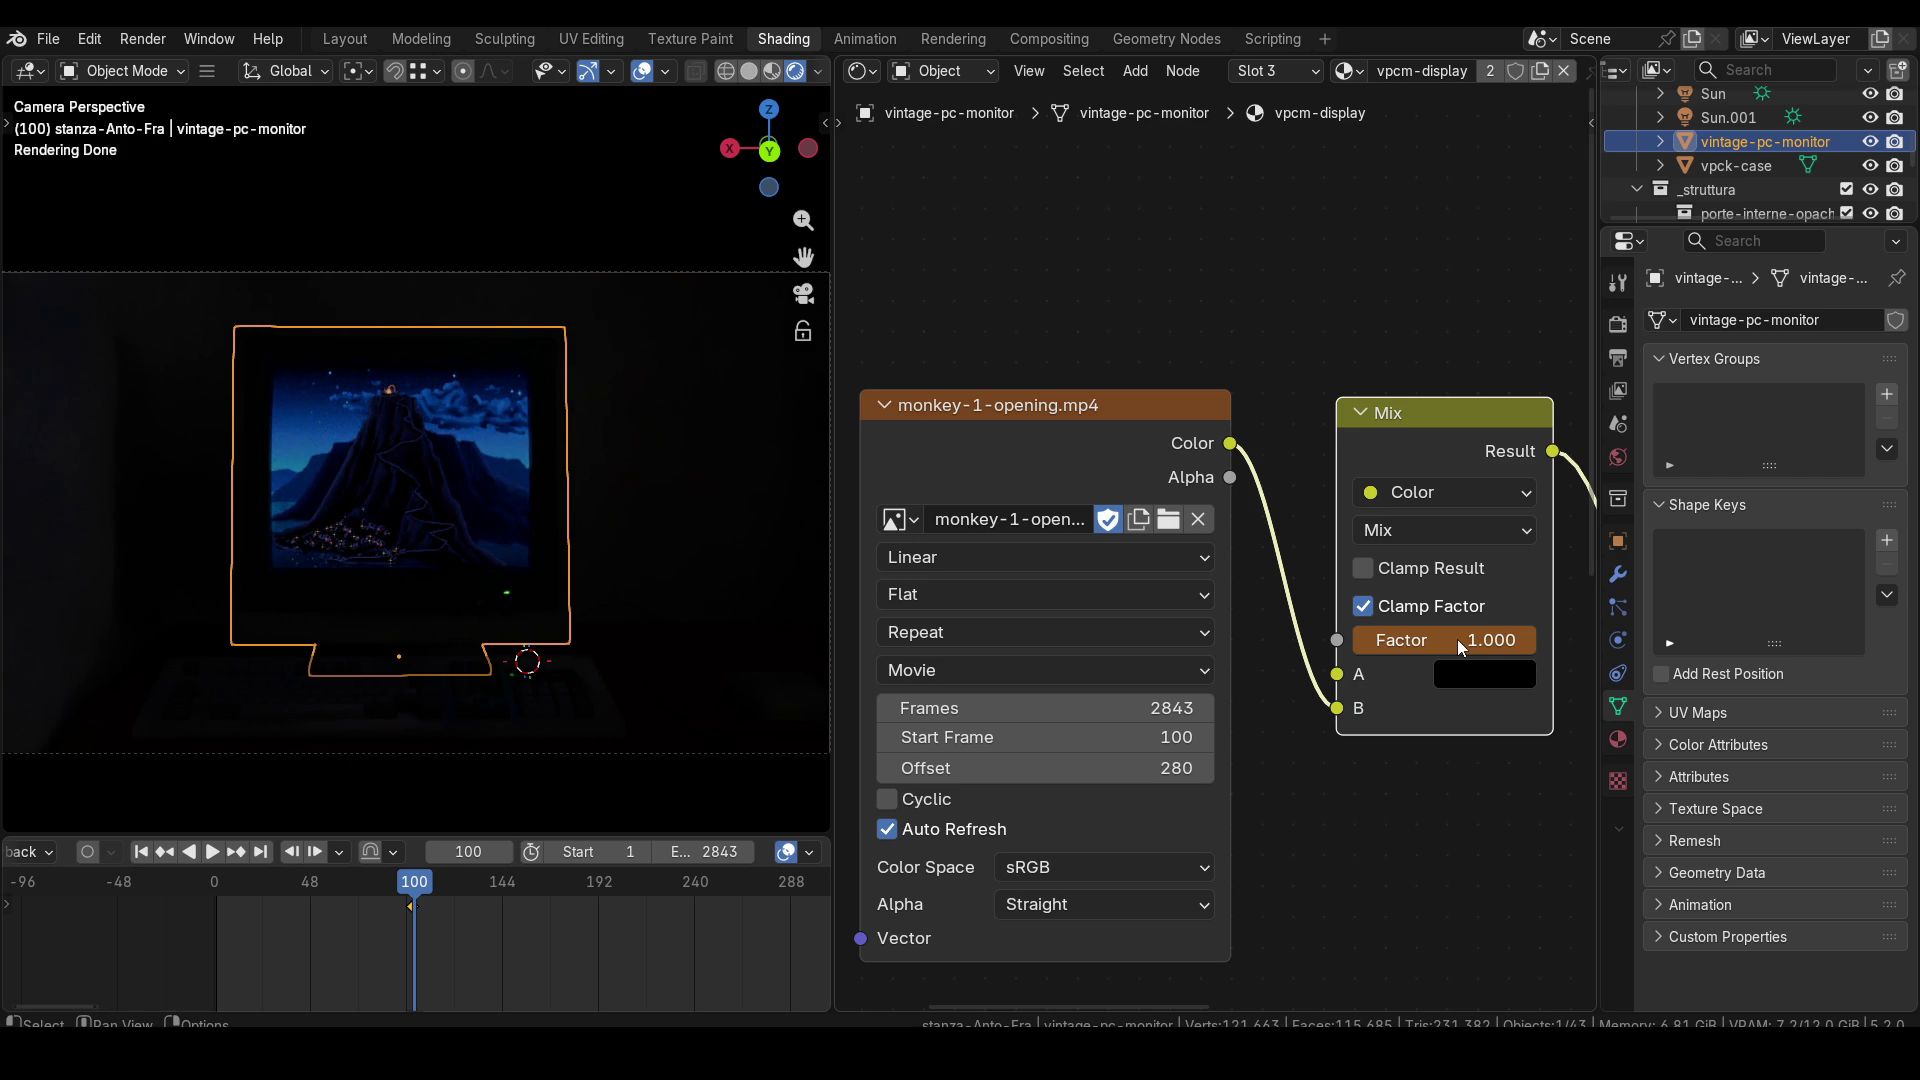
Since we want to play the movie starting from frame 280, we need to enter 280 in the Offset field. Also, since playback needs to begin at frame 100 of Blender's Timeline, we need to enter 100 in the Start Frame field.
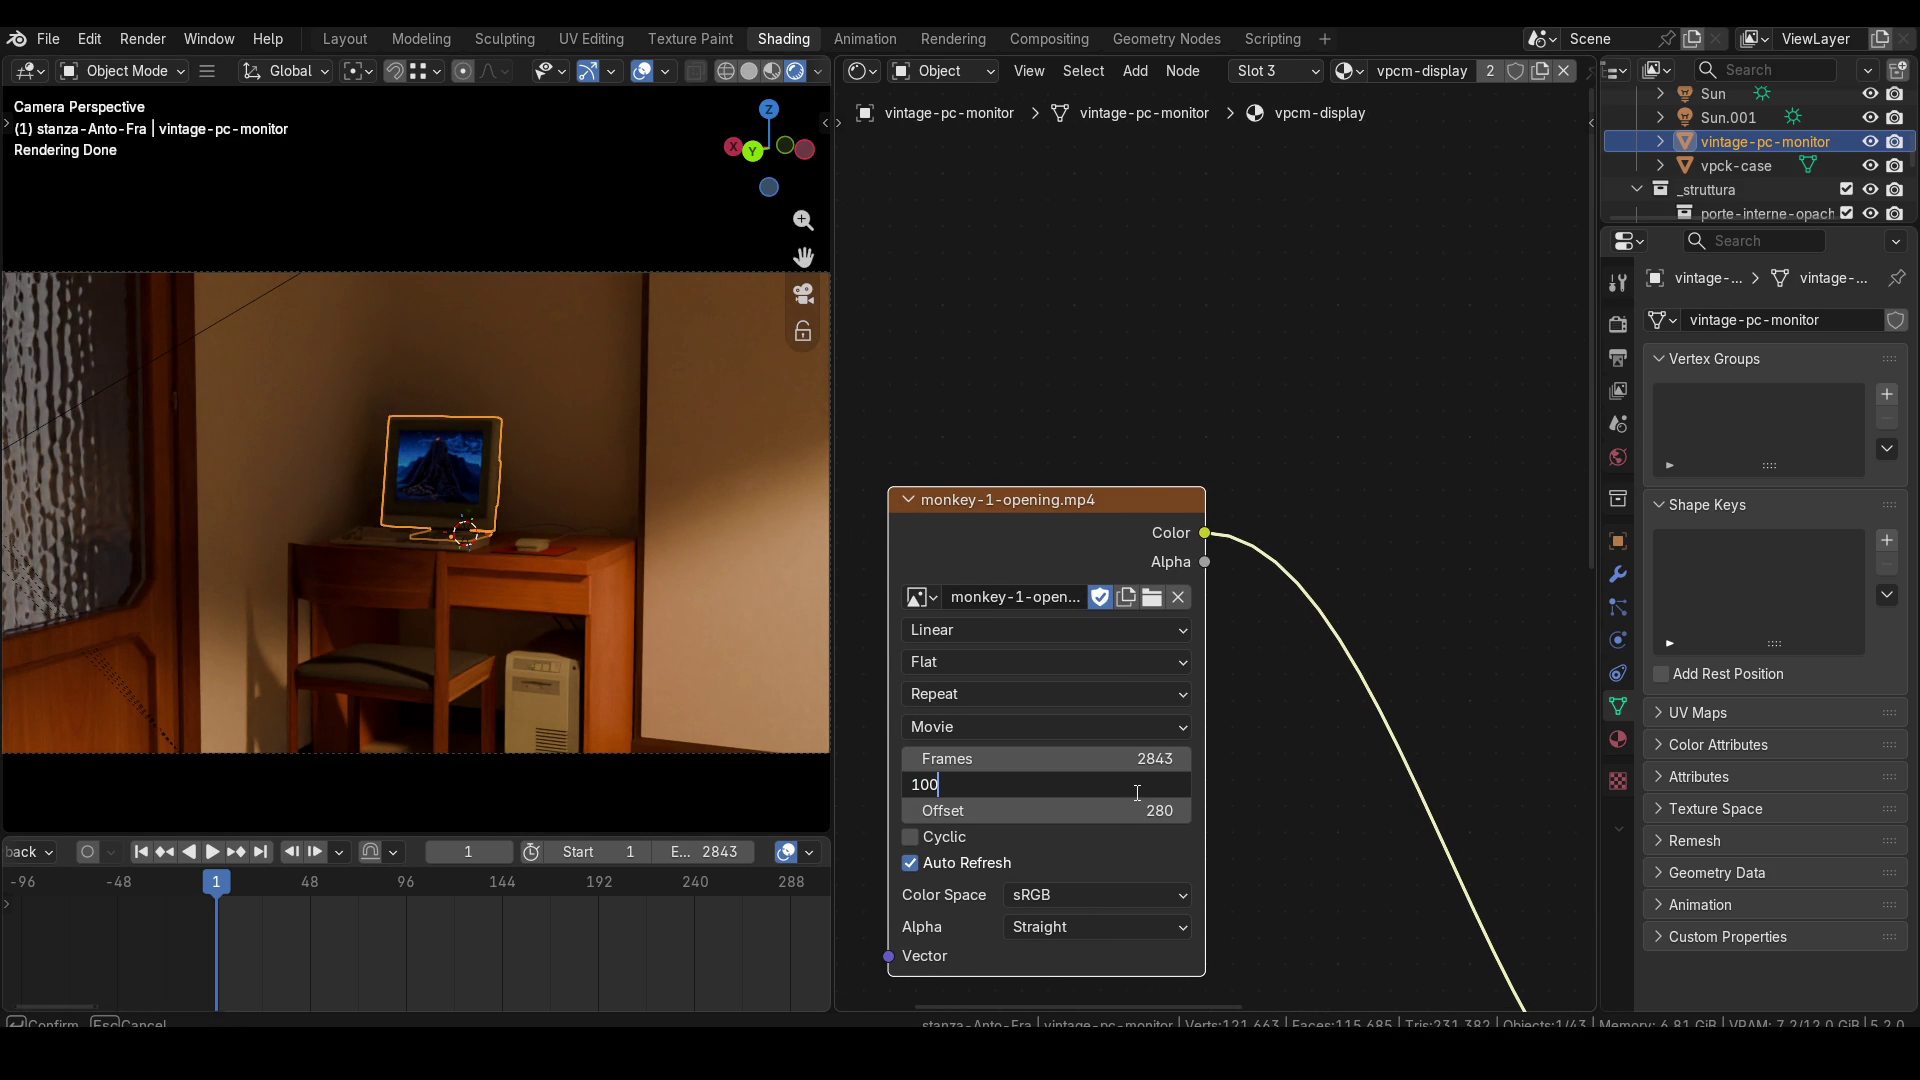
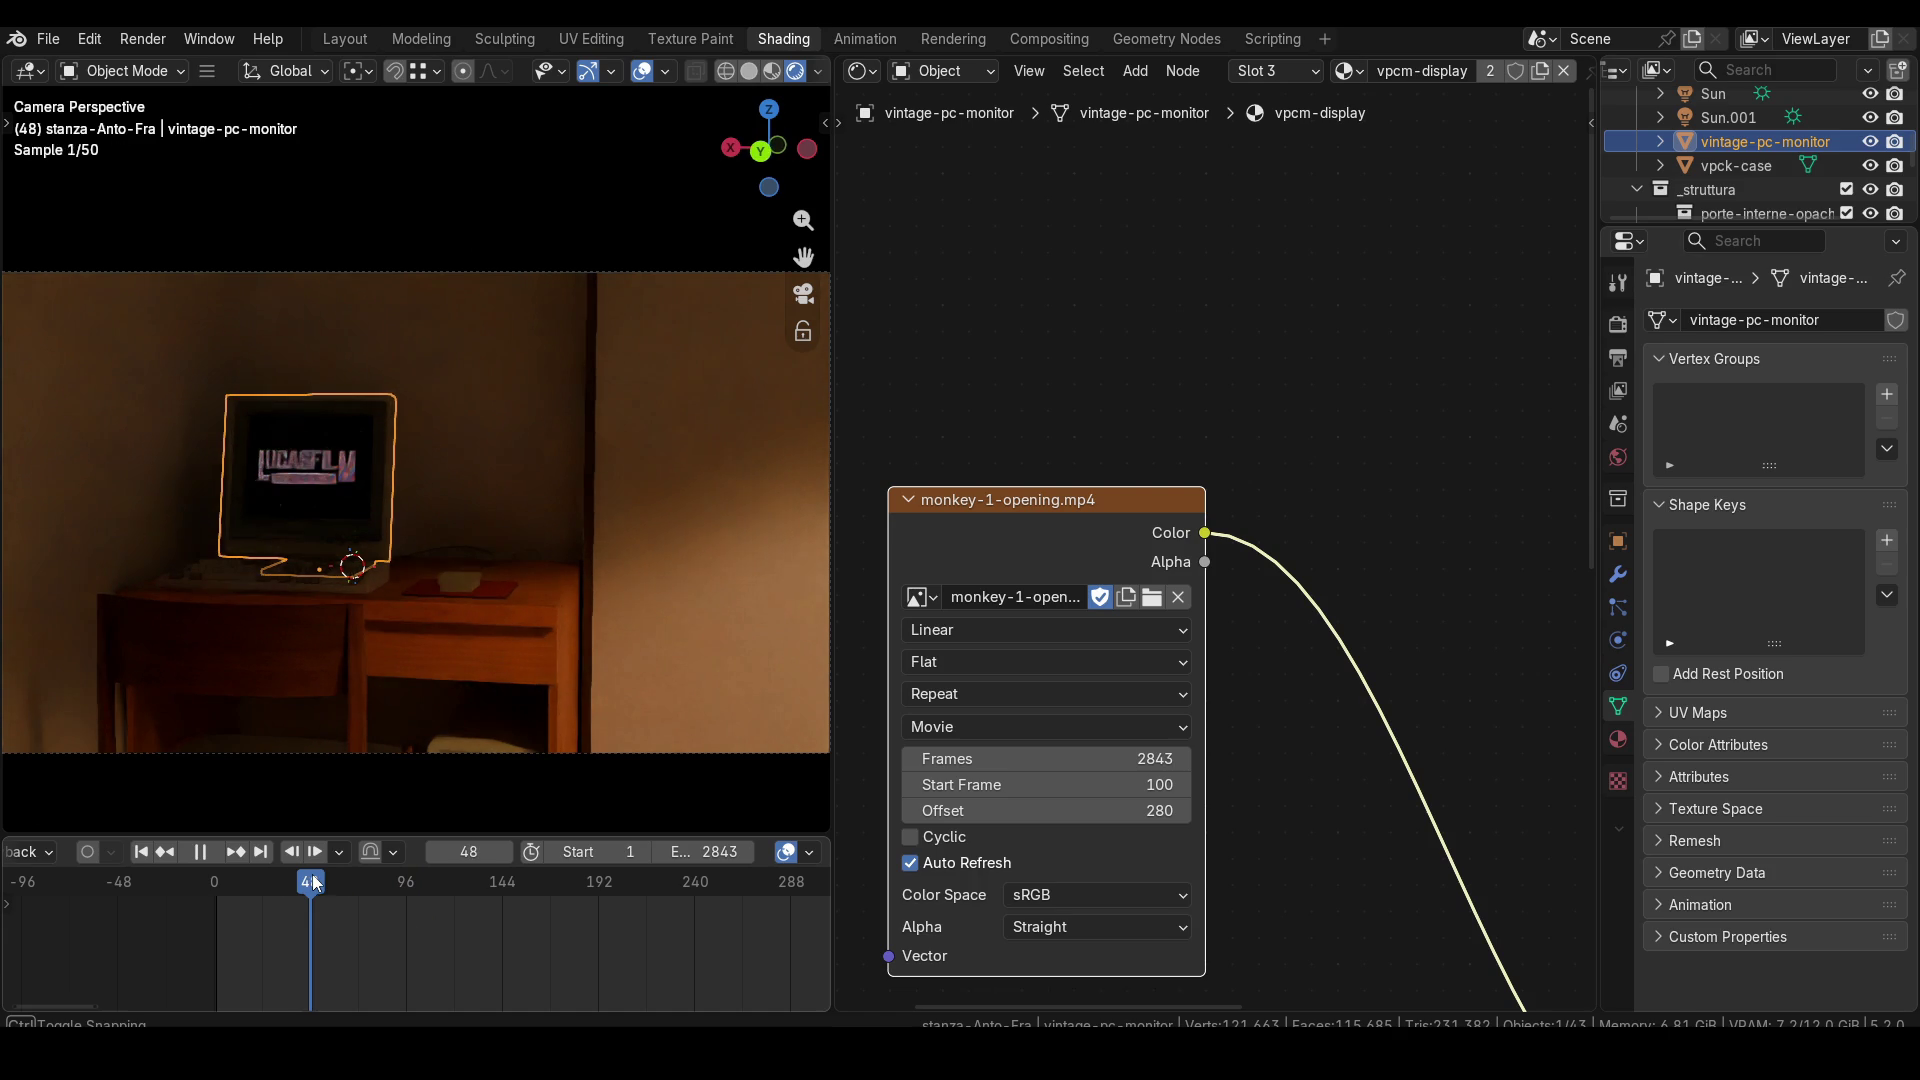
However, if we preview the animation, we can see that the frames before frame 100 are still visible, while we want the screen to be black at that point. To solve this problem, we can mix the movie output with black using a Mix node and animate the Factor of this Mix node. Specifically, we set it to 0 through frame 99, inserting a keyframe at frame 99, and then set it to 1 at frame 100, inserting another keyframe at frame 100. This gives us an instantaneous transition between the two frames. The Factor should initially be set to 0 and then to 1 if black is the first input of the Mix node, because a Factor of 0 uses only the first input, while a Factor of 1 uses only the second.
That's all for this tutorial! If you found it useful, you can support me by leaving a Like and subscribing to the channel! See you soon!