


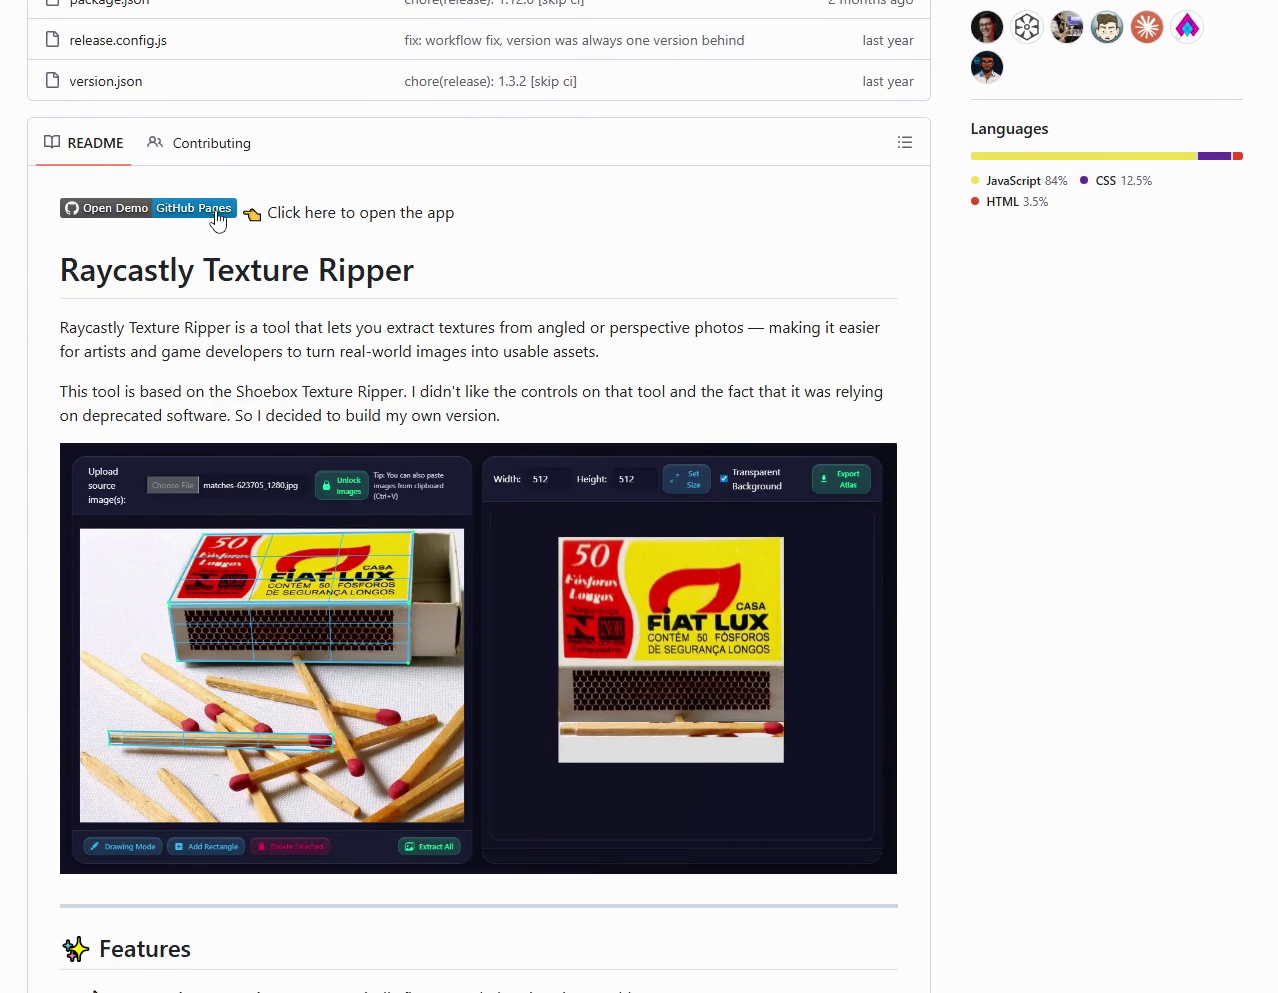
Raycastly Texture Ripper is a free and open-source program that allows us to extract and straighten portions of photographs, combining them into a single image that can be used either as a single Texture or as a Texture Atlas for texturing the surfaces of our 3D objects.
Video Transcript
Raycastly Texture Ripper (GitHub)
Hello everyone! In this short tutorial, I’m going to talk about Raycastly Texture Ripper, a free and open-source program that allows us to extract and straighten portions of photographs, combining them into a single image that can be used either as a single Texture or as a Texture Atlas for texturing the surfaces of our 3D objects.
In the description, you’ll find a link to the Texture Ripper page on GitHub, where you can download the package containing the source code or, by scrolling down, click GitHub Pages to launch Texture Ripper directly in your browser, without having to download and install it. However, if you do want to download it, you can click the Download Desktop App button in the bottom-right corner to access the downloads page.
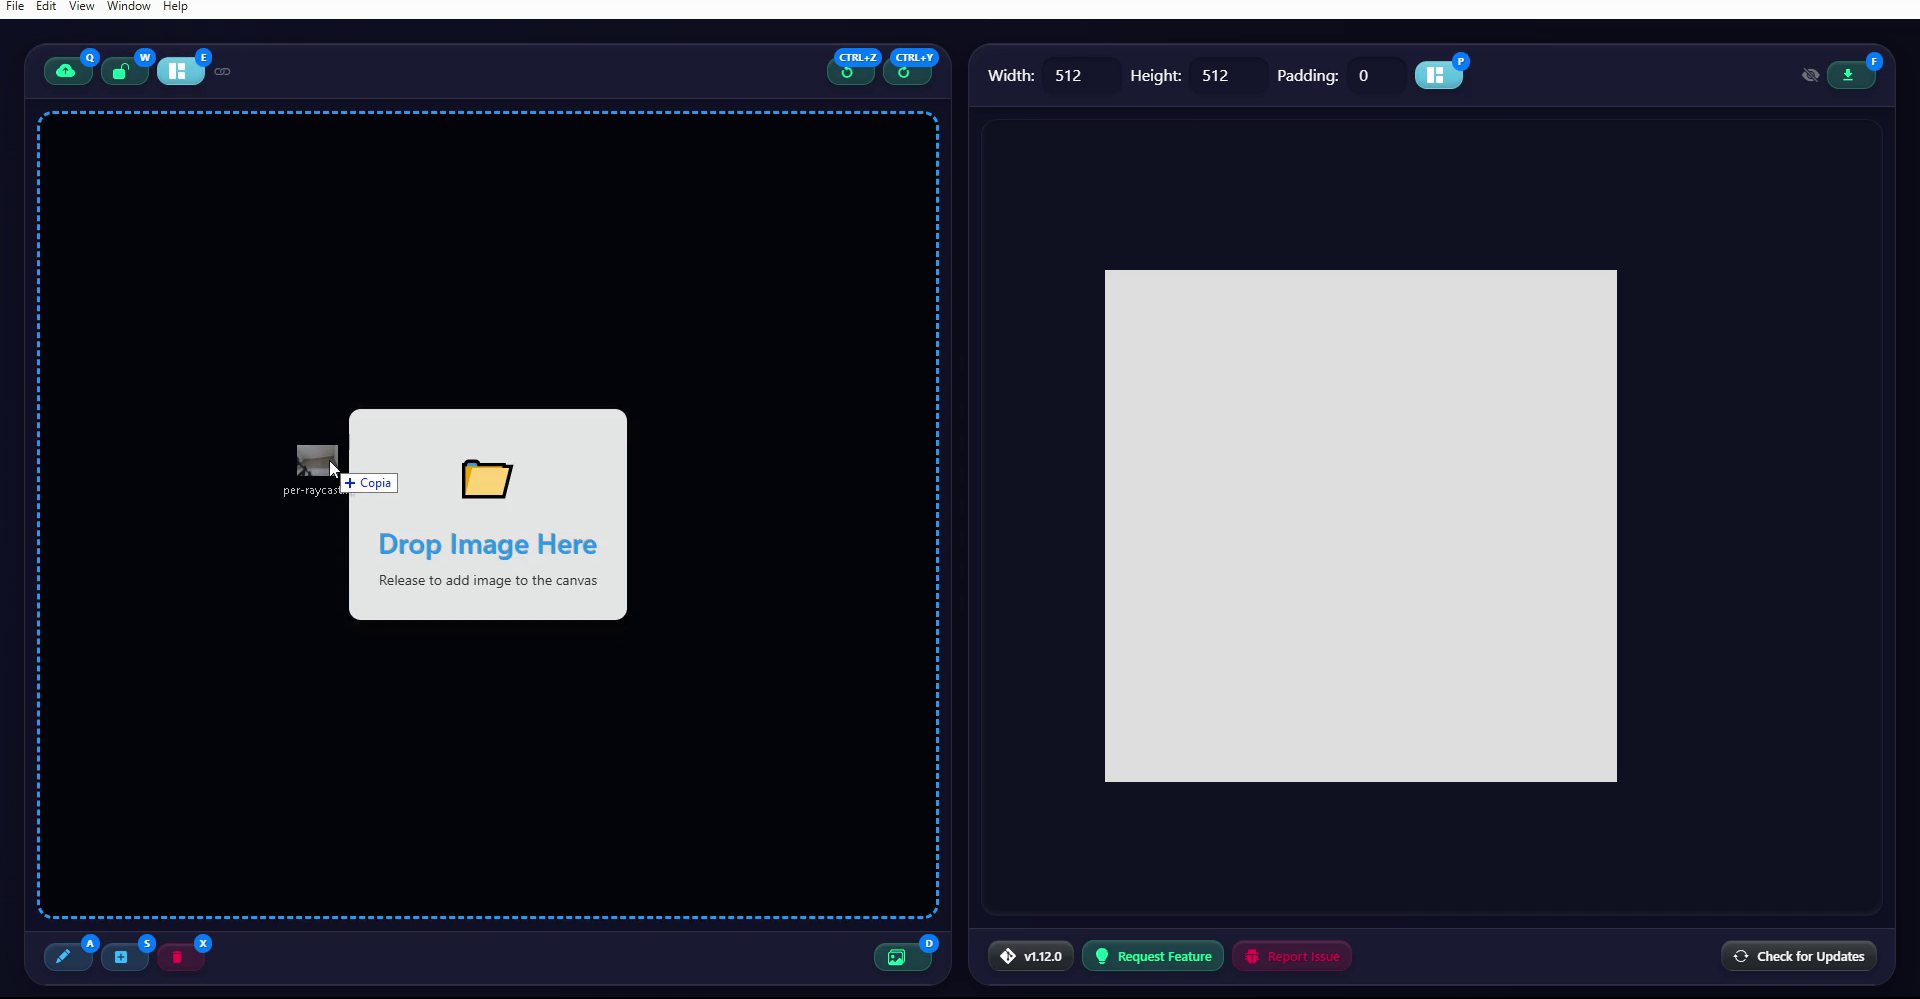
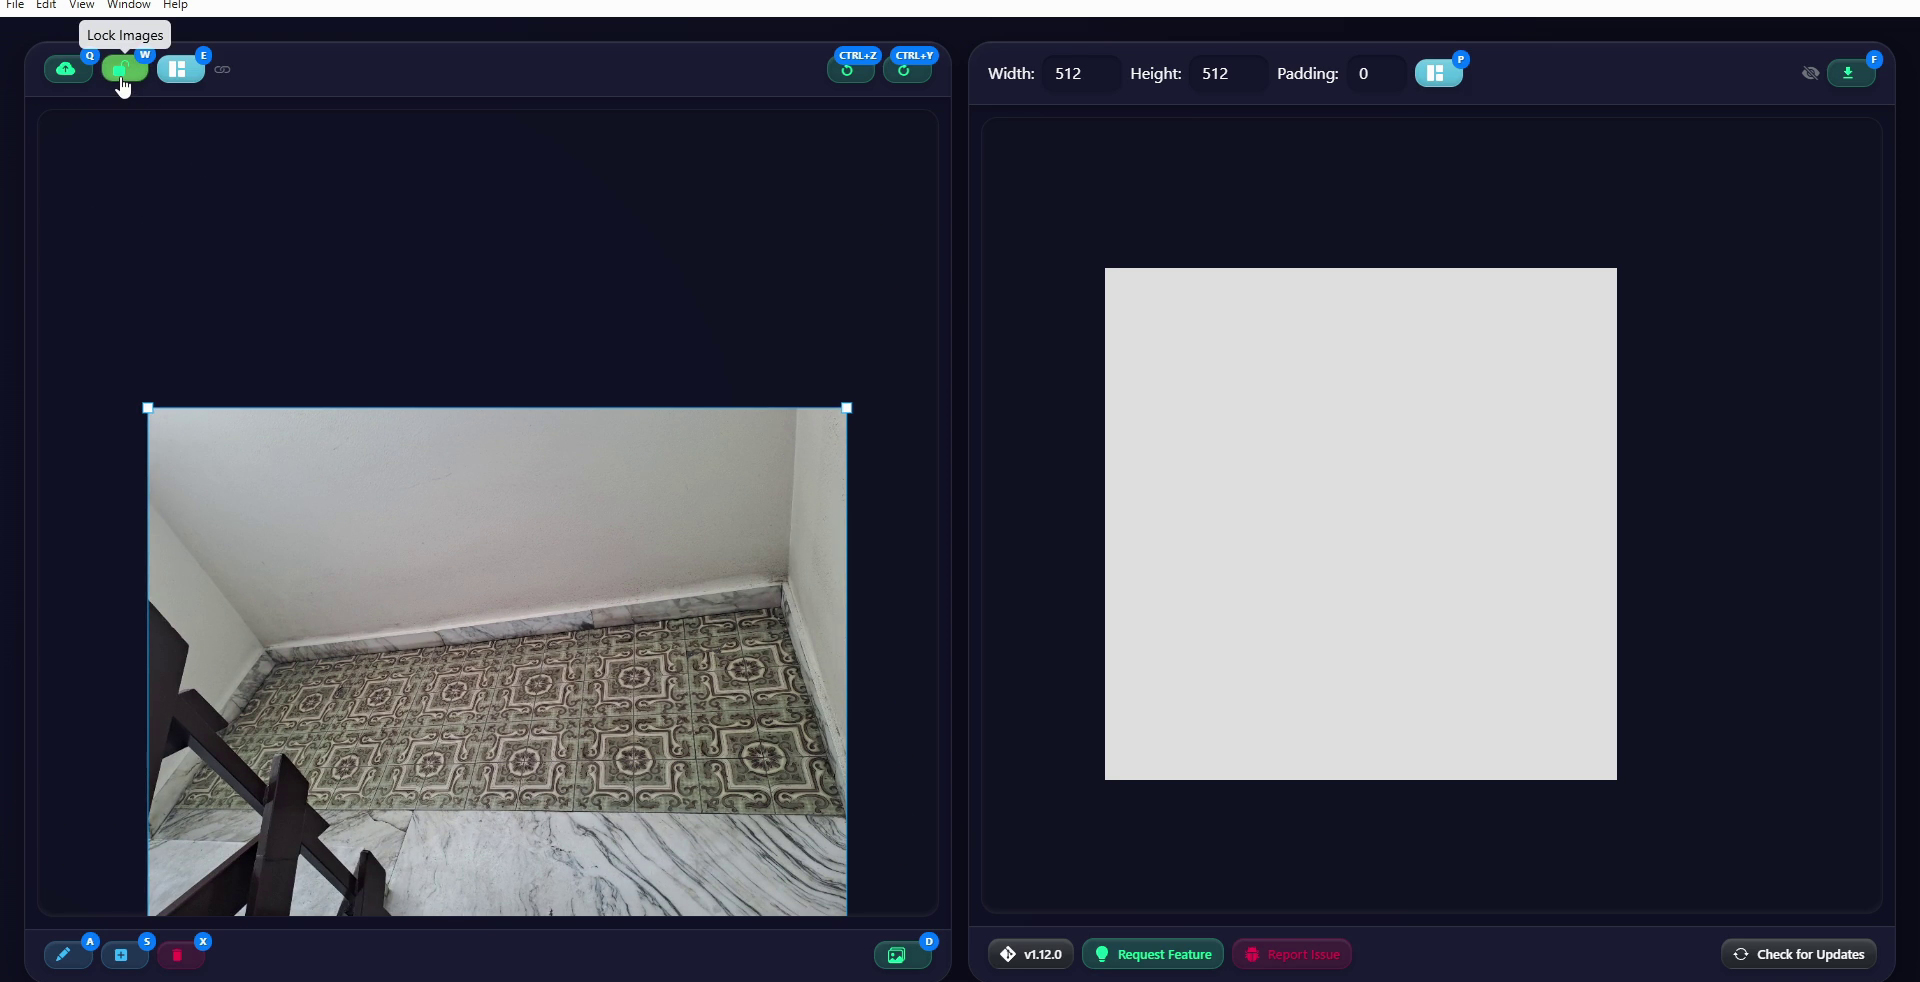
First, let’s take a look at the workspace, which is divided into two sections. On the left is the area where we can load one or more photos, either by using the Upload button or by drag-and-drop. For this example, I’m importing only one photograph, but we can load multiple images in a single session and have Texture Ripper arrange them using the Auto Pack button. Each photo can be resized or moved within the workspace, after which we can lock the layout by clicking the Lock button in the top-left corner.
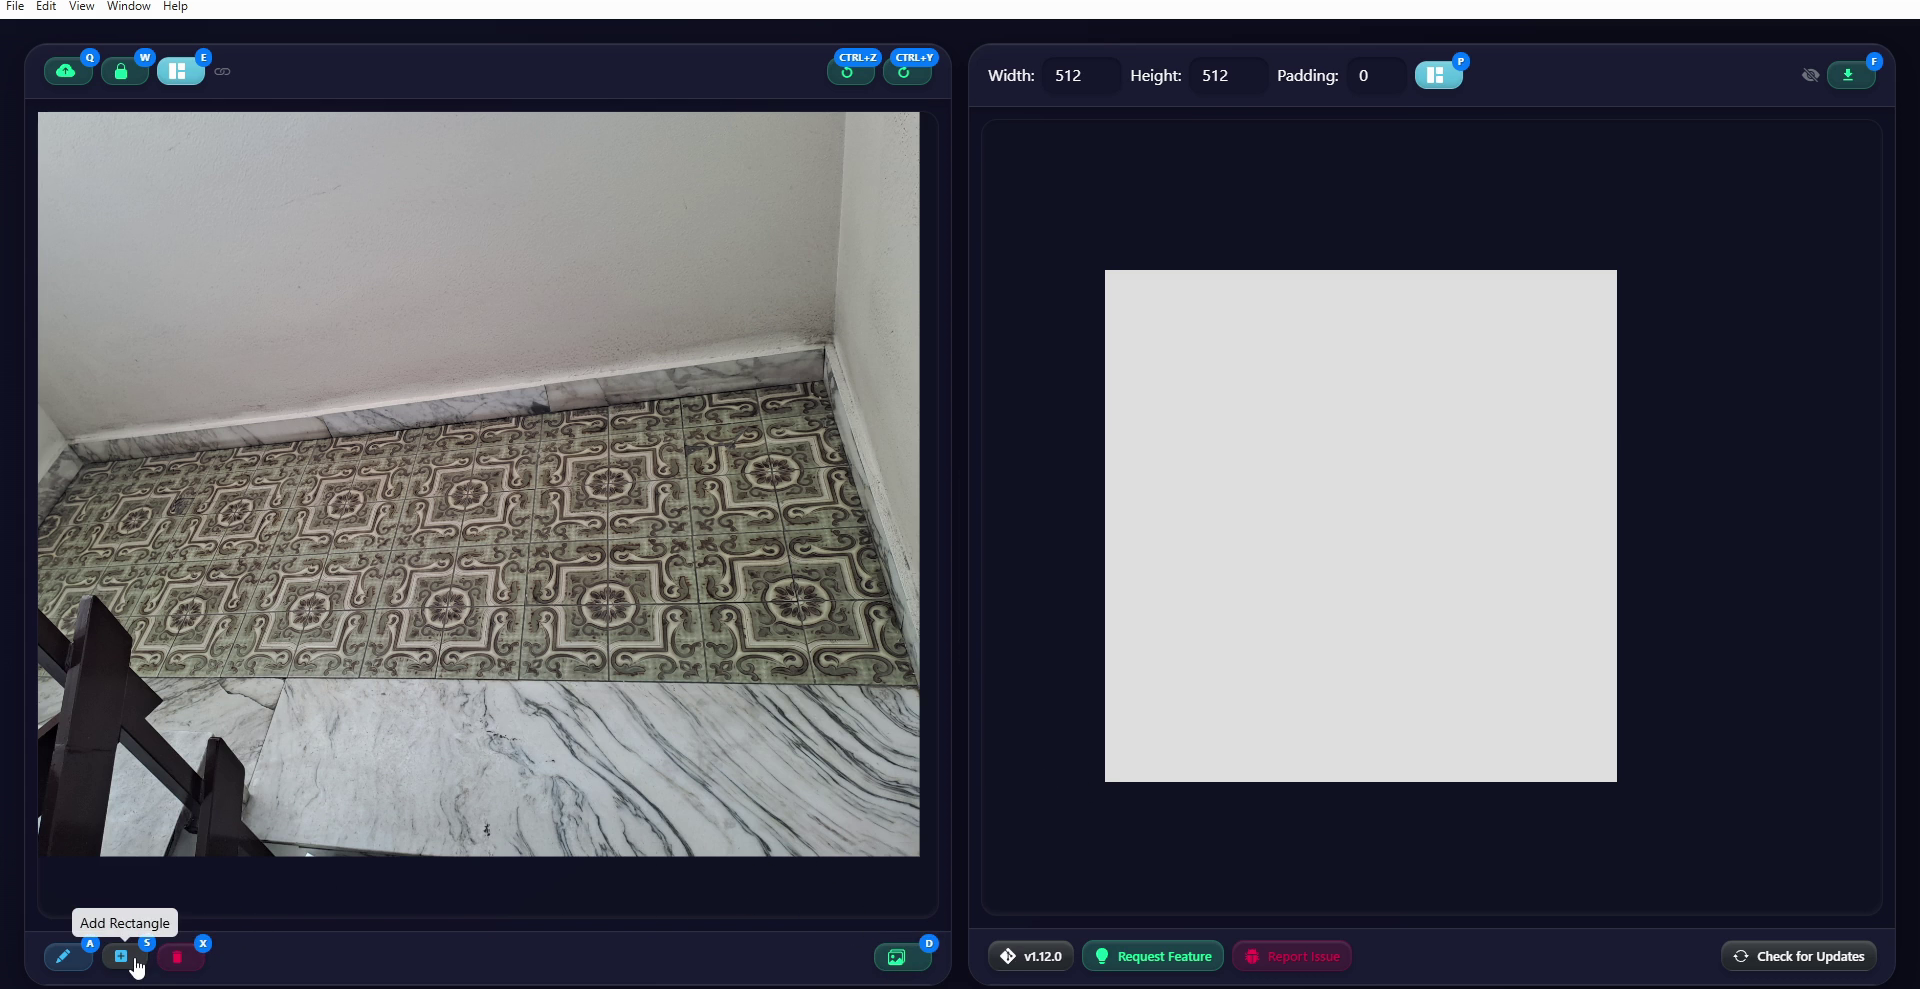
At the bottom left, we find the buttons that allow us to draw or delete the various Ripping areas on the original images. For drawing, we have the Draw and Rectangle modes, but Rectangle is the more stable one, so that’s what I’ll use for this tutorial. The Extract All button will then allow us to create the Textures for the different areas we define, but we’ll get to that shortly. I’ll add a first rectangle. As you can see, it has four main numbered control points at the four corners, along with additional intermediate control points along the edges, which we’ll use later.
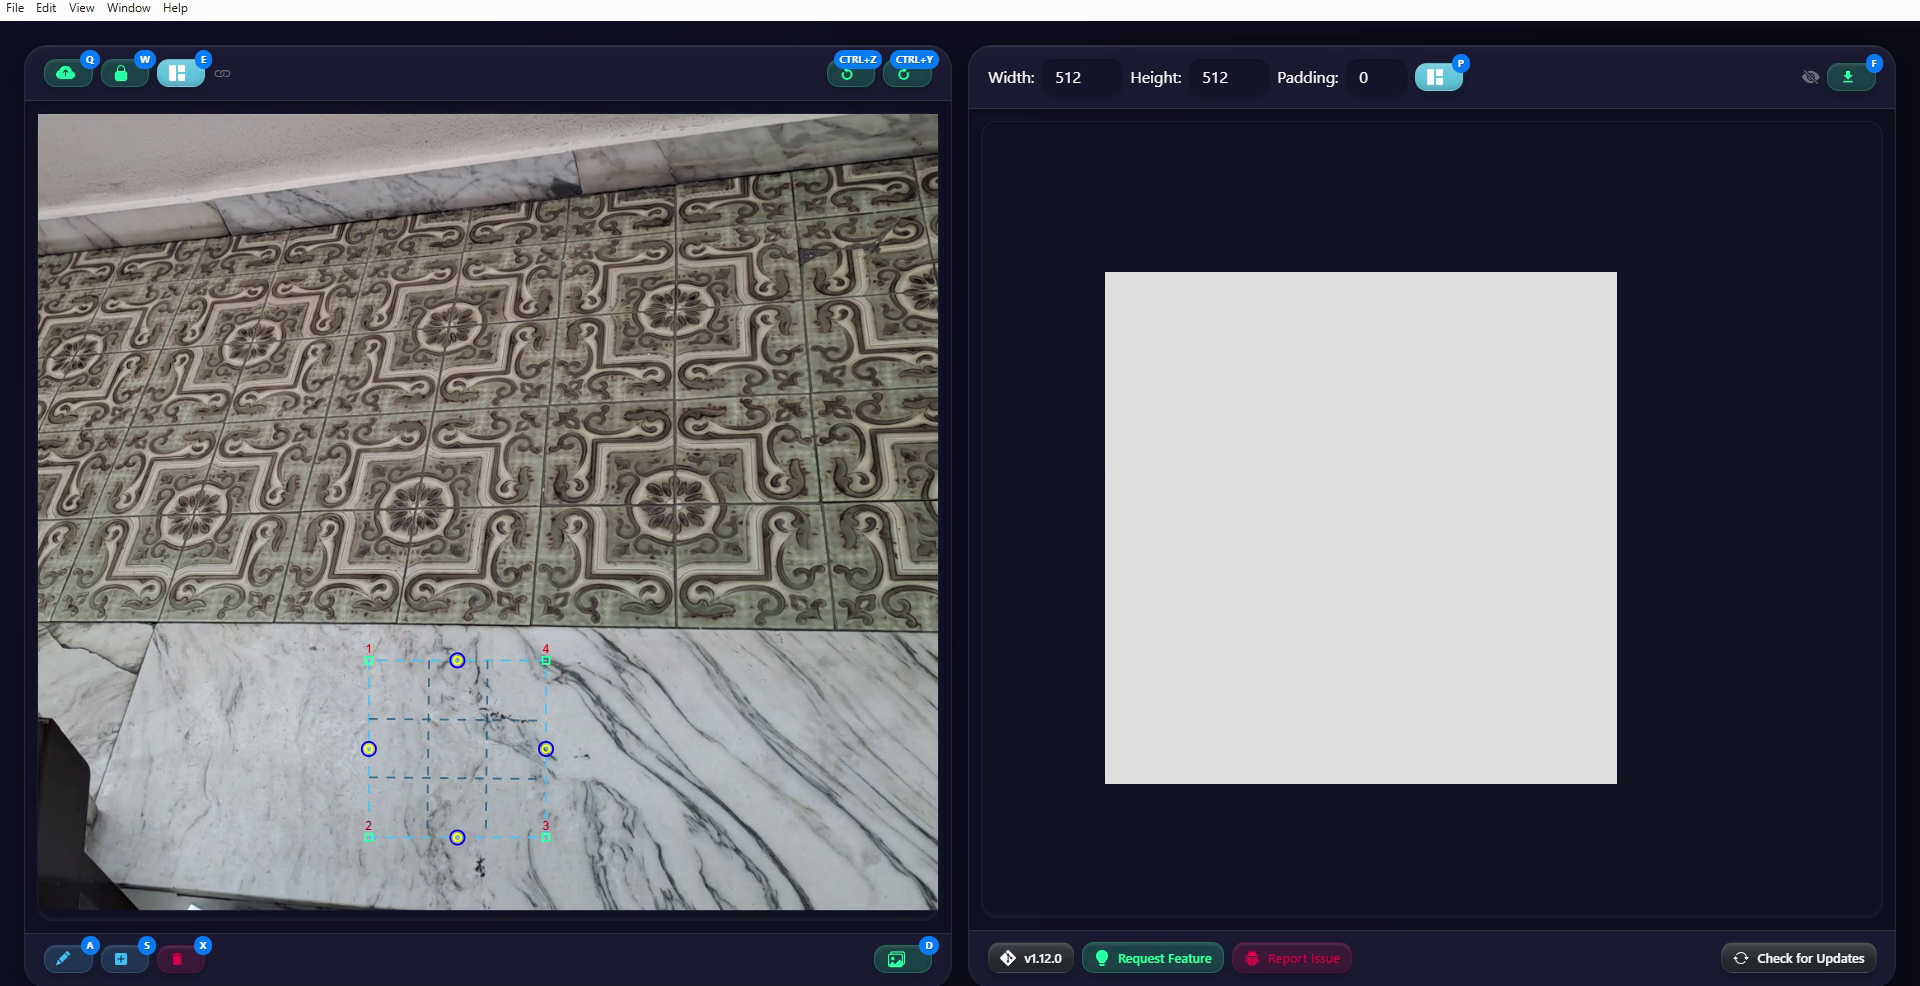
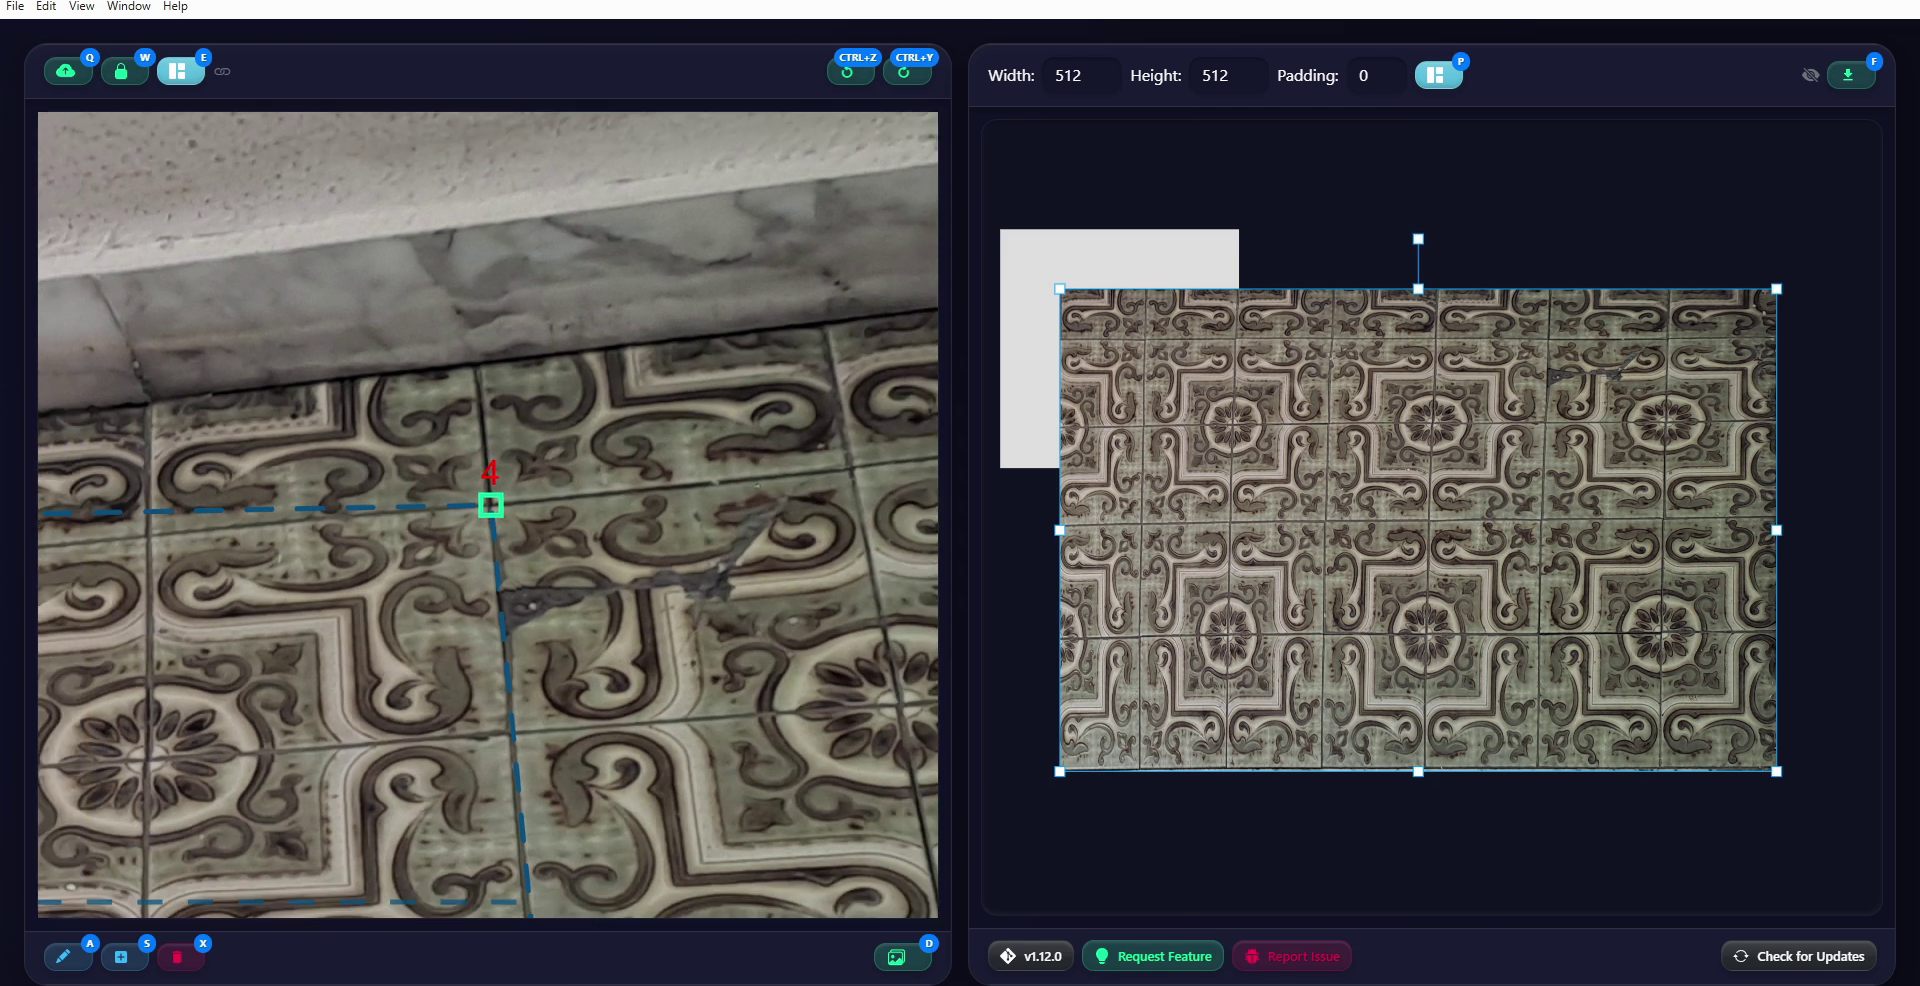
I’ll start defining the ripping area by positioning the four control points at the corners. At first, the area I’m defining looks good because I’m including a good number of floor tiles, but this photograph actually allows us to create a tileable Texture, so I’ll adjust it later. For now, I want to show you the first result obtained by clicking Extract All, which generates the image in the workspace on the right, where we define the Texture Atlas to be exported.
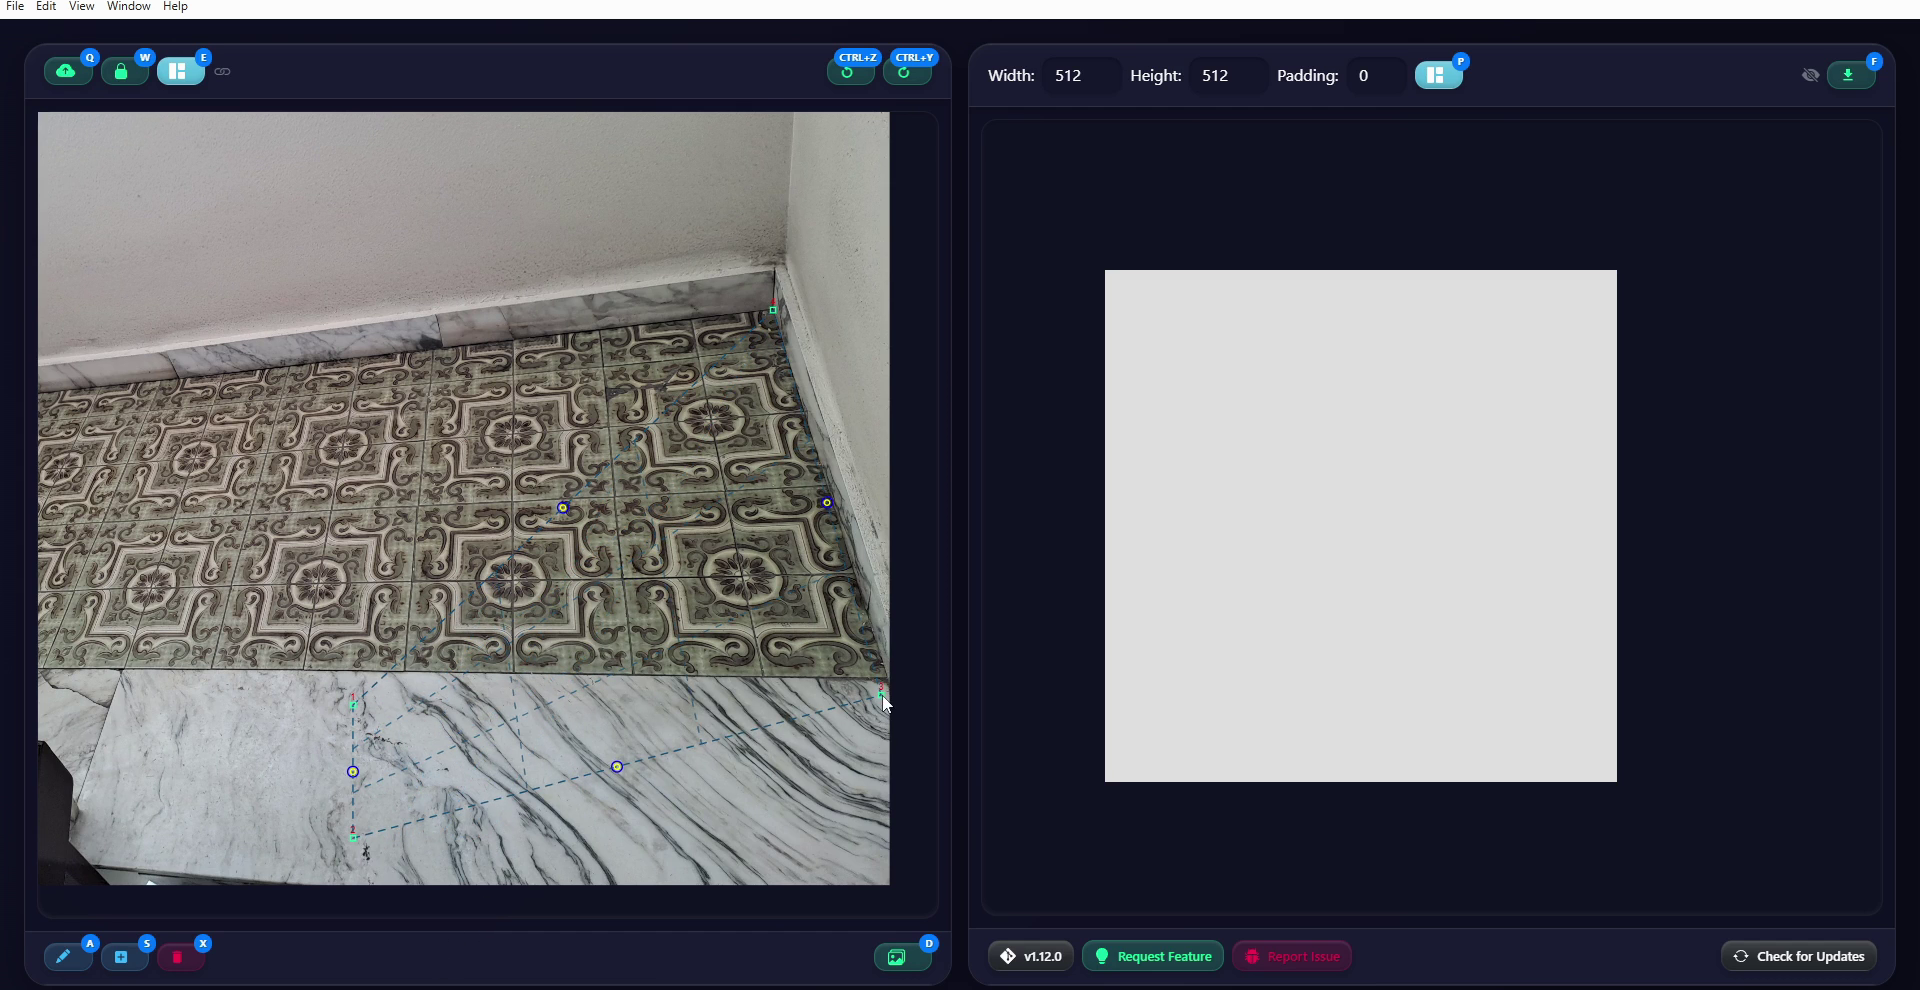
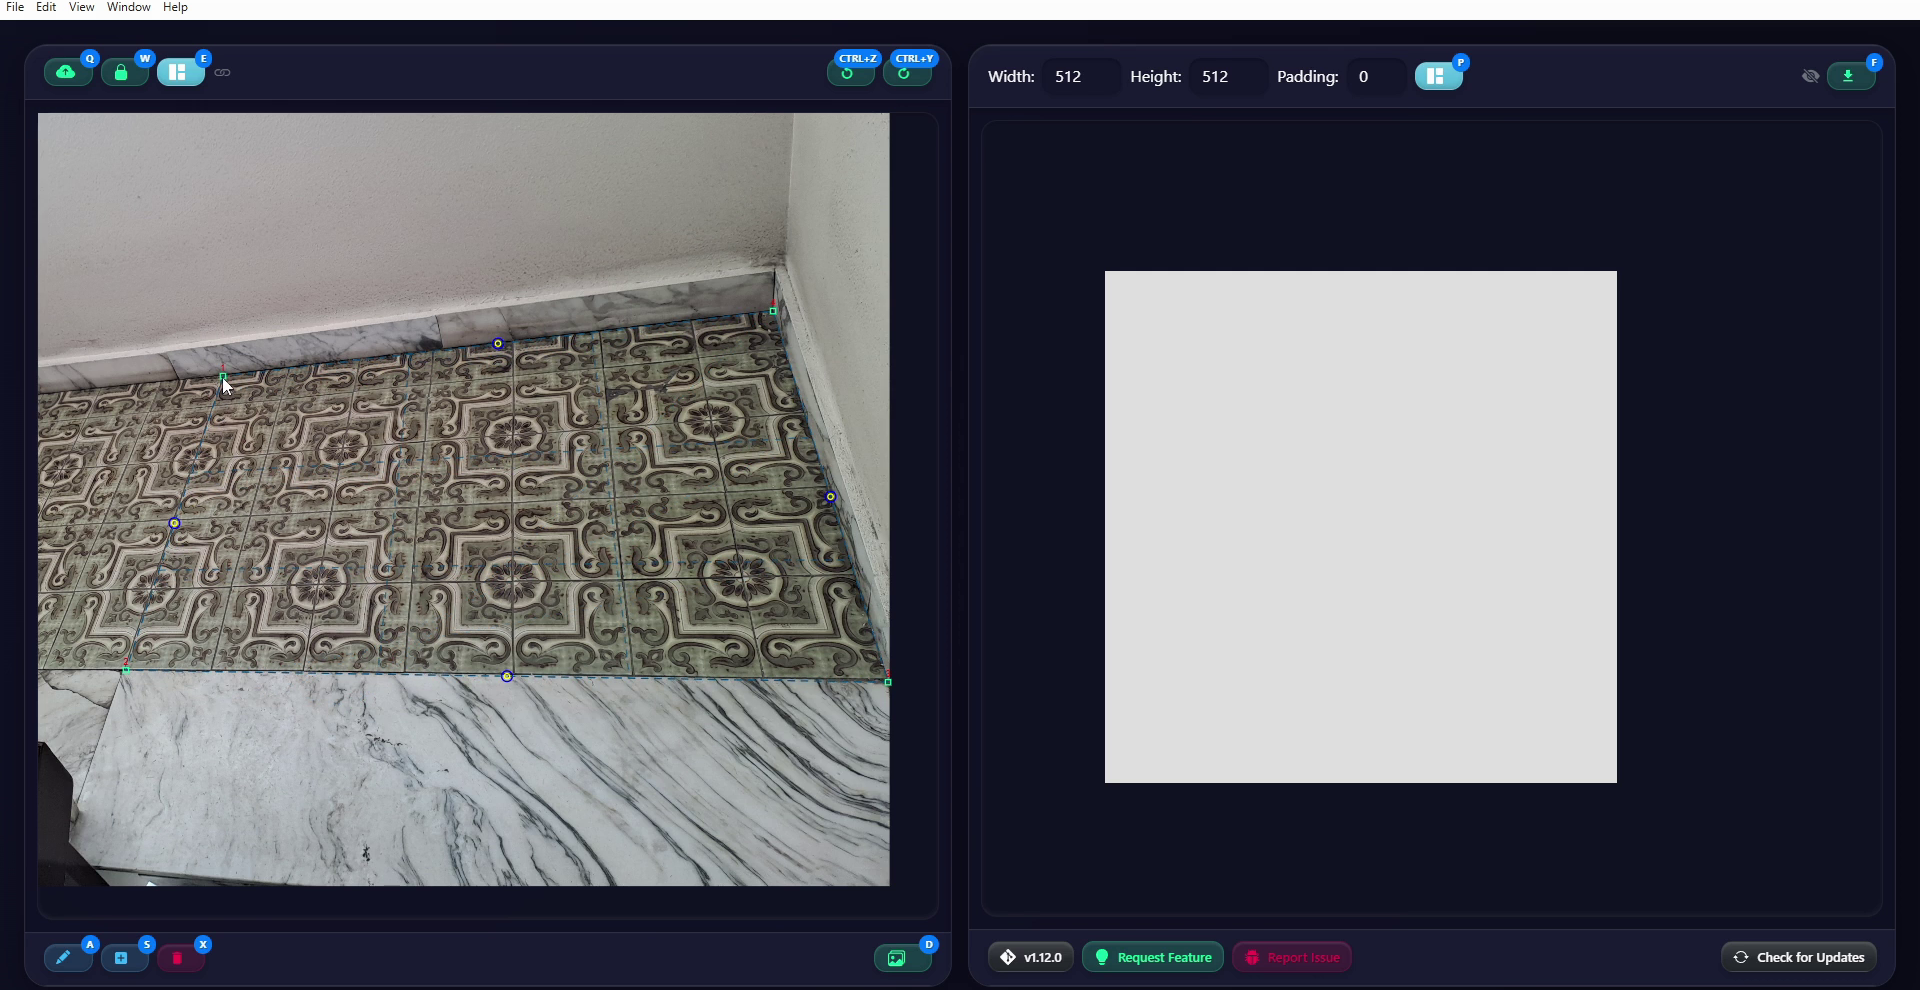
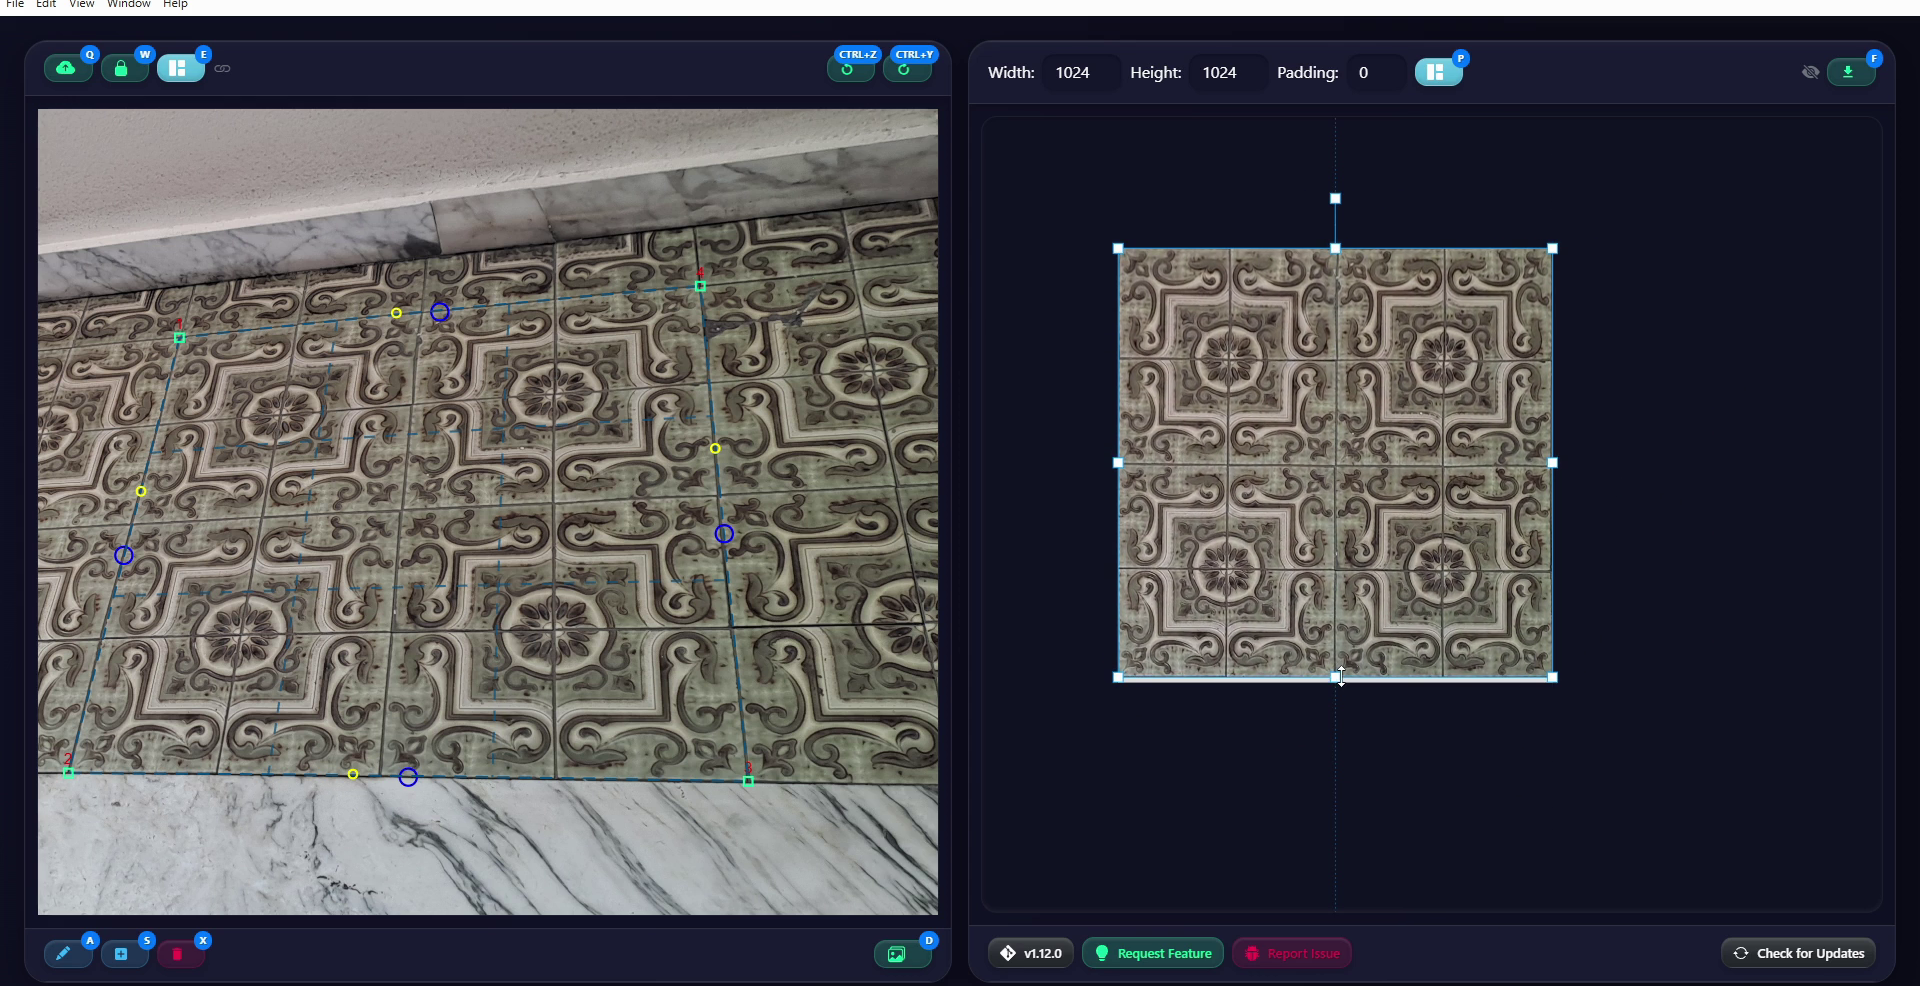
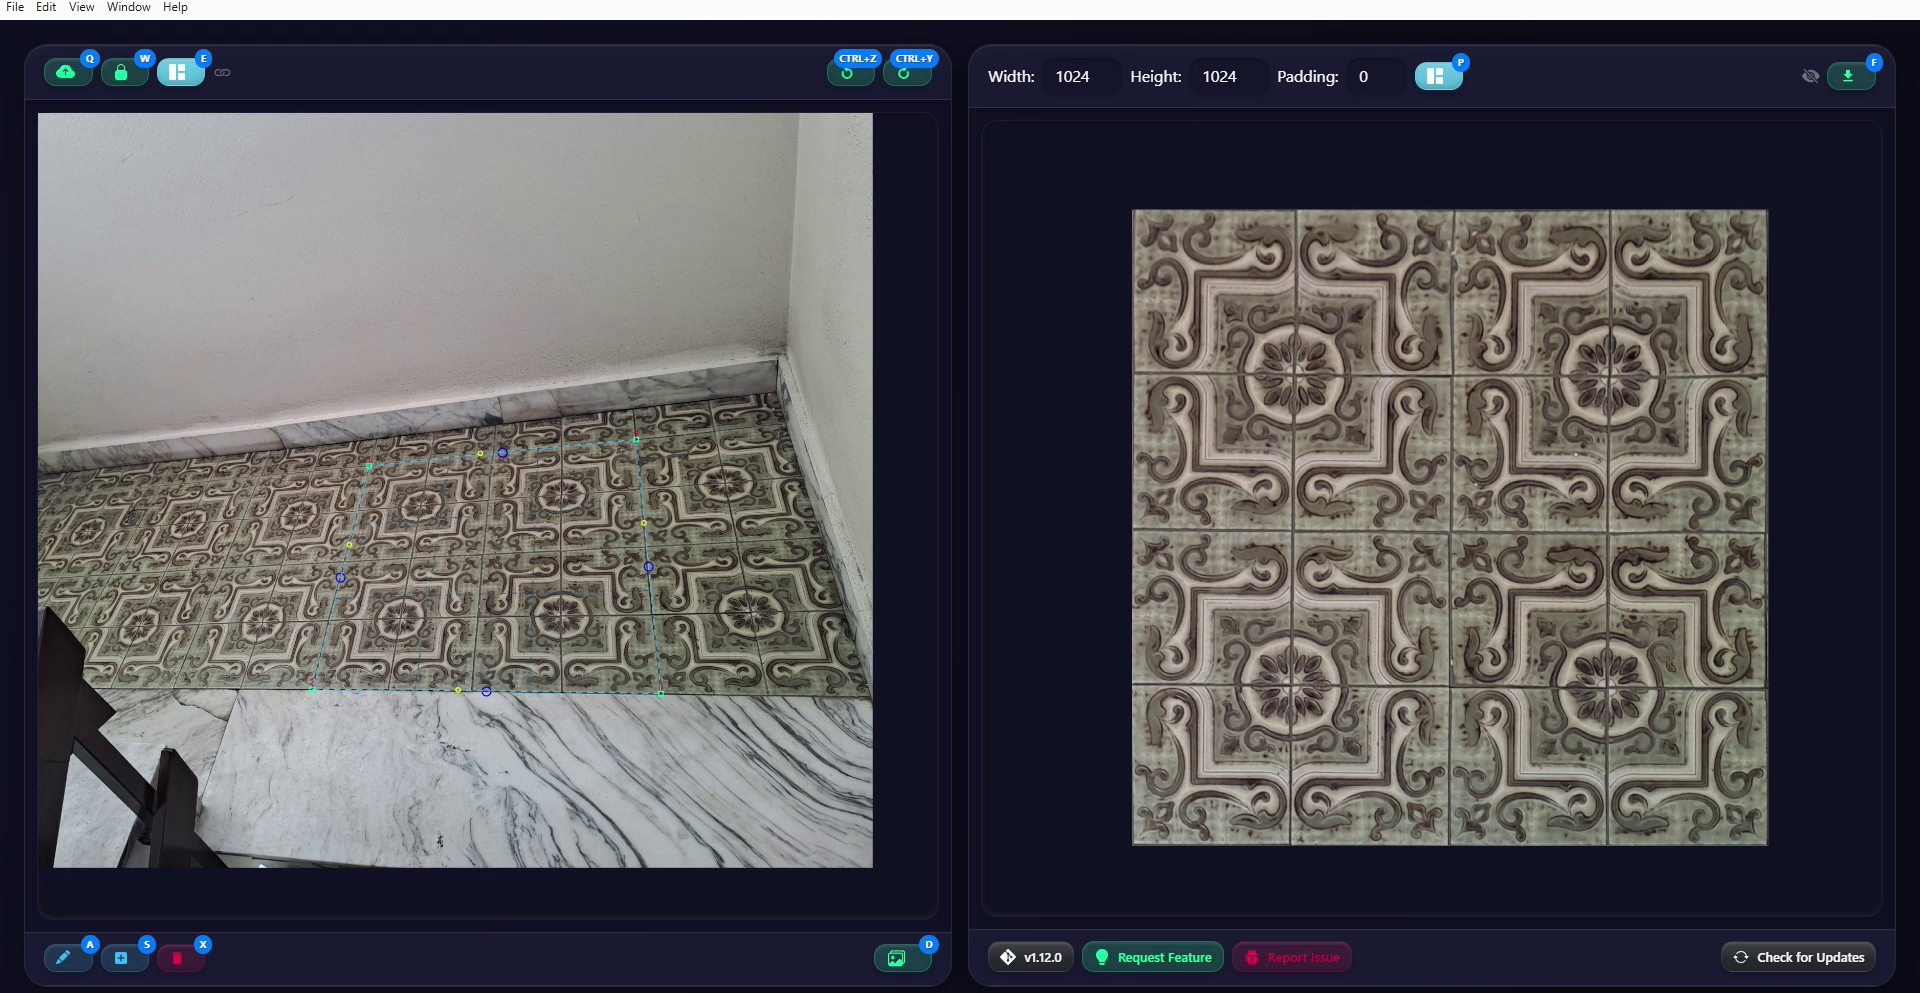
The resulting image has some obvious perspective issues. In fact, it is more compressed at the top and on the left. In a moment, we’ll see how to use the other control points to correct these problems. First, however, I’ll redefine the Ripping rectangle on the left, trying to capture a square made up of sixteen complete, seamless tiles. Once that is done, I’ll click Extract All again, which updates the image in the panel on the right and removes the previous one.
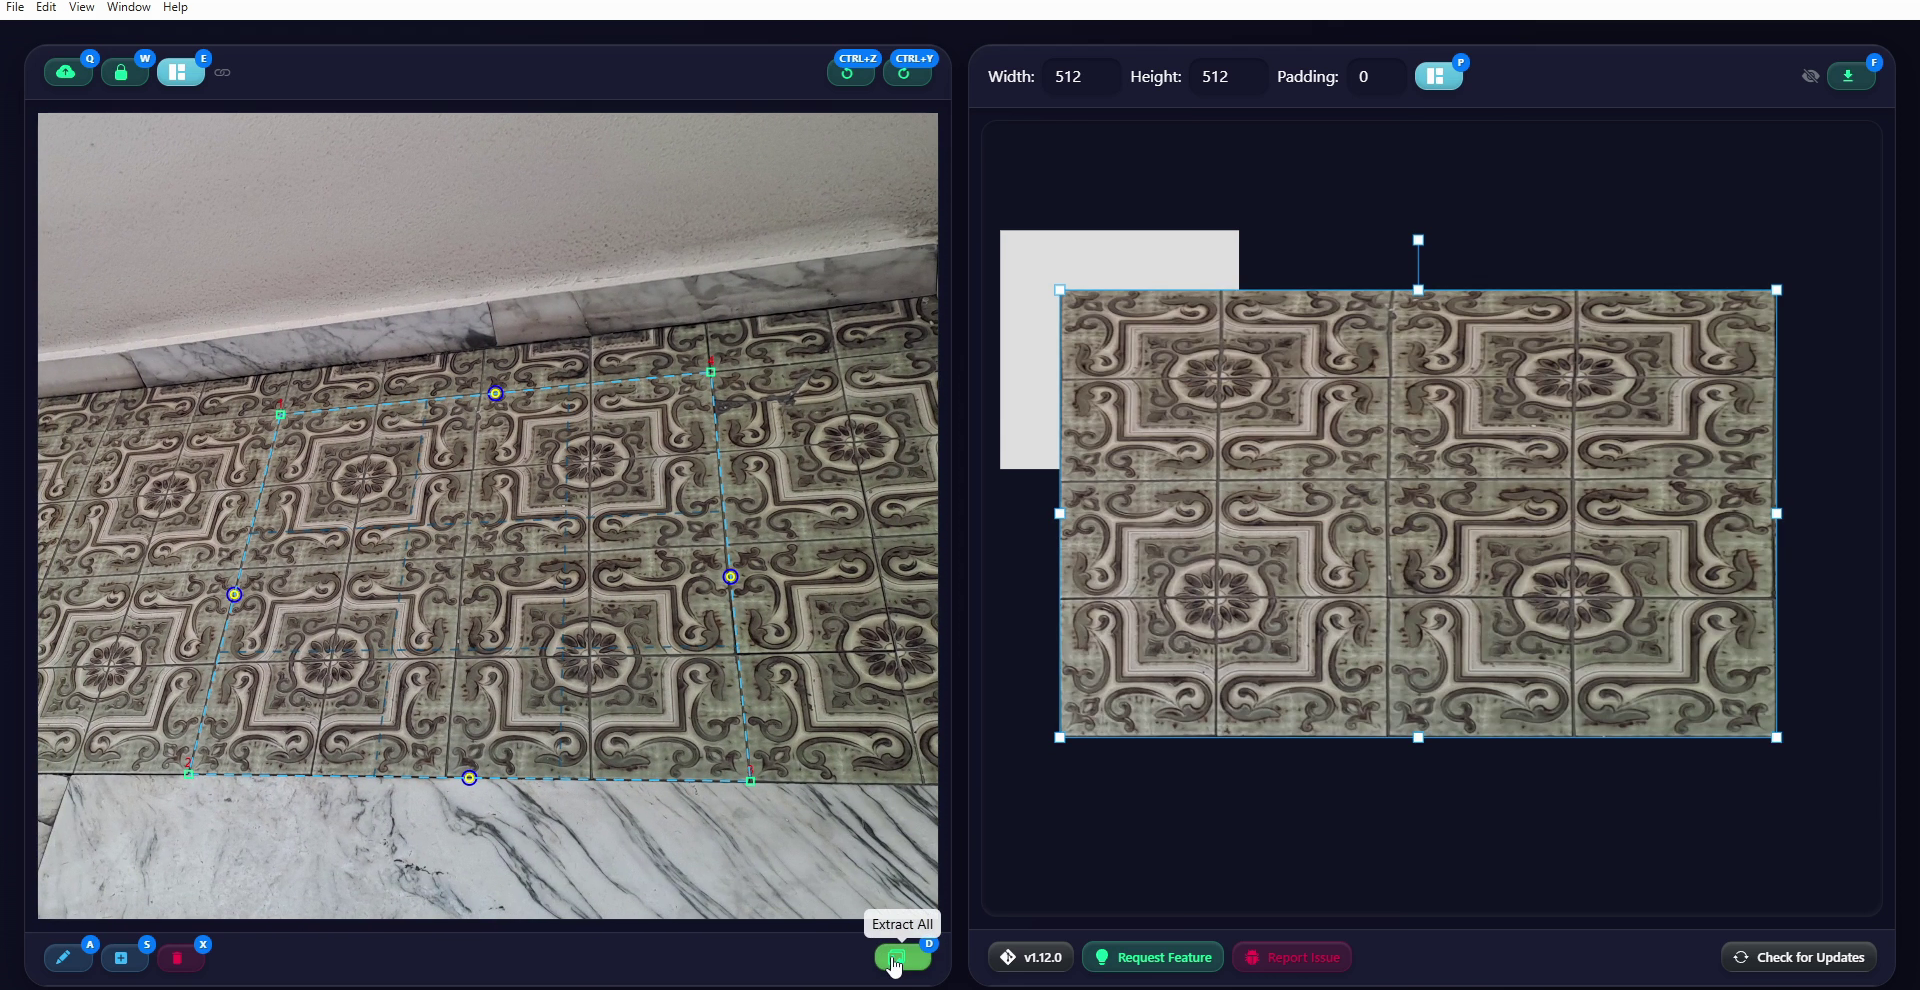
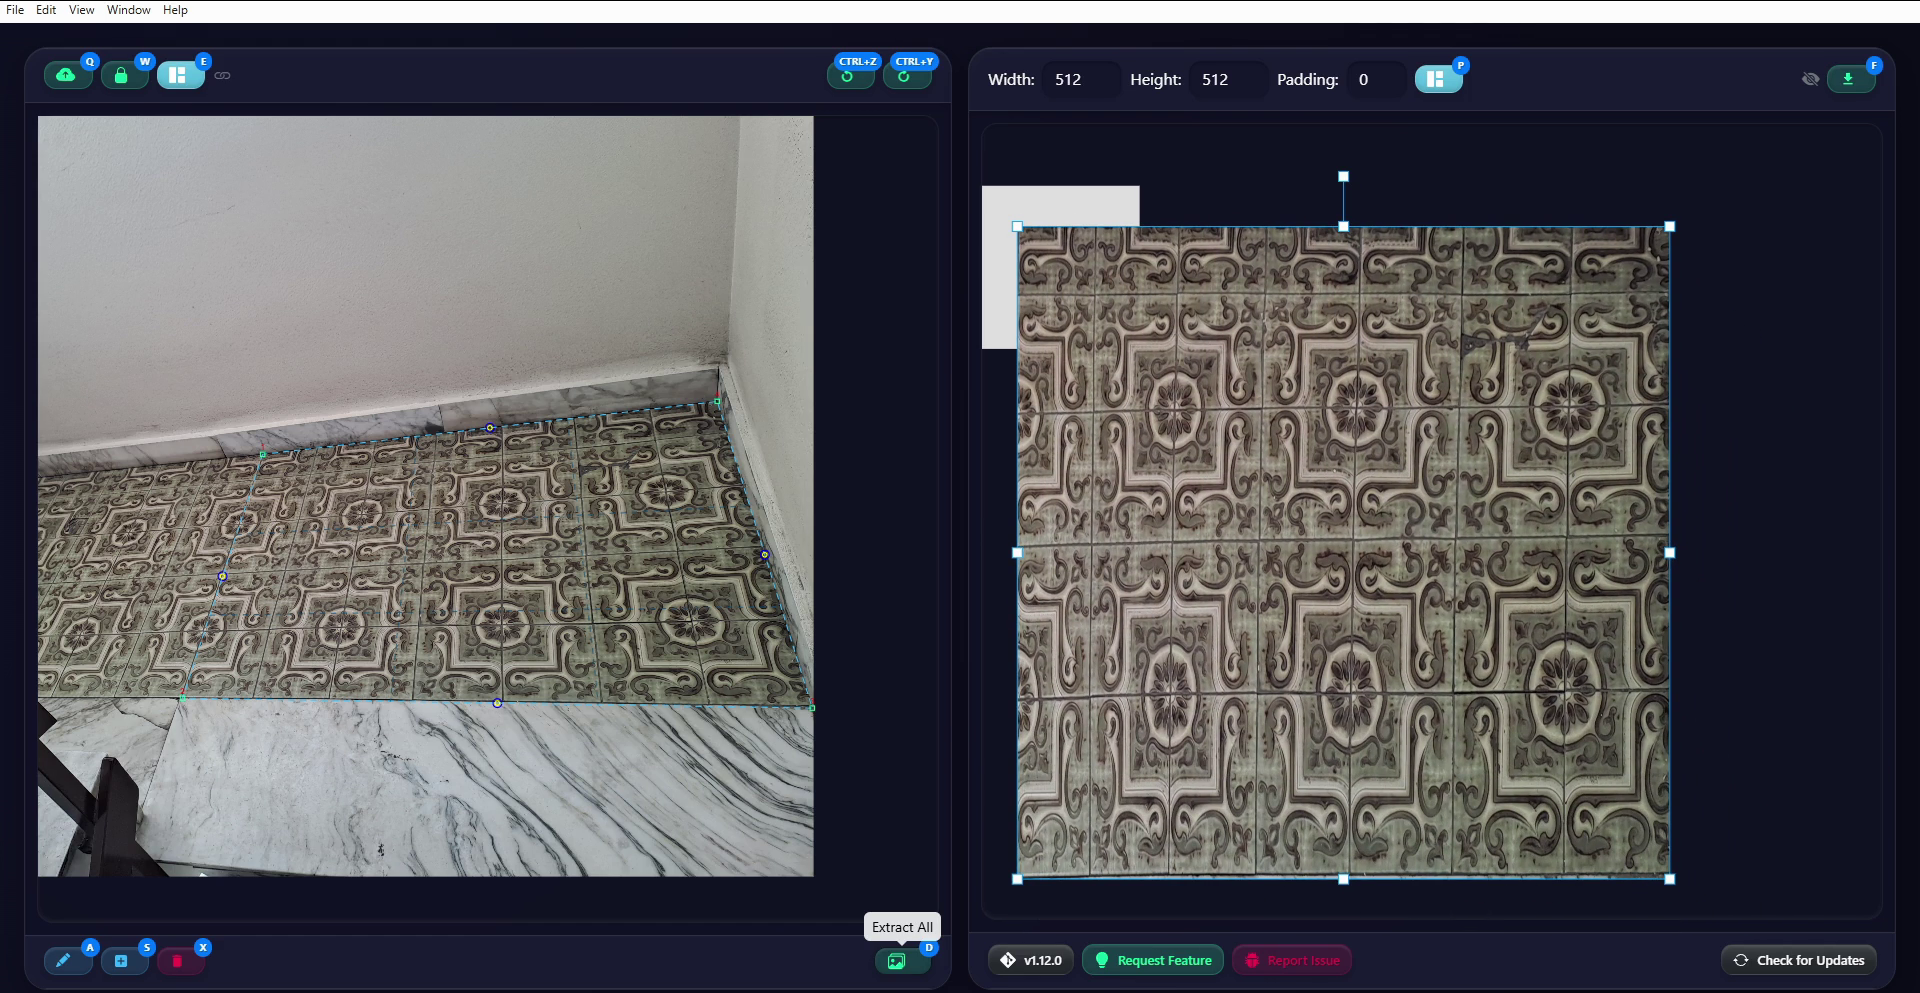
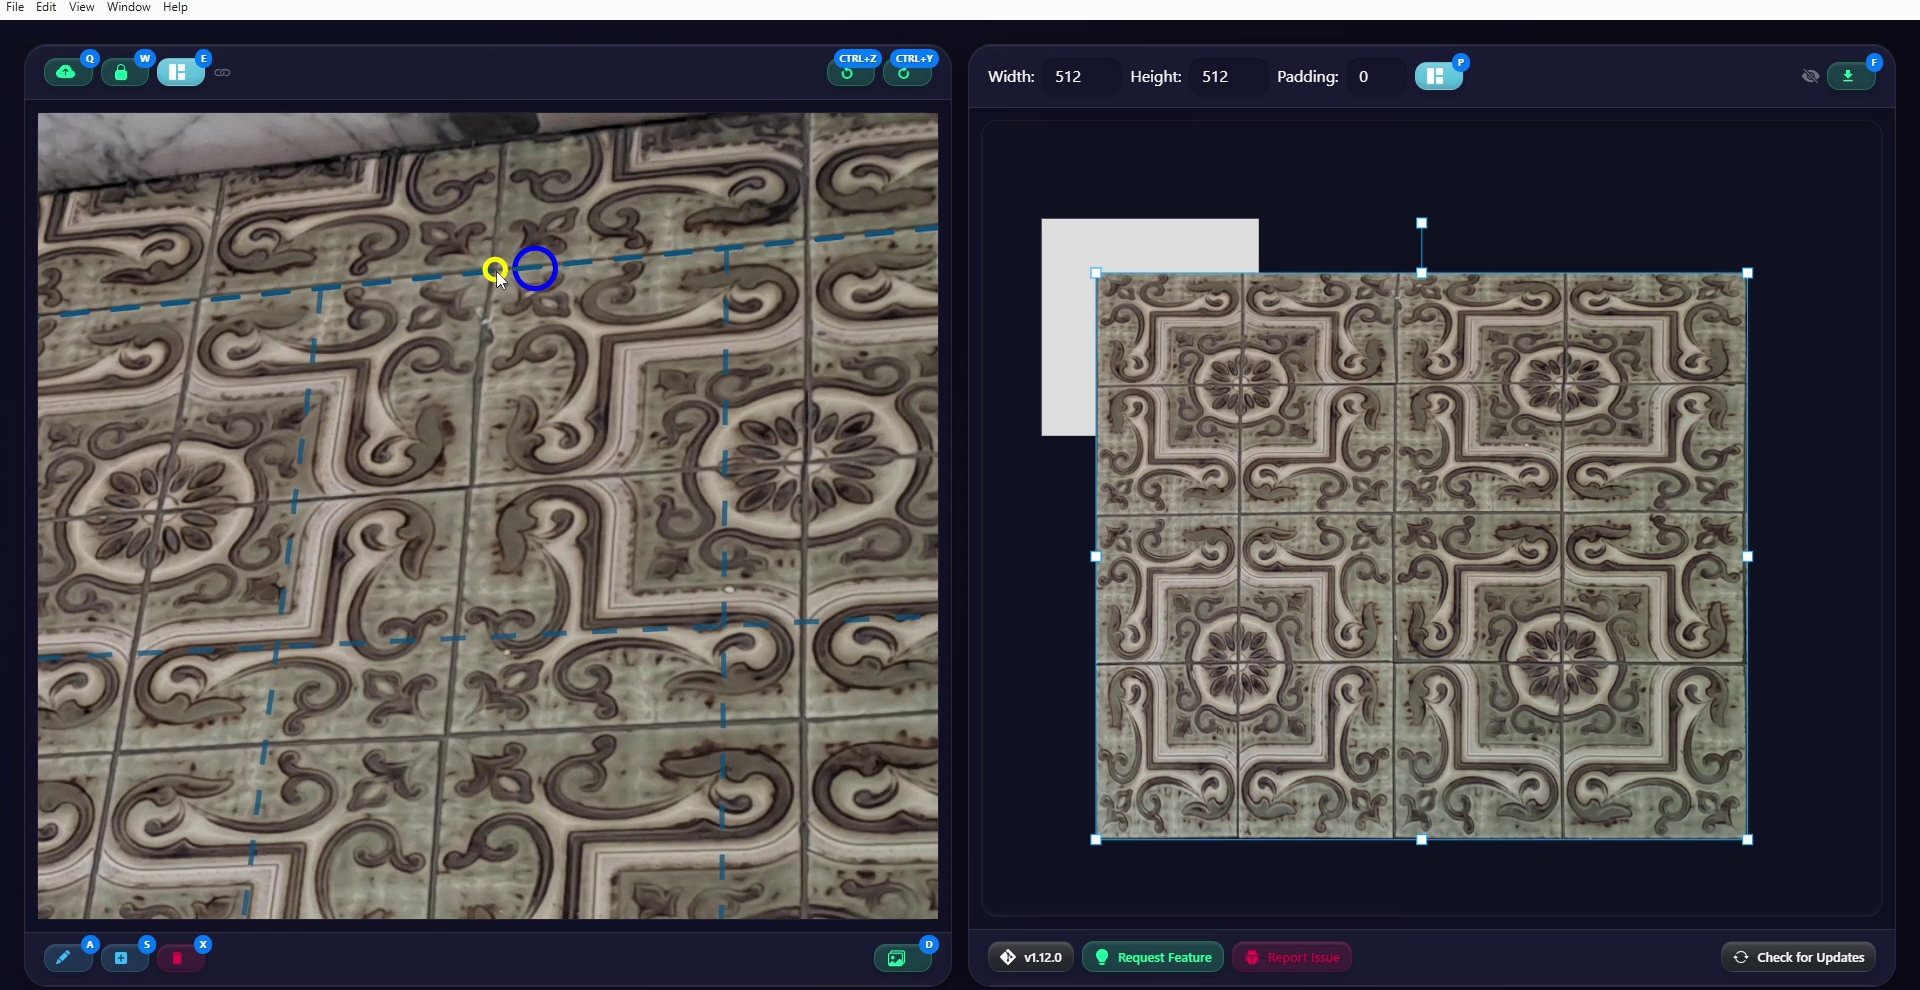
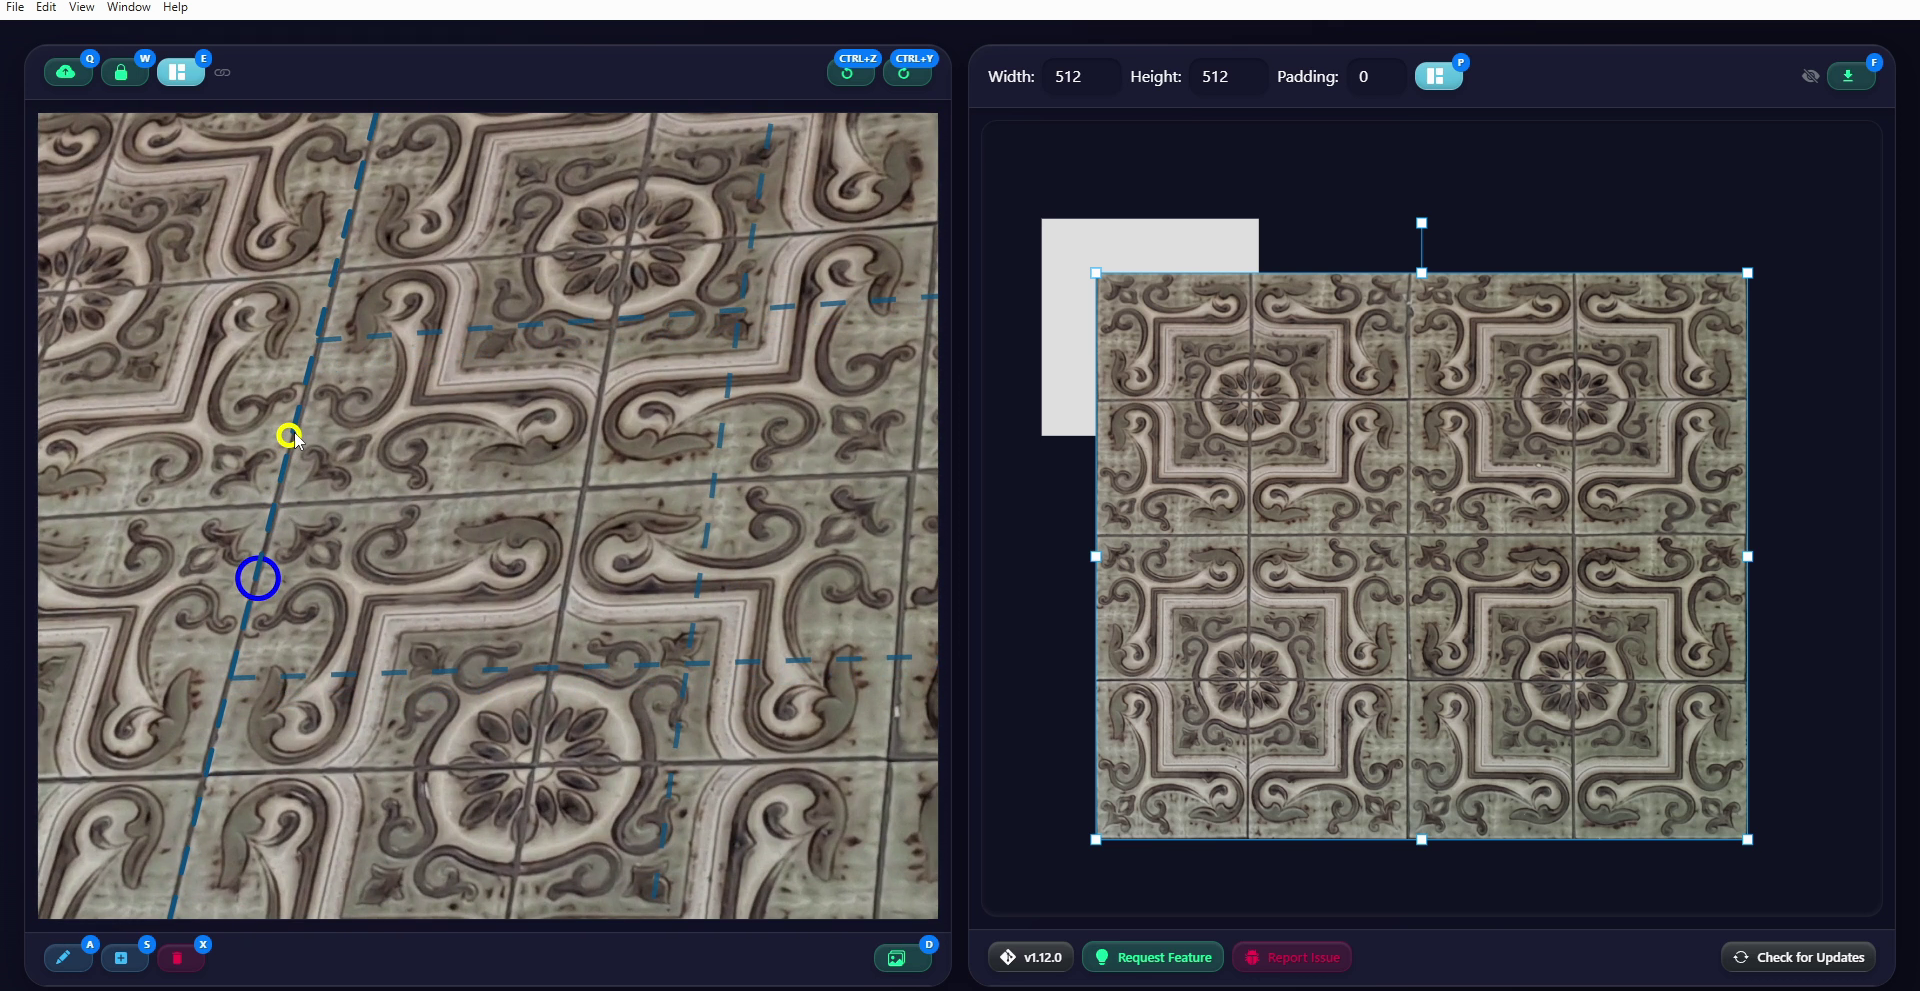
This image also initially has incorrect proportions and perspective issues, so now let’s see how to fix them. First, let’s move the control points located along the edges of the rectangle. These control points are especially useful with photographs where distortion along the edges is very noticeable, such as images taken with wide-angle lenses, because they allow us to curve the Ripping rectangle. In this case, however, I’m using them to improve the spacing of the intermediate dashed lines, two horizontal and two vertical, in order to eliminate the compression at the top and on the left side of the Texture. As you can see, the blue circles for these control points remain in their original positions to remind us where the original midpoints of the different sides were, while we move the yellow circles to modify the Ripping. From time to time, I click Extract All to update the Texture, then make a few adjustments and click Extract All again until I get a satisfactory result. The only thing left to fix is the overall proportions, meaning the width and height of the image.
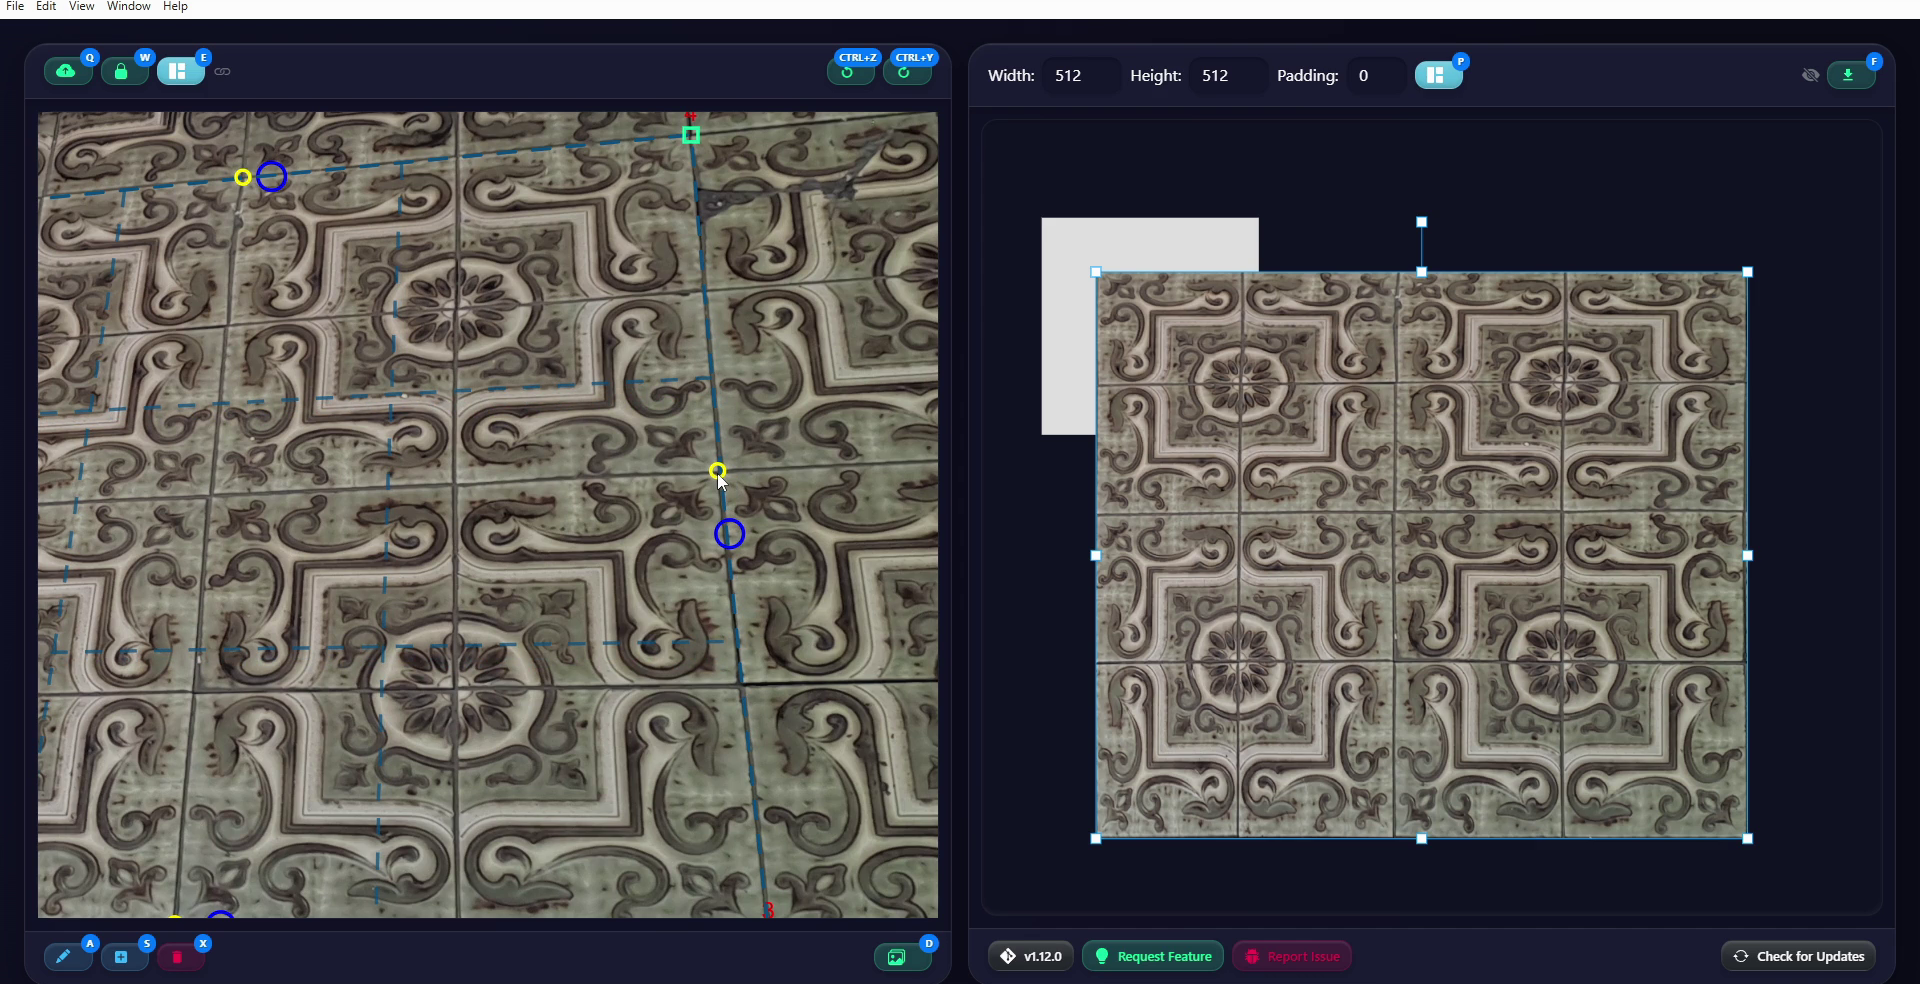
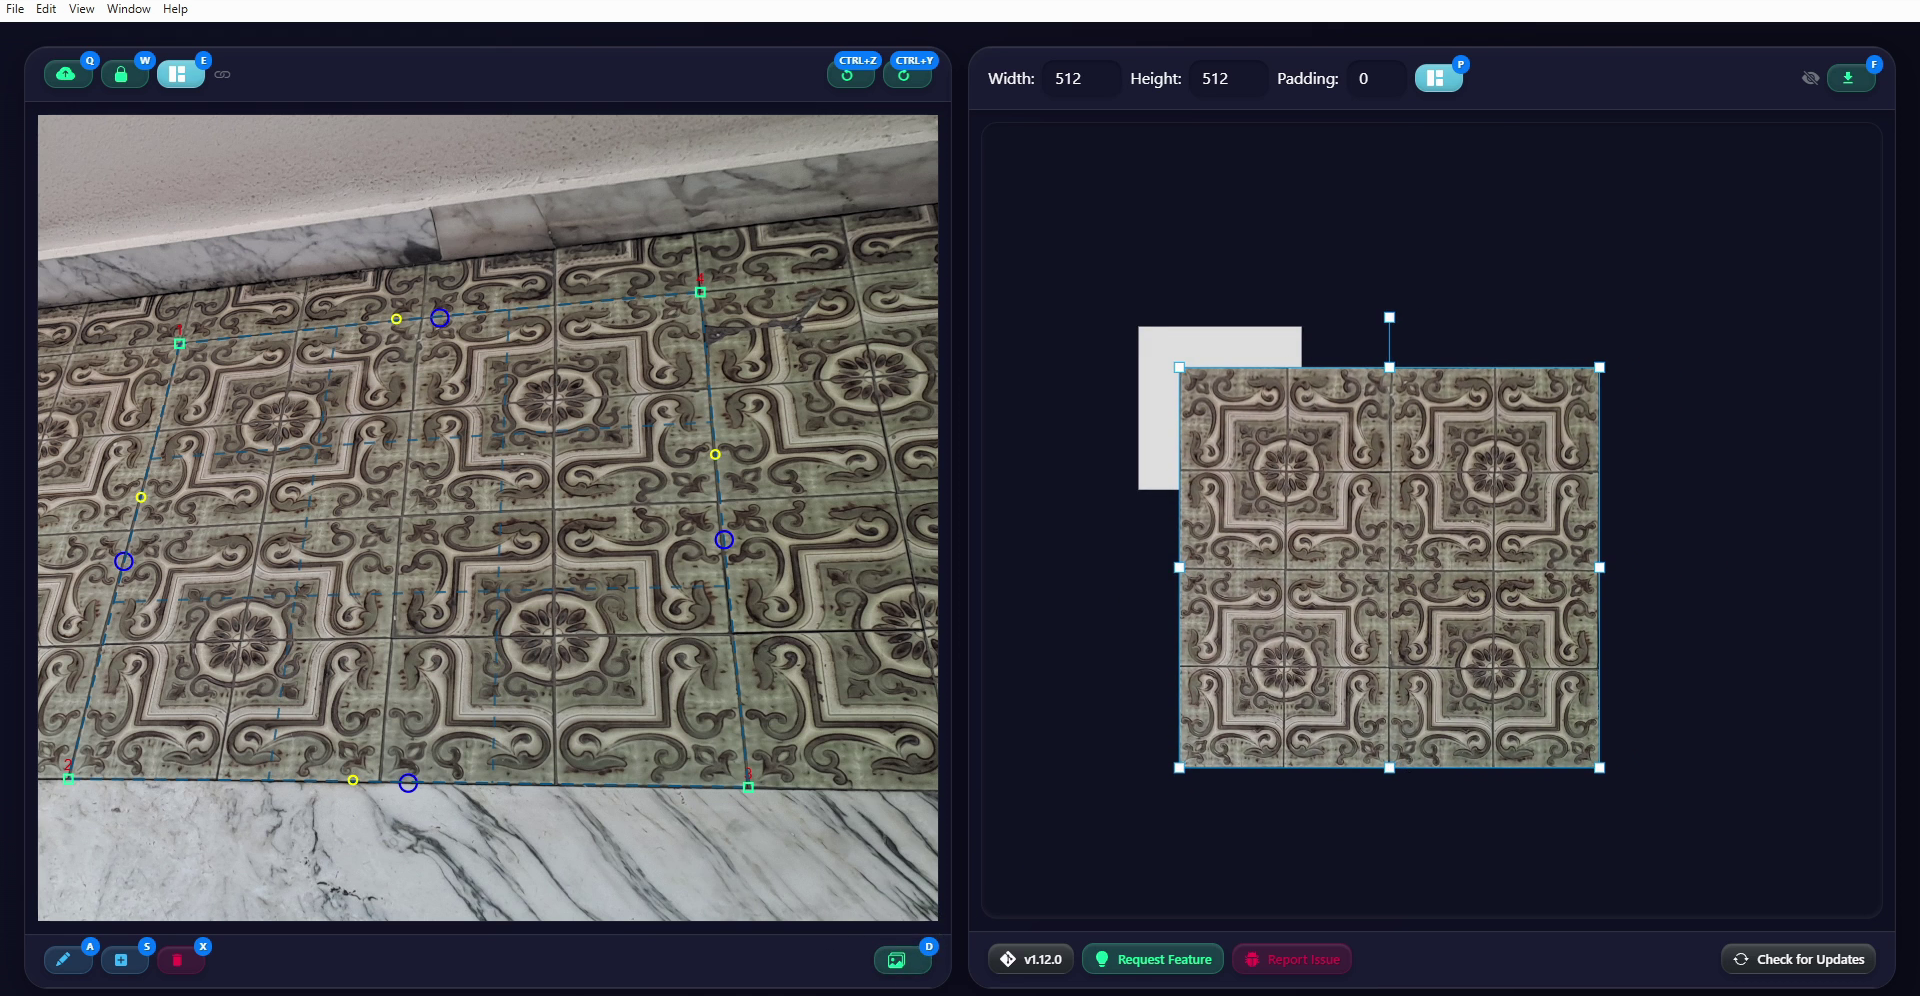
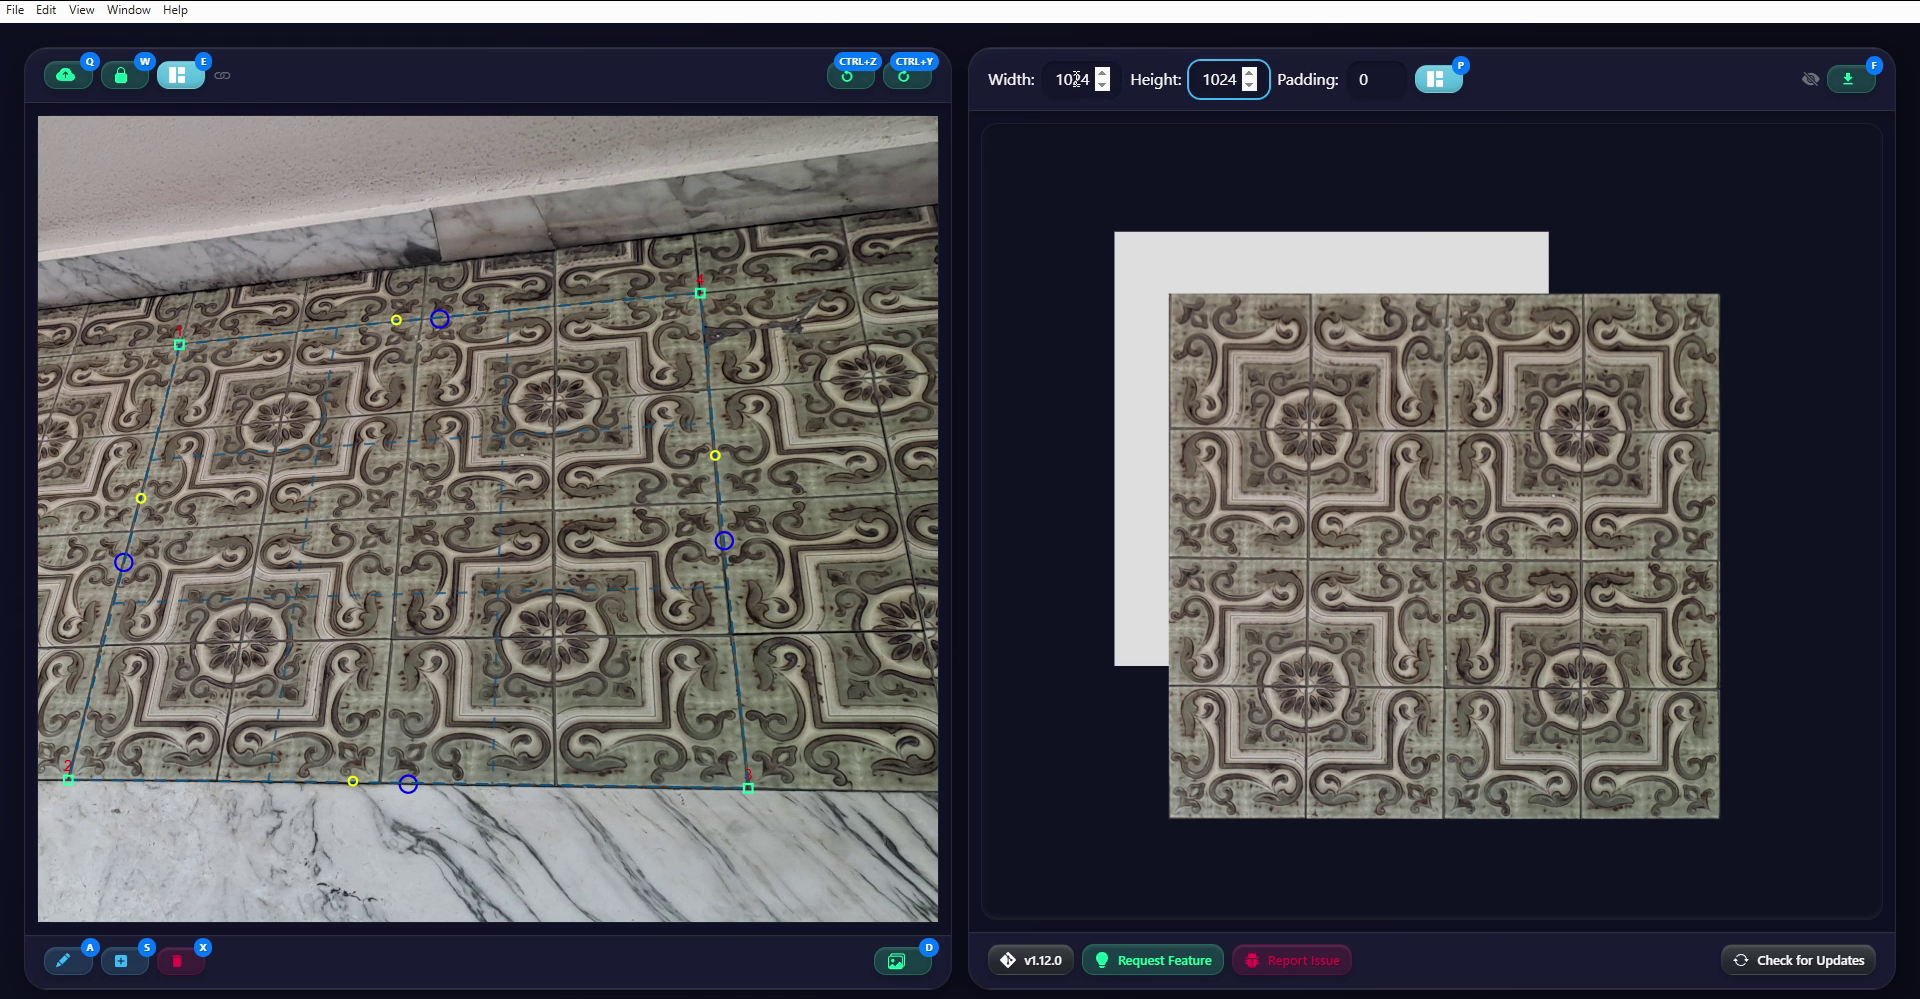
For this step, the light-colored square in the export workspace on the right is particularly useful. That square represents the area of the image that will be exported at the end of the process. Its resolution is defined by the two fields at the top of the window, which are set to 512 by 512 pixels by default. First, I’ll set a higher resolution, such as 1024 by 1024. The automatic snapping of the Texture to the edges of this export area helps us position our Texture and, since it represents a square made up of 16 tiles, we can also set its width and height correctly by filling the export area. Once this is done, we’ll have a 1024 by 1024 Texture ready to be exported as a PNG file by clicking the Export Atlas button in the top-right corner. Before doing that, however, I want to show you how to add more Ripping areas, and therefore more Textures, to our Atlas.
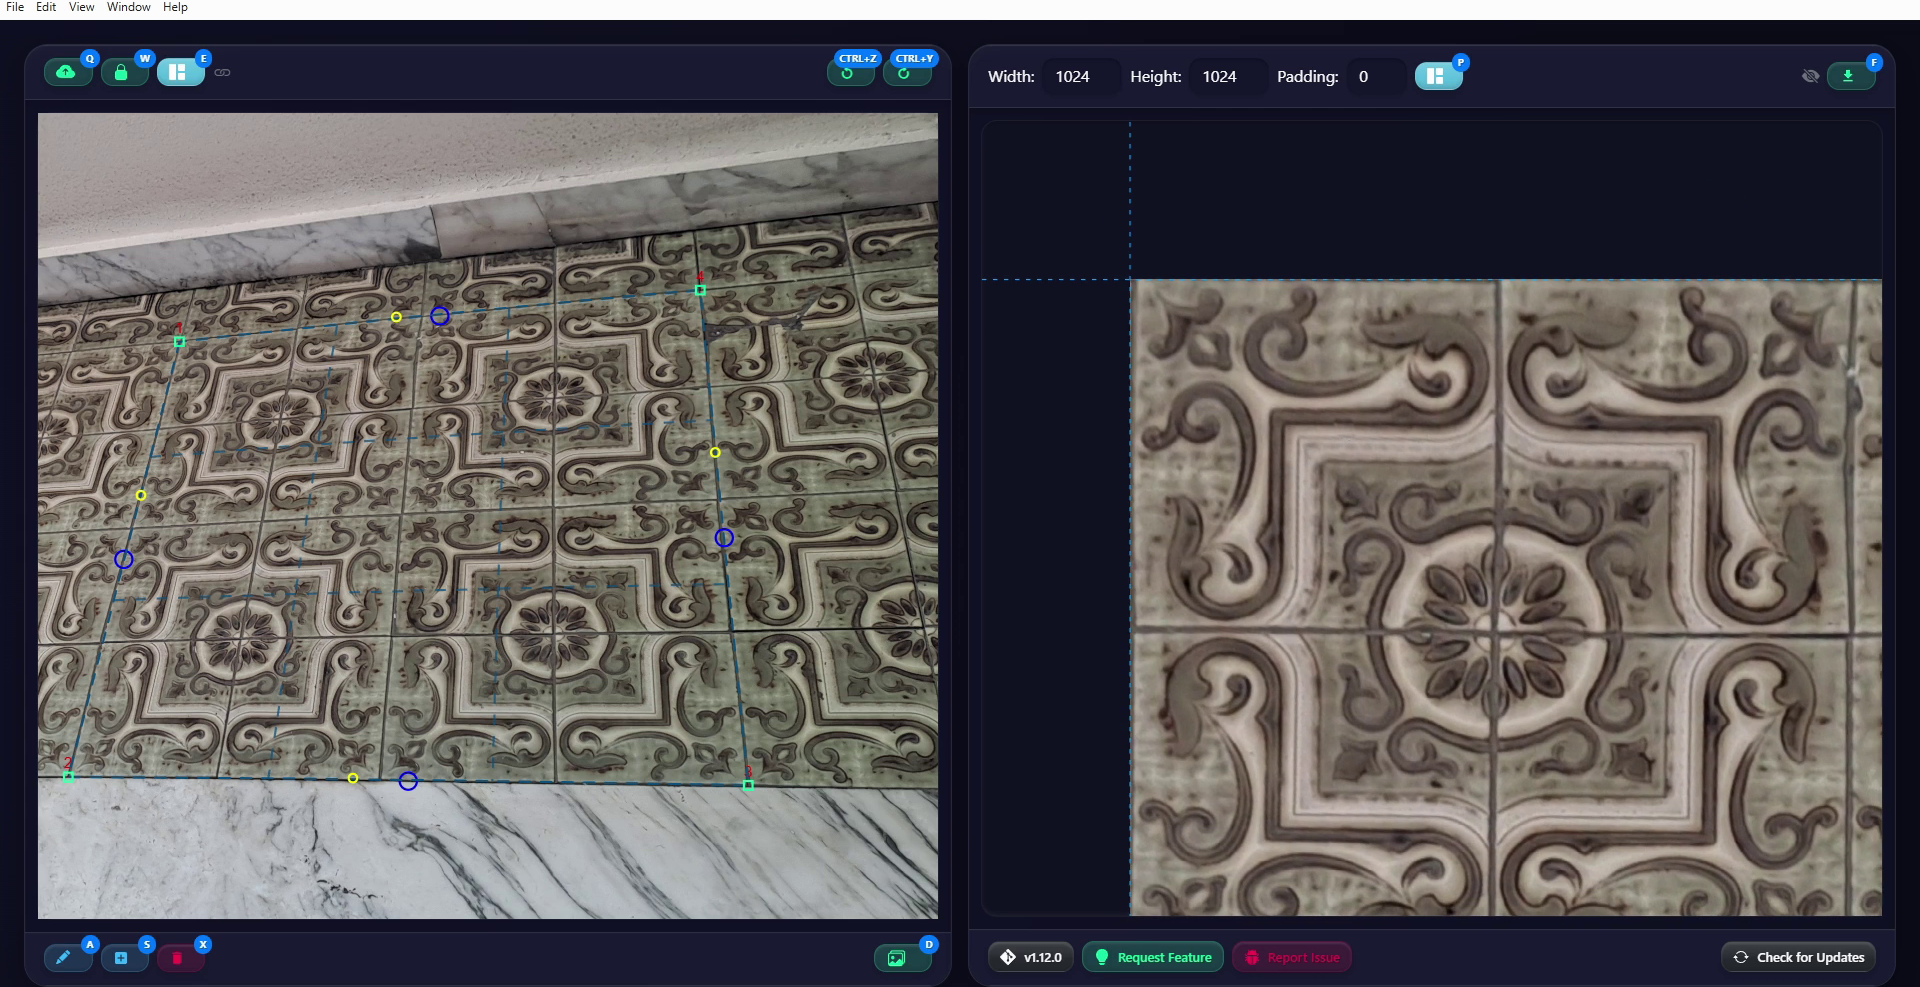
In the workspace on the left, I click Add Rectangle again to define additional ripping rectangles, selecting other interesting parts of the photograph. Once I’m done, I click Extract All to generate the new Textures, which can then be arranged in the workspace on the right.
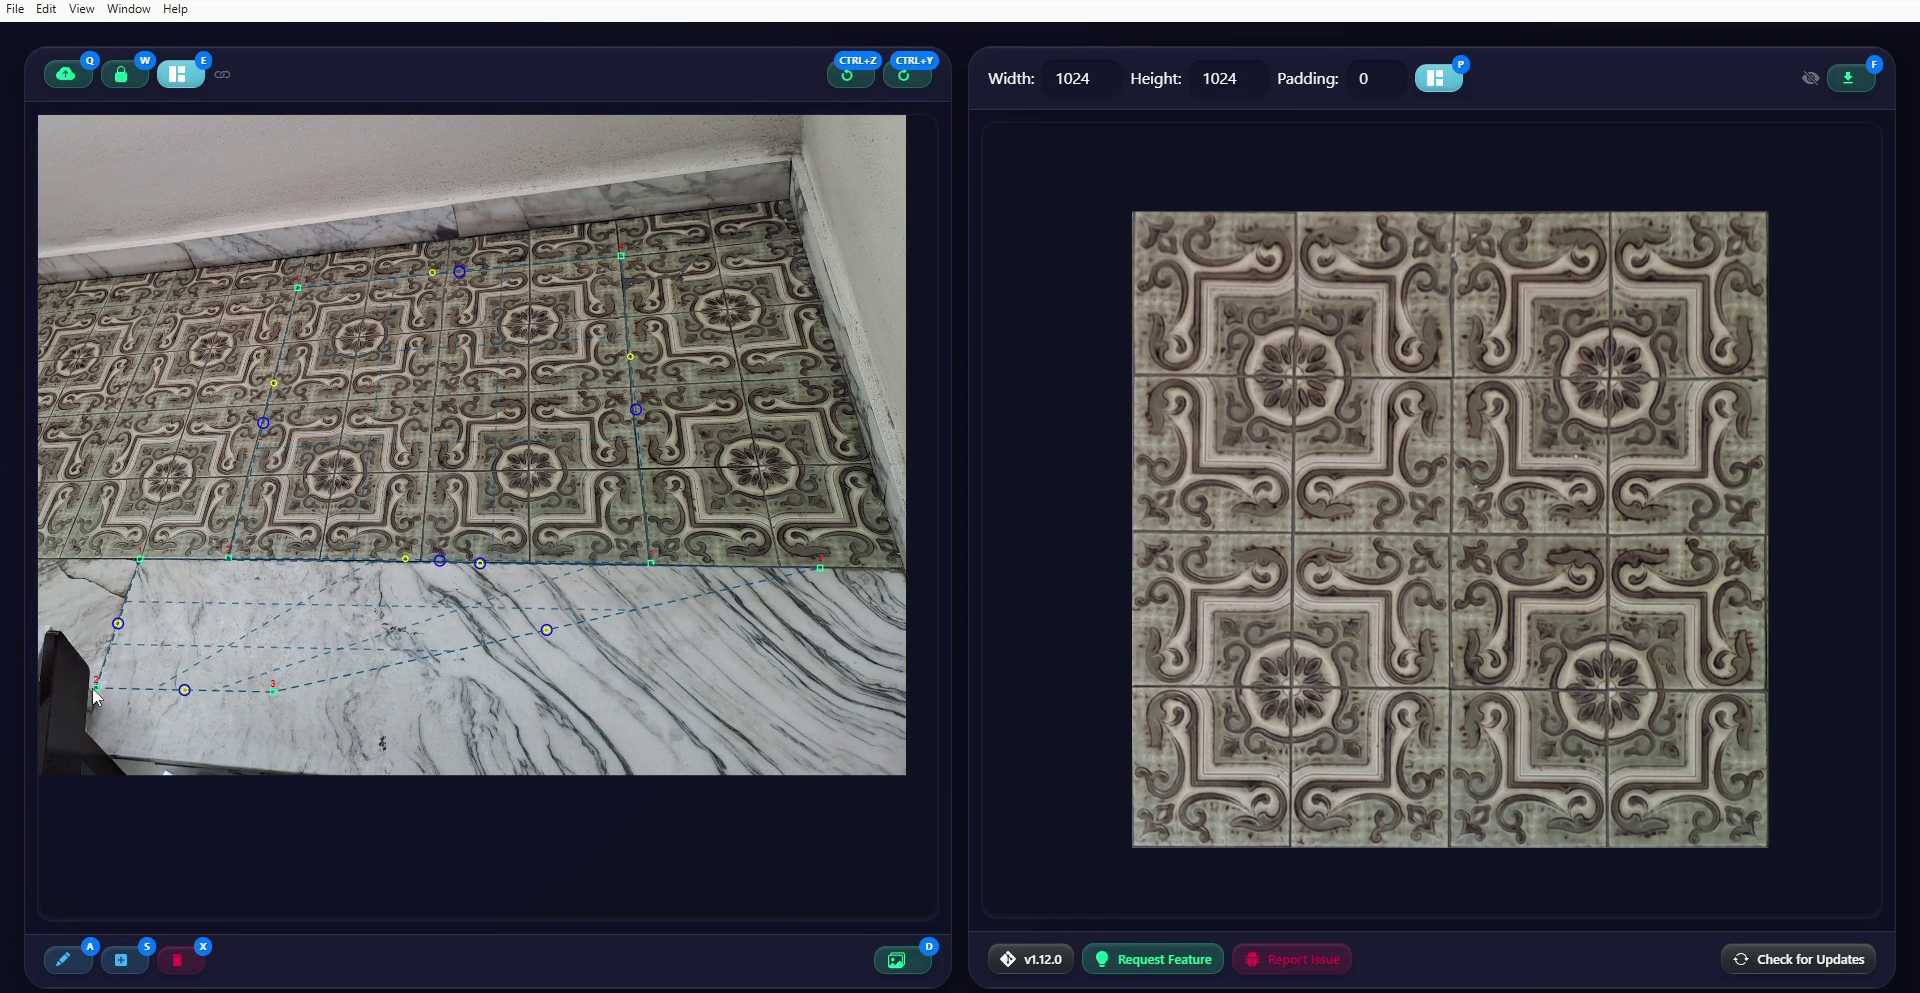
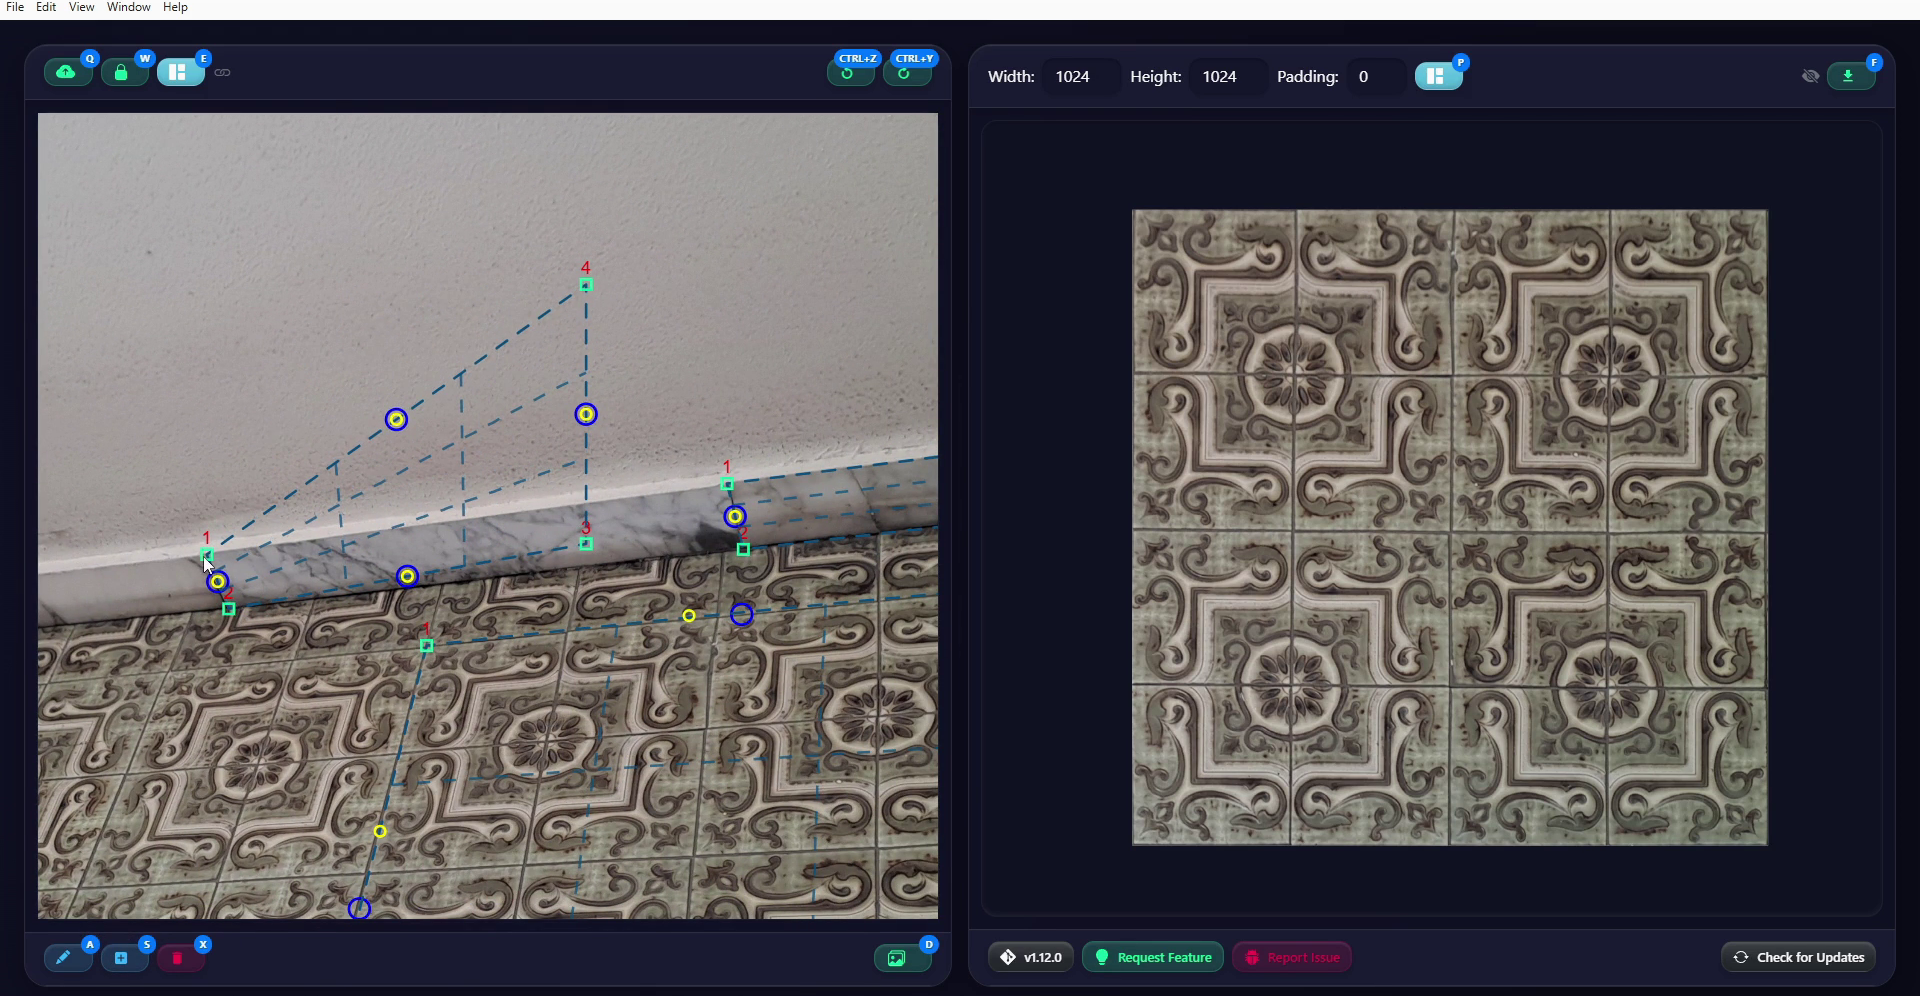
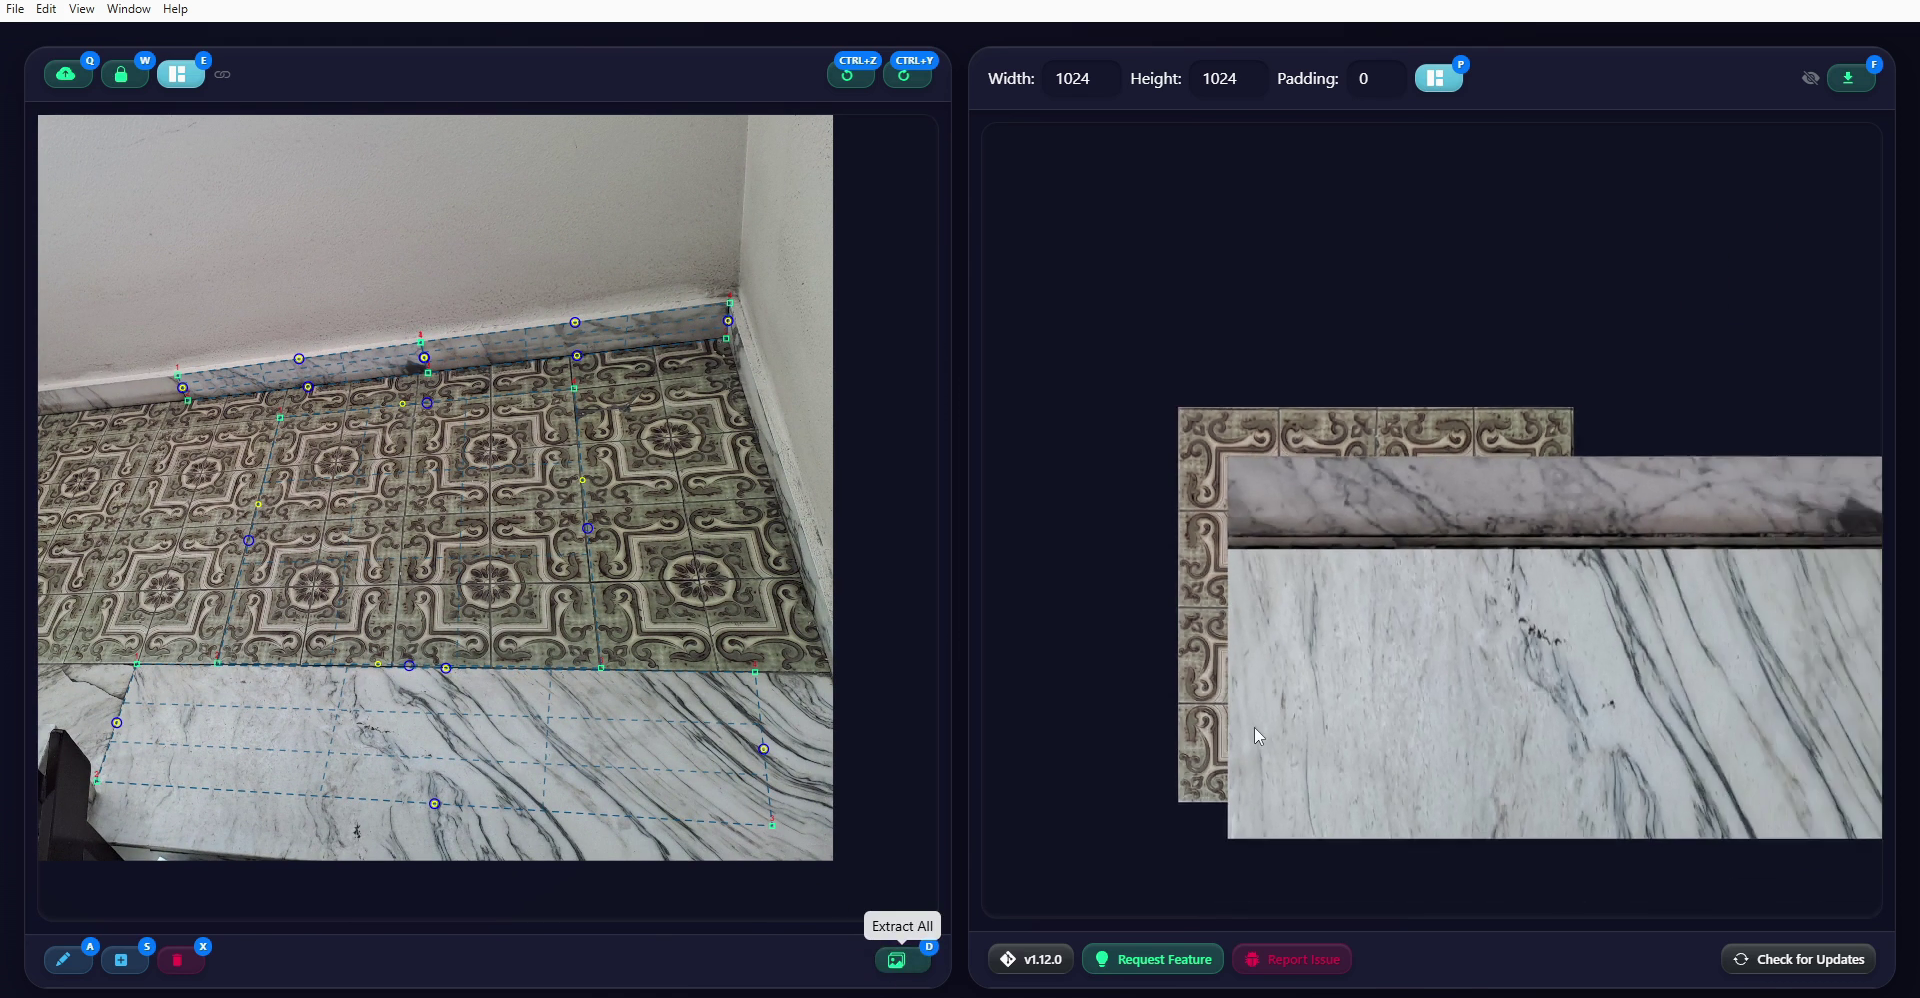
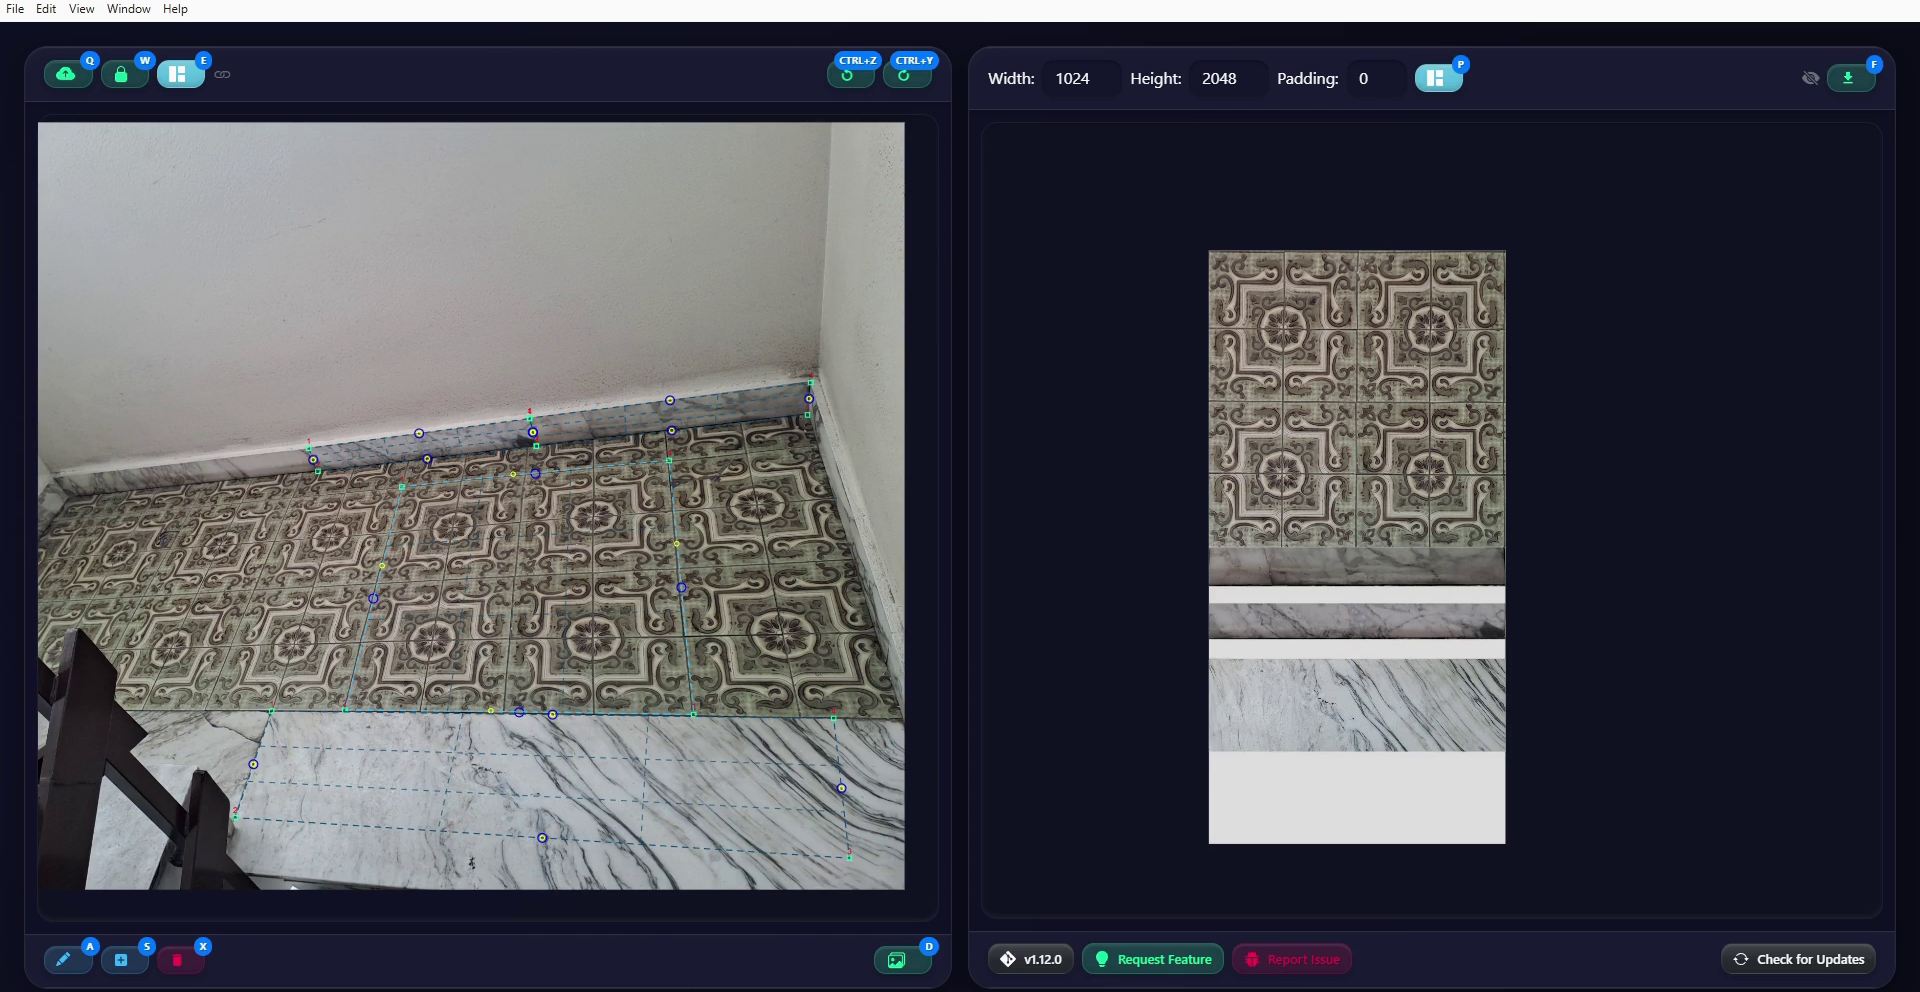
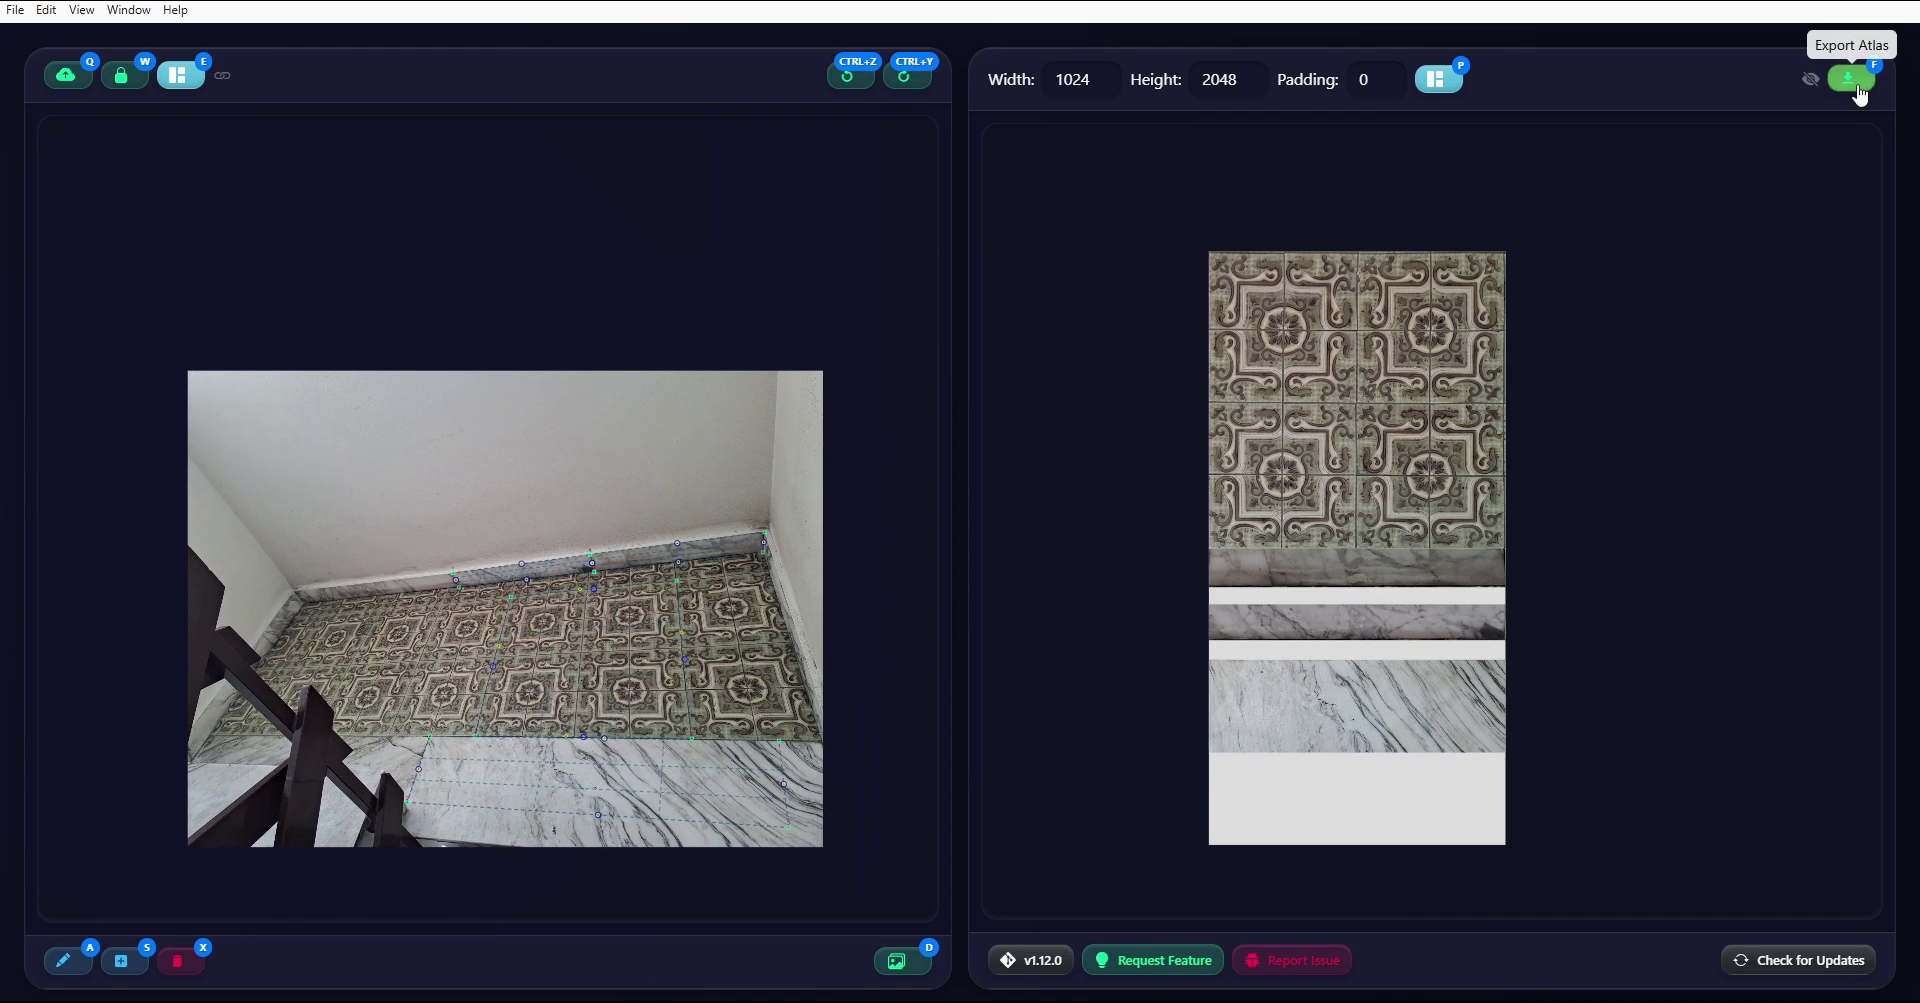
I then arrange these Textures in the Atlas as well, changing the height of the export area to make room for the new images. I’m not using the Auto Pack feature with the button at the top because I don’t think it’s necessary in this case, but it’s useful to know that the feature is available. In reality, I’m not creating an ideal Atlas here, because for this kind of use, square export images would generally be preferable, perhaps by adding other elements taken from additional source photographs. For this quick example, though, this is good enough. Once everything is ready, I export the image as a PNG by clicking Export Atlas.
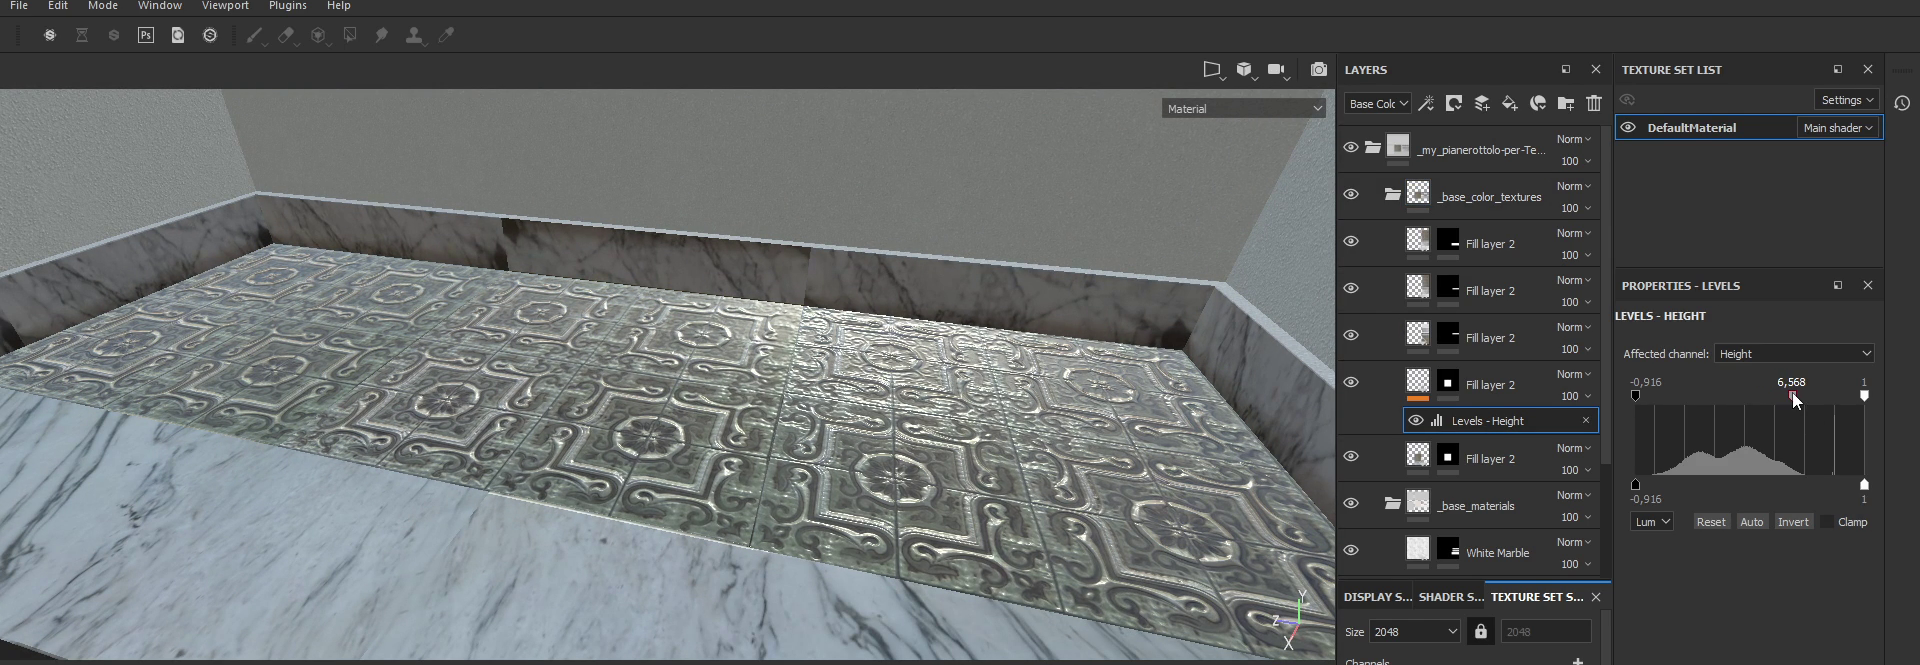
The Texture created this way can be used as a starting point for creating a PBR Material in software such as Substance Painter, as I’m showing on screen now. Here, I’m quickly generating both the Roughness and Metallic channels from basic materials, as well as a Height Map based directly on the Texture Atlas. Of course, this is not a properly created Height Map, but it is more than sufficient for a quick example.
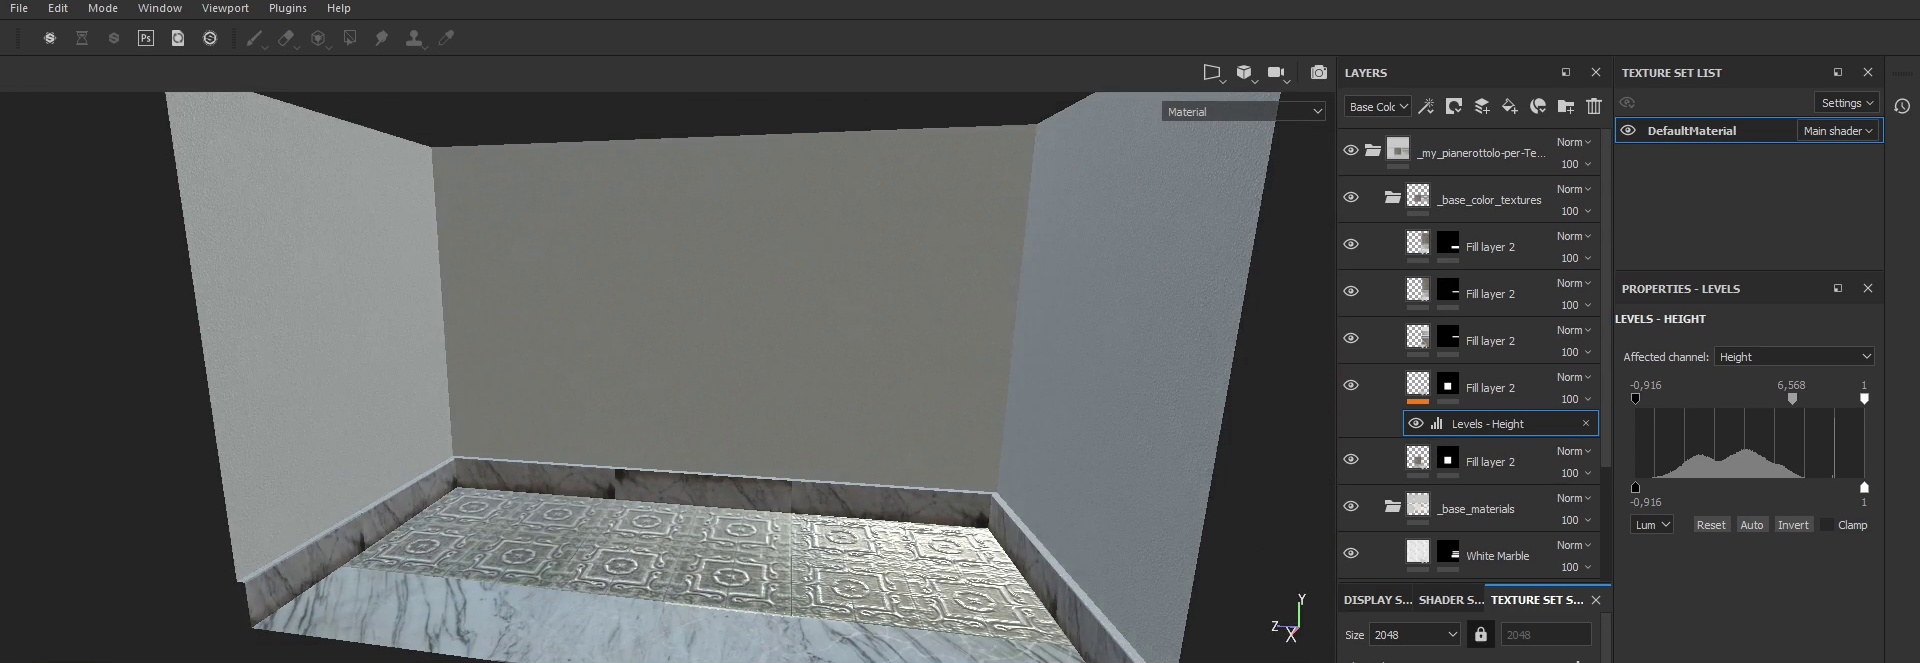
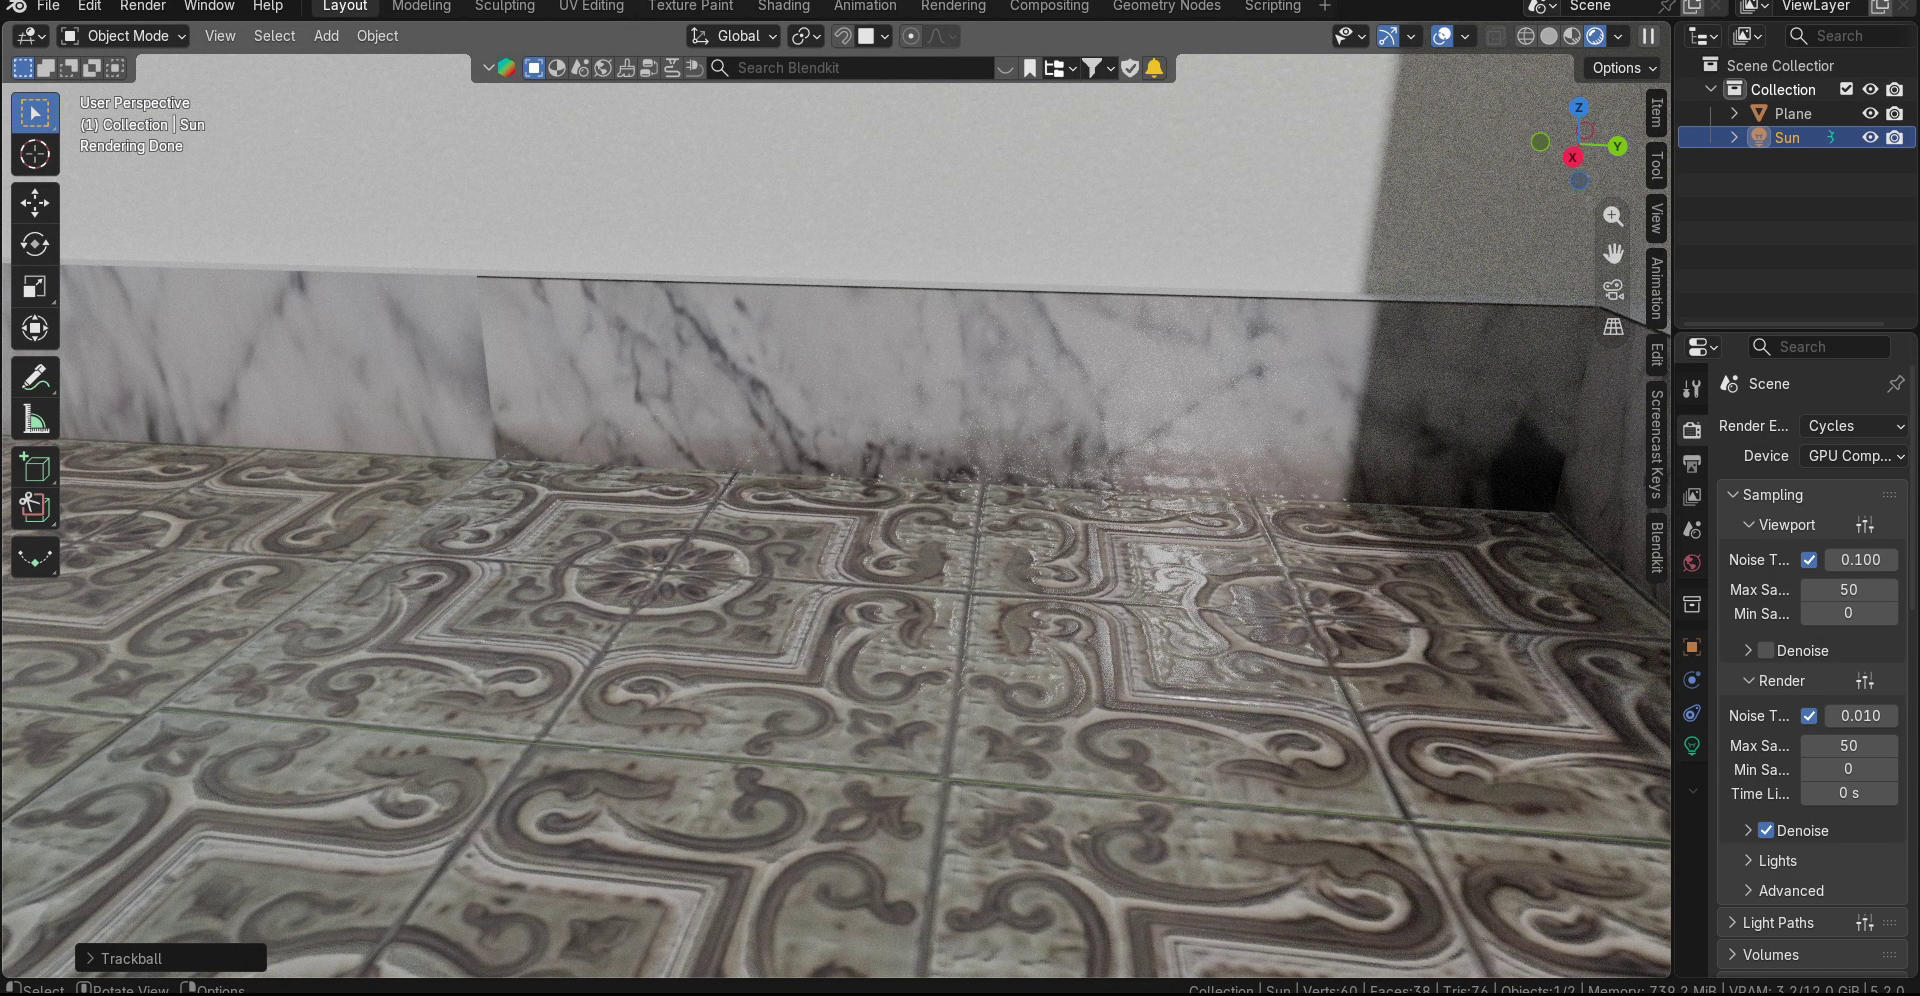
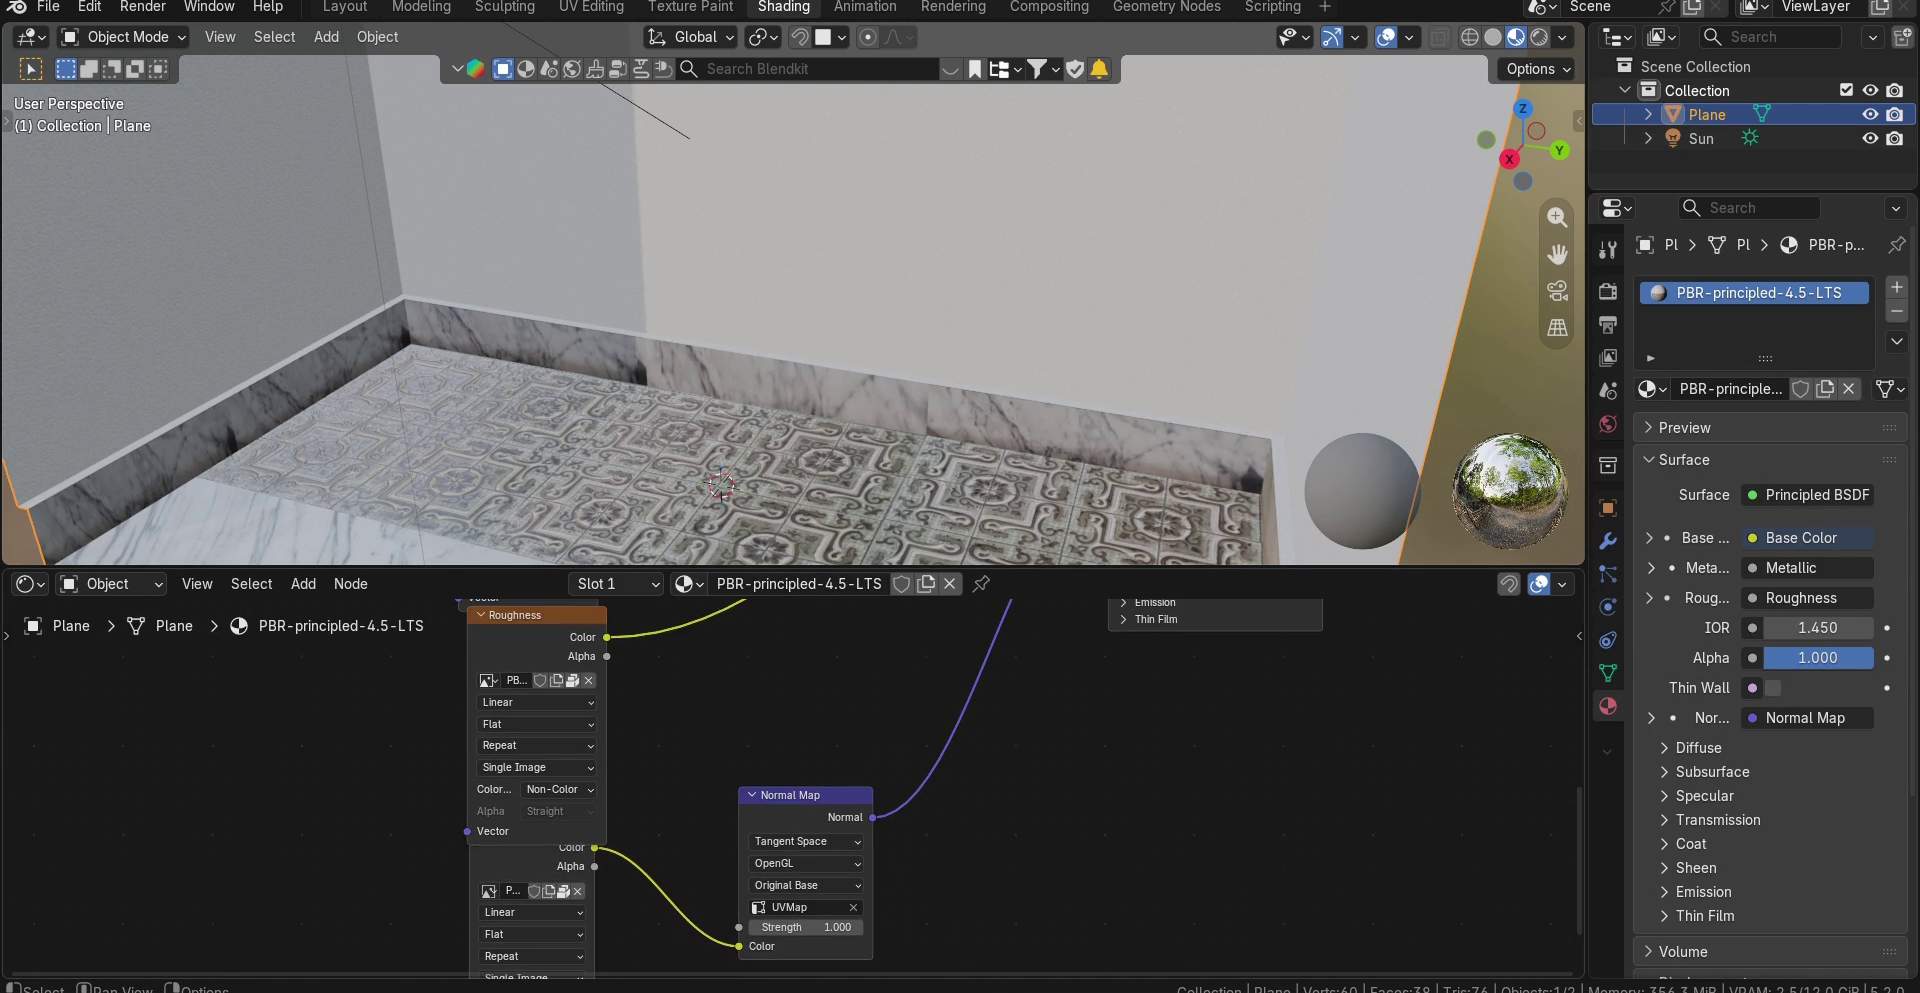
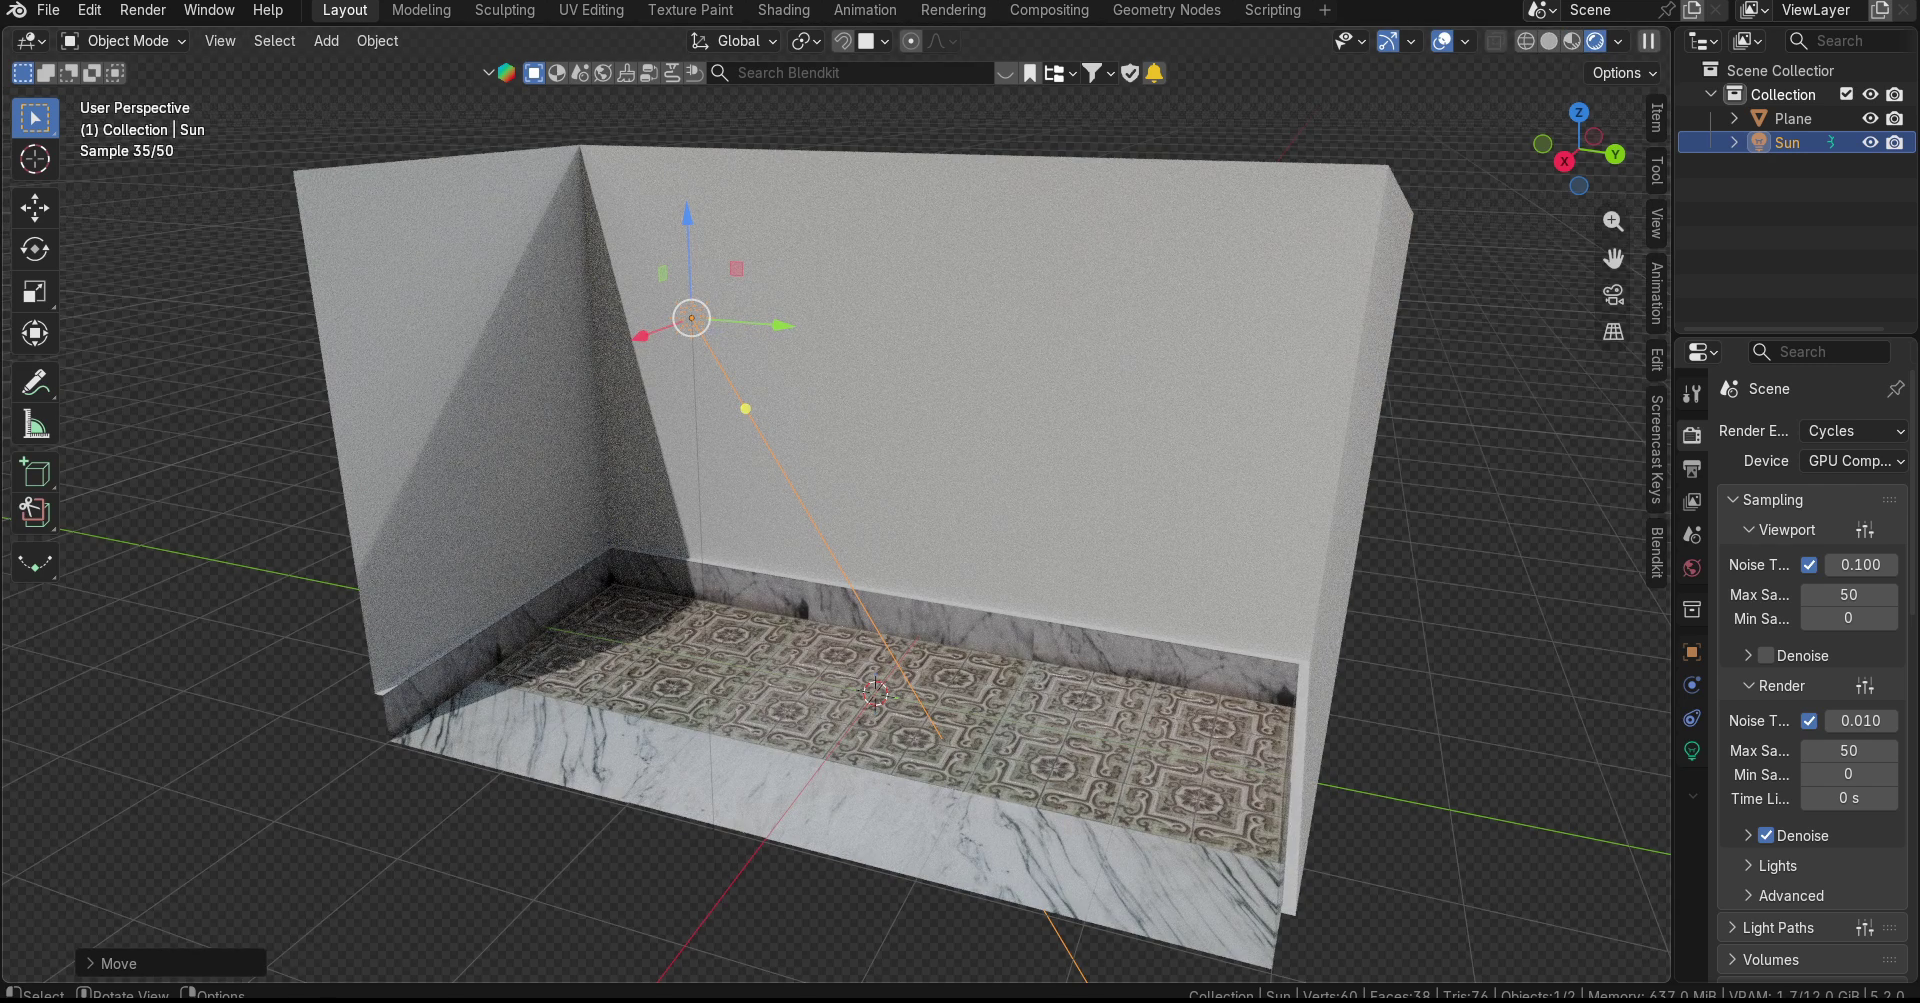
And here, finally, are the PBR Textures exported from Substance Painter and applied to a simple 3D model in Blender, where we can still refine the UV seams or overlaps to avoid unattractive repetition or incorrect seams. The Height map was exported from Substance Painter as a Normal Map and applied here to the Cycles Principled shader, giving us the raised surface effect on the tiles.
Well, that’s all for this tutorial! As with my other videos, the written version of this tutorial and additional resources are available on my website, also in other languages, through the link in the description. If you found this tutorial useful, you can support me by leaving a Like and subscribing to the channel! See you soon!