


Raycastly Texture Ripper is a free and open-source program that allows us to extract and straighten portions of photographs, combining them into a single image that can be used either as a single...
In this very short tutorial, we’ll see how to fix a Normal Map that, when imported into Unreal Engine, makes surface details appear incorrectly lit.
In this tutorial, we'll see how to use a Movie Texture in Blender. Among other things, we'll see how to preview the different frames of the movie directly in the 3D Viewport and how to set its...
In this short tutorial, I'll show you the Texture Cache feature for Cycles, introduced in Blender 5.2. It provides better memory management during rendering, making it possible to render scenes...
In one of my most popular tutorials, I showed you how to create a proper window glass material in Blender. The goal was to let light pass through the glass, including colored stained glass, instead...
In this short tutorial, we'll see how to use the Thin Wall mode for thin object materials in Cycles, introduced in Blender 5.2.
In this very short tutorial, I’ll show you how to create the effect of an old CRT monitor in our Blender renders using an image and a couple of nodes in the Shader Editor.
In this short tutorial I will show you how to set up Constraints to easily open and close the upper compartments of a tool box.
In this short tutorial I will show you a way to move object Origins in Blender 5 using a mode called Affect Only. This allows you to reposition Origins more easily in an interactive way, optionally...
In this short tutorial we will see how to create solid extrusions procedurally starting from a single vertex and building, step by step, only segments, as I am showing in the video.
In this very short tutorial I will show you a little known Blender selection tool that can turn out to be very useful. It is the Select Active tool, available in both Previous and Next modes.
In this video, I will describe the steps and operations I followed to create the rendering you see on screen, which shows a corner of a room with a small table and a computer from the very early...
In this very short Unity 2D programming tutorial, I will show you how to make the camera follow the main character with a slight delay instead of instantly, so you can create smoother transitions.
In this short tutorial we will see how to model a tightened and wrapped shape, to obtain something visually similar to a candy wrapper or a bag closed with a string, in a non-destructive way by...
In this basic tutorial we will look at the two main methods for quickly filling a Layer or a selection in Krita. We will also see how to change the shortcuts for filling the entire selection, so...
In this very short basic video about Krita 5, we will look at three ways to enlarge some tool icons and the size of the text.
In this short tutorial I will show you three different Remeshing methods in Blender 5, specifically Voxel-based methods.
In this short tutorial, we will look at some simple methods to align vertices or project them onto an external edge, both orthogonally and non-orthogonally, in Blender 5.
In this short tutorial we will see how to use Annotations with the Cell Fracture tool in Blender 5.
In this final episode of the basic turntable photogrammetry series, I will apply the PBR Textures exported at the end of the previous episode to the Low Poly model.
In this episode of the basic turntable photogrammetry series, we will look at some useful tools for correcting errors in the Textures imported into the Substance project.
In this episode of the basic turntable photogrammetry series, I will show you how to bake the Normal Map from the High Poly geometry to the Low Poly one in Substance Painter.
In this episode of the basic series on turntable photogrammetry, I will show you how to transfer the Color information from the original High Poly reconstruction to the Low Poly object obtained in...
In this episode of the basic turntable photogrammetry series, I will create a Low Poly version of the geometry obtained at the end of the previous episode.
In this episode of the Turntable Photogrammetry basic series, I will import the High Poly mesh into Blender and clean it up a bit before creating the Low Poly version.
In this episode of the basic turntable photogrammetry series, we will see how to reconstruct the high poly geometry from the images with transparency generated in Blender at the end of the previous...
In this episode of the basic turntable photogrammetry series, we will see how to remove the green background and Color Spill from photographs in Blender.
In this episode of the basic turntable photogrammetry series, we will analyze the fundamental features of a Meshroom project for reconstructing geometry from photographs.
In this episode of the basic turntable photogrammetry series, I will give an overview of the setup used to photograph the walnut shell that will be reconstructed through photogrammetry.
This is the episode 0 of a series on a photogrammetry project that involves the use of Blender, Meshroom, and possibly Substance Painter. This is a basic series aimed at those with little to no...
In this very short tutorial I want to show you how to get a preview of the transparent materials in Substance Painter's 3D viewport.
In this short tutorial, I want to talk about a little-known but very useful tool in Substance Painter: Fonts. These are a special type of Alpha mask that allow us to write custom text using a...
In this tutorial, we will look at a way to apply logos or, more generally, decorative elements, known as decals, onto the surface of objects in Substance Painter.
In this short tutorial, we'll see how to use a Layer, whether it's a Fill Layer or a Substance Material, across multiple Texture Sets in a Substance Painter project.
In this tutorial, we will look at a basic technique that allows us to reduce, at least to some extent, the tiled appearance that results from using repeating Materials across large surfaces, such...
In this video tutorial, we will explore the Light generator through a practical example.
In this tutorial, created with the 2019 version of Substance Painter, we will see how to retrieve the ID Colors of a model, when available, and use them to quickly create layer masks.
This is a basic introductory tutorial intended for users who already know something about materials, brushes, and layer masks in Substance Painter, but have never used Particles in Substance...
In this tutorial we will see how to create a Material Preset in Substance Painter, that is, how to define our own Fill Layer by setting the Textures for Base Color, Normal, and the other...
In this tutorial, we will look at three different ways, among the many possible ones, of quickly texturing a checkerboard in Substance Painter.
In this tutorial, I want to show you a simple use of the Blur filter in Substance Painter by applying it, in this case, to a couple of layer masks. Specifically, I will use the filter to blur the...
In this tutorial, created with Substance Painter 2019, we will see how to use a Generator to modify the edges of an object. Specifically, we will focus on the Metal Edge Wear Generator and the...
In this tutorial, created with the 2019 version of Substance Painter, I will show you how I used a Generator to add light-colored blotches to the Texture of a Material.
In this tutorial, created using the 2019 version of Substance Painter, we'll see how to group a set of Layers into a Smart Material and save that object to the program's Shelf, so that it can be...
In this tutorial, we will see how to import and map a MASK to apply one material over another in Substance Painter, specifically using a PNG image with white symbols on a transparent background and...
In this tutorial, we will see how to simulate stitches on an object using Substance Painter brushes (version 2019) on the mask of a Material that, as we will see, will have only the Height channel...
In this short basic tutorial for Substance Painter 2019, we will see how to change the background image of the virtual environment, while also observing how different images affect the material...
In this beginner-level tutorial, we will see how to assign two different materials to different parts of a single object that has only one Texture Set, meaning an object provided as a single...
In this basic tutorial on Substance Painter, aimed at those who are truly starting from scratch with the program, we will look at the fundamental settings for creating a new Substance project and...
In this tutorial we will look at what PBR is, how the fundamental Textures are used to define a PBR Material in Substance, and most importantly, how they work together.
In this ninth and final episode of a series on Atmospheric Perspective in Compositing in Blender 4.1, we will add the virtual universe background to the setup and conclude the series.
In this eighth episode of a nine-part series on Atmospheric Perspective in Compositing in Blender 4.1, we will see how to decrease the contrast of the image based on the distance from the virtual...
In this seventh episode of a nine-part series on Atmospheric Perspective in Compositing in Blender 4.1, we will take a break from creating effects to tidy up the nodes in the graph and make some...
In this sixth episode of a series of nine dedicated to Atmospheric Perspective in Compositing in Blender 4.1, we will see how to desaturate distant elements.
In this fifth episode of a nine-part series dedicated to Atmospheric Perspective in Compositing in Blender 4.1, we will implement the shift towards blue or other colors of distant objects in the...
In this fourth episode of a nine-part series dedicated to Atmospheric Perspective in Compositing in Blender 4.1, we will implement the first of the effects in this series: distance blur!
In this third episode of a nine-part series dedicated to Atmospheric Perspective in Compositing in Blender 4.1, we will discuss the information coming from the Depth channel of Render Layers and...
In this second episode of a nine-part series dedicated to Atmospheric Perspective in Compositing in Blender 4.1, we will perform a couple of preliminary operations before starting the rendering of...
This is the first of a series of nine tutorials dedicated to Atmospheric Perspective in Blender 4.1 through Node Compositing in Post-production.
In this short basic tutorial, made with Blender 4.5, I’ll show you how to light a scene with an HDRI image and render the world background with a different image, a color, or a Texture, depending...
This is a very short tutorial on how to use the Dilate Erode node in Blender’s Compositor to eliminate, or at least reduce, imperfections in Color Keying mattes, especially those found inside the...
In this video tutorial made with Blender 4.3, we’ll take a look at three simple operations related to Materials. The first two operations will allow us to hide or delete Materials, while the third...
In this short tutorial on Blender 4.5 for beginners, we’ll see how to separate parts of an object, how to parent them to each other, and how to set their Origins so they can be used properly.
In this short Blender 4.5 tutorial, we’ll see how to display Vertex Colors on objects both in Solid mode in the 3D Viewport and in Rendering.
If you want to assign a color to one or more faces in Vertex Paint mode in Blender, the first thing to do is enable Paint Mask mode...
In this very short basic tutorial on sculpting in Blender, I’ll show you two very useful operations for working with Face Sets: Initialize By Loose Parts and Auto-Masking.
In this tutorial, we’ll see how to modify the appearance of the 3D model in Compositing with color correction, how to implement Lens Distortion, and how to retrieve the Shadow Catcher Pass...
In this tutorial, we’ll see how to use the Shadow Catcher mode to capture the shadows cast by the 3D model onto the Plane and add them to the final render in Compositing.
In this tutorial, we'll see how I set up the initial scene for the Shadow Catcher tutorial, which I'll publish next week.
In this very short video tutorial, I’ll show you a little-known but very useful menu in Blender. It’s the Quick Favorites menu, which you can access by pressing the Q key.
In this short tutorial, I’ll show you a method to retrieve the distance value of a point in the render. This can be useful for implementing Compositing effects based on precise values, for example,...
In this very short video tutorial, we’ll take a look at one of the reasons why the error "At least 8 common tracks on both keyframes are needed for reconstruction" may appear when trying to...
In this video, I’ll show you the changes I made to materials, lighting, and especially post processing in Compositing in Blender 4.3, to go from the first rendering to the second one.
In this very short video, I’ll show you what the Realtime Endframe add-on for Blender is and how to use it, especially in combination with the automatic keyframe recording mode.
In this very short modeling tutorial in Blender, I’ll show you two ways to use the Edge Slide tool that you might not know yet...
This add-on allows you to specify a final dimension along one axis for an object and get proportional resizing on all axes based on the specified dimension.
In a tutorial published a couple of weeks ago, I showed how to enable Depth of Field in Blender, both in the 3D Viewport and during rendering, to keep one object in focus while blurring the rest of...
This is a very short and basic video about usingCompositing Switch node in Blender 4.3, particularly for animating the activation or deactivation of a node or a group of compositing nodes.
In this video, we’ll go through an overview of the tools and features of the Camera objects in Blender. Specifically, we’ll cover the Passepartout option, the Safe Areas, and the Composition...
This is a basic tutorial on how to set up custom shortcuts in Blender, specifically using version 4.3 of the software.
In this basic Blender tutorial, we'll learn how to set the depth of field for the virtual camera, ensuring only one specific point in the scene remains in focus while blurring areas closer or...
In this brief tutorial on Blender's interface basics, we will see how to highlight edges, or more precisely, the ridges and valleys, of our 3D models in the 3D Viewport.
In this video tutorial, we will see how to define custom attributes for the edges of objects in Blender 4.3 and specify these attributes in the Edge Weight section of the Bevel modifiers. This...
In this short tutorial, we will see two methods to create an animated Streaks glow effect.
In this tutorial, I’ll show you how to replace a planar portion of real-world footage in Blender using Motion Tracking, without having to perform the Solving step.
In this second introductory video tutorial on custom masks for Compositing in Blender, I’ll cover a few concepts I didn’t discuss in the previous video, namely how to add new control points to...
This is a short introductory tutorial on custom Compositing masks in Blender, which are very useful for applying effects only to specific parts of an image.
In this short video tutorial, I’ll show you the Compositing node group I created to recreate a simple Halation effect in Blender.
In this very short video, I’ll show you the shortcut for connecting any Compositing node in Blender directly to a Viewer node, so you can view the node’s output in the Compositing window's...
This is less of a tutorial and more of a quick deep dive into converting color images to grayscale in Blender’s Compositor.
In this very short video tutorial, I want to talk to you about an important security measure for Blender users.
In this short video tutorial, I'm going to talk about the Center Focus Depth of Field add-on.
In this very short video, made with Blender version 4.3, I’ll show you how to quickly change the selected object while in Sculpt Mode.
In this very short video, I’ll show you how to change the color used to display a Material in the 3D Viewport, meaning during modeling, not rendering. This can be useful to easily identify objects...
Last week I published a video where I showed how to map a Color Ramp along the Z axis of an object, both in local and global mode, to create a gradient along the object's height.
This is a basic tutorial on Texture Mapping, made with Blender version 4.3, in which we’ll see how to map a gradient Texture along one of an object’s axes. Specifically, we’ll map the gradient...
In this very short tutorial, I'll show you the Compositing node setup I created to add a black outline around objects rendered on a transparent background in Blender 4.3.
This is a very short tutorial on how to use File Output nodes to save multiple versions of the same rendering as image sequences, while performing the rendering only once, thus saving a good amount...
Here’s a super useful shortcut to modify multiple object parameters in Blender all at once.
This is a basic tutorial on how to easily create animations like the one you're seeing on screen, where some electronic components gradually fall onto a rotating printed circuit board.
This is the second of two tutorials dedicated to analyzing and using a Compositing node group for Blender 4.3 that allows you to render only a specific object or material in its original colors,...
This is the first of two tutorials dedicated to analyzing and using a Compositing node group for Blender 4.3 that allows you to render only a specific object or material in its original colors...
This is a short tutorial about a little-known extrusion method in Blender that can be very useful in many situations.
In this brief tutorial, we’ll see how to initiate renderings from the command line and, more importantly, how to queue multiple renderings from different files in succession.
This very short video is a small extra to the photogrammetry miniseries with Blender and Meshroom, whose final episode I published just a few days ago.
In this modeling tutorial made with Blender 4.3, we’ll see how to model a chain that follows the path and length defined by a Curve object.
In this tutorial, I will show you how I used the Curve modifier in Blender 4.3 to deform an object along a path, specifically to create the opening and closing motion of a bread box lid.
This is a basic tutorial on how to use the Crypto Matte node in Blender 4.3 to extract object masks in Compositing, especially when your final render includes Motion Blur, like the example I’m...
In this short tutorial, we’ll explore two options related to zooming and navigating in Blender’s 3D space.
This is a very short tutorial on how to create the cylinder animation you're currently watching in the video.
This is the second of two tutorials created using Blender version 4.2, where we’ll explore some basic methods for cutting and separating parts of mesh objects in Blender.
This is the first of two tutorials created with Blender version 4.2, where we’ll see some basic methods for cutting and separating parts of mesh objects in Blender.
In this very brief basic tutorial, we’ll talk about a specific rotation called Tilting and the Tilt operator that allows us to perform it.
This is a very brief tutorial created with Blender version 4.2 on a lesser-known but very useful modeling feature in Edit Mode called Split Edges and Faces.
In this video, made with Blender version 4.2, I’ll show you a couple of Python scripts that allow you to export the contents of a Blender scene to FBX, including Textures, for all Blender files...
This is a very brief tutorial on a little-known but very useful feature: using Markers in the Timeline to switch the active camera when creating an animation in Blender.
In this video tutorial, made with Blender version 4.2, we will see how to specify at which points an extruded geometry appears and disappears along a curve in Blender.
In this tutorial, we'll see how to use View Layers to obtain masks from objects that, actually, do not need to be rendered, but whose shapes and positions are of interest to us in order to achieve...
In this short basic tutorial, we'll cover two different topics with a single practical example: how to position objects on two or more different View Layers in a Blender 4.1 scene, and how to blend...
In this tutorial, I want to talk about the possibility of using Blender's procedural textures to modify Mist and Depth information in Compositing, achieving effects like the one shown above: an...
In this tutorial, we will examine the features, settings, common points, and differences between Depth and Mist: two Compositing Render Passes in Blender that provide us with information about the...
In this video, we'll see how to use the Mix 1 mode of the Glare post-production node in Blender to isolate and adjust the glow separately before adding it back to the original image. Among other...
In this tutorial, we will see how to set up some Rigid Bodies and an Hinge Constraint to create the animation of Newton's pendulum.
This is not exactly a tutorial but rather a small insight into the creation of the animation you are currently watching on the screen, in which a soccer ball enters the goal and moves the net, only...
The animation you can see on screen was created in Blender 3.6 using a simple 3D model to which I applied the Cloth simulator...
This short tutorial was created using Blender 3.6 and shows what to do, at least with this version of the software, to ensure that a Rigid Body object interacts correctly with a Cloth-type object,...
This is the second and last of two tutorials, made with Blender 3.6, in which we will examine the Sun Beams node to simulate light scattering in the air in Post-Production, after rendering, without...
This is the first of two tutorials, created using Blender 3.6, in which we will examine the Sun Beams node to simulate the dispersion of light in the air in Compositing, that is: after rendering,...
1. In this second tutorial about analyzing the Classroom rendering, which you are currently looking at, we will talk about Compositing effects, in Post-Production, used to transition from the...
This is the first of two tutorials in which I will examine two aspects of the rendered image that I am currently showing on screen: how to create volumetric lights when the scene's light source is...
The UV Project modifier allows you to modify the UV unwrap of the object that possesses it in reference to another object.
To correctly check the orientation of the Normals, activate the Face Orientation option in the Viewport Overlay menu of the 3D Viewport.
The Bridge Edge Loops operator can also be used on more than two profiles or sections at once.
If you need to connect two profiles with a curved path, you can choose from different solutions, but perhaps the simplest one is what I'm about to show you...
Sometimes, I've encountered situations where merging two or more objects using the Join function in Object Mode results in the disappearance of the UV map from one or more of the original objects,...
Blender's Select Boundary Loop operator allows us to isolate the boundary edges of the currently selected geometry.
In this short tutorial, we'll see how to make the faces of an object transparent based on their orientation relative to the camera, achieving the effect visible in the rendering I'm showing on the...
In this tutorial, we will see how to emphasize the edges of an object and add a Glare type glow through post-production of our renderings in Blender.
In this tutorial, we'll see a way to quickly change the hue of a Texture on an object, allowing us to create multiple copies with different colors.
In this tutorial, we will see how to save the Render Passes of our renders into an EXR file and then open these very files and modify them in Compositing.
In this tutorial, we'll see how to import and set up a 3D model downloaded from Adobe Stock into Blender.
In this short tutorial, we will see how to provide a random value for the intensity of a light source in Blender. Specifically, we will discuss using the Noise modifier on animation curves.
In this short tutorial, we will see how to retrieve UV seams in a 3D model that does not display edges marked as Seams in Blender.
In this tutorial, we will see how to create the animation of an electric arc climbing up two electrodes in Blender. This effect is also known as Jacob's Ladder, due to a biblical episode.
In this Blender 4.5 tutorial I’ll show you how to make particles emit from a Particle System, how to orient them correctly, and how to make them follow a path defined by a Curve object.
In this tutorial, we'll see how to use an image, particularly in the HDR or EXR format, as the backdrop for Blender's virtual universe, enabling us to light our scene with a more intriguing...
In this short tutorial, we’ll see how to place one object on the surface of another in Blender using the Snap tool in Face Project mode.
In this tutorial, made with Blender 4.1, we will see some basic operations for modeling geometries in Edit Mode; specifically, we will discuss the Poke Faces and Tris-to-Quads operators, especially...
In this basic tutorial on modeling in Blender, we will see how to model the cap of a BIC pen using the Bridge Edge Loops operator.
To create an animation in Blender like the one I am currently showing on the screen, where an object is animated using keyframes and interacts with Rigid Body objects, it is necessary to set the...
To import a Compositing node setup from one Blender project into the current one, by performing an Append, it is necessary to group the node setup in the project that contains it and, if possible,...
In this short basic tutorial on Compositing in Blender, we will see how to create and rename parameters for a node group and how to create a couple of parameters to adjust the intensity of the...
This is a basic videotutorial on how to use the Circle operator from the LoopTools Add-On, particularly to correctly create circles on curved surfaces, making it easy to perform extrusions both...
One of the new features introduced with Blender version 4 is the Kuwahara Compositing node, belonging to the Filter group...
When we make an animation, Blender makes the interpolation between one keyframe and another with a mode that will make it more or less linear or have special effects...
This very short tutorial stems from a comment by a user on my video about exporting renderings with Glare effects on transparent backgrounds. In particular, the user complained that the glares...
Here it is a very short tutorial on how to solve an issue that may occur when you want to make your camera follow a path in a scene in Blender.
In this tutorial, I will describe the node setup I created to achieve an NPR (Non-Photorealistic Rendering) from a 3D model with PBR materials and textures.
In this tutorial, I will describe the node setup I used to create a starry sky with bluish clouds, entirely procedural, in Blender 4.1, using the Cycles rendering engine.
In this very short video, I’ll talk about the Purge Unused Data tool available in Blender 4.2, which I believe will be particularly appreciated by those, like me, who have been using Blender for a...
You have probably experienced zooming in on a scene in Blender and noticed that the zoom seems to stop at a certain point. In this short video tutorial, we'll look at three ways to solve this...
This is a very brief tutorial on how to select only certain edge rings in a mesh, for example, every other one, or every two edge rings, and so on, in Blender 4.2.
In this short tutorial, we’ll go over some information about Auto Save and, more generally, backing up our projects in Blender 4.5.
As you may know, a quick method to align or straighten a set of vertices or faces in Blender is to perform a Scaling operation with a value of 0 on one or two axes, often using the Global or Normal...
In this short Blender modeling tutorial, created using version 5 of the software, we’ll see how to easily and non-destructively create a decorative element generally known as a Forged Steel Basket,...
In this very short tutorial, I’ll show you the small workaround I use when I want to create a Sculpt Mask based on a selection made in Edit Mode in Blender 4.5, in order to exclude certain parts of...
In this short tutorial, we’ll see how to correctly set up the Material for window glass in Blender, specifically using the Cycles rendering engine.
This is a short video for Blender beginners to clarify three tools related to geometry edges. These are Mean Crease, Bevel Weight, and Mark Sharp.
List of video tutorials in the Fire and Smoke series in Blender 4.5.
In this brief basic videotutorial about Substance 3D Painter, we will learn how to highlight material details using the Sharpen filter.
This is the second of two tutorials on creating a "Look At" script in Unity 2022 to make an object point towards another one.
This is the first of two tutorials on orienting an object towards another in Unity; specifically, we will see how to make the 3D model of a surveillance camera automatically orient itself towards...
Coroutines are functions that can be performed concurrently with the main game execution cycle...
In this tutorial, we will study the Slerp function of Quaternion in Unity, which allows us to transition from an initial orientation to a final one over a specified period of time, performing...
In this tutorial, we will see what Time.deltaTime is in Unity and how to use it.
In this very short video about filters in Painter, I’ll show you how I removed the sharpening effect along the UV seams of the 3D model you’re seeing...
In this tutorial I'm going to show you how to switch to the Materials Legacy mode in Unity, in order to manually assign the textures to the Material of an imported 3D model.
This is a basic tutorial on how to use Rigid Bodies and Physics Materials to make objects fall and bounce in our Unity projects.
In this tutorial we will see how to import 3D models downloaded from Adobe Stock into Unity, setting up PBR Textures for both the built-in Shader and the Universal Render Pipeline.
In this tutorial, I will show you how to play an audio file in Unity and, more importantly, how I resolved an issue related to overlapping audio playback from an Audio Source.
In this short beginner tutorial on Unity 6, we’ll see how to set an HDRi panoramic image, in the so-called Equirectangular format, as a Skybox, meaning as the background of the virtual universe.
In this short tutorial, we’ll see how to use the Vertex Colors of objects exported from Blender 4.5 in Unity 6.
This is a basic tutorial on how to use Instant Meshes, a free and open-source program that allows you to perform retopology and reduce the polygon count of 3D models.
In this video, I want to introduce you to a small free tool from Autodesk that converts ASCII FBX files into binary format, allowing them to be imported into Blender using the default FBX...
In this short video, I will show you how I created a dynamic Defocus effect in Unity, focusing only on the objects in the center of the camera's view while blurring the others.
If you are using Unity's High Definition Rendering Pipeline and notice strange effects when certain transparent materials are at the edges of the frame...
To export objects with Vertex Colors or a Material with PBR Textures from Blender 4.5 and import them into Unreal Engine 5, the best choice is the binary GLTF format...
In this short tutorial on the basics of the Unreal Engine 5 interface, we’ll see how to display the 3D viewport in fullscreen and how to move around the virtual space using the WASD keys or the...
If you're familiar with PBR materials, for example because you've used them in other programs such as Blender, Unity, Substance, and others, then you know there are two workflows, called Metallic...
In this short tutorial on Unreal Engine, we'll see how to combine multiple objects into one, both during the import process and afterward, using the Combine Static Meshes and Merge Actors tools.
Look for the Tablet section, just below the performance settings...
Let's see how to bake a Normal Map to transfer the details from a High Poly model to a Low Poly object.
fSpy is a free software that allows you to recreate the perspective of an image from the real world in a virtual environment.
This is a basic tutorial on Compositing in Blender, made with version 4.1, for beginners and focusing on applying Ambient Occlusion to your renderings.
To include Textures in a USDZ file, you need to use Blender 3.6...
To export an FBX file from Blender including materials and textures, simply choose File - Export FBX, and in the export window, change the Path Mode from Auto to Copy, then select the Embed...
When adding a semitransparent effect in the Compositing in Blender, such as the Glare effect from the Filter group, the glares in transparent areas of the image are not saved when exporting the...
In this short tutorial on Blender 5, I will talk about the Mesh Tools extension which, among other things, makes it easy to create an Offset, that is, a parallel copy of a selection placed at a...
This is a basic tutorial made with Blender 4.1, where we will see how to define a character's Actions and export them, along with the 3D model, in FBX format, and then import everything into Unity...
In this tutorial, we will see how to use Blender's Copy Rotation Constraint to rotate multiple objects, each around its own Origin, all at once, in particular by copying the rotation of a single...
In this tutorial, we'll look at how to set up materials and modifiers to achieve wireframe renderings of 3D models in Blender.
In this brief tutorial, we will examine a simple Blender scene to use for creating a turntable animation of any 3D model.
These animations are required by some stores where you can publish your 3D...
In this short tutorial, we will see how to use Blender's animation Cycle modifier to create cyclic animations, meaning we will make certain keyframes repeat themselves cyclically throughout the...
In this tutorial, created using Blender version 3.3, we will see how to create the animation of some red blood cells moving inside a blood vessel.
In this tutorial, we will see how to use the UV export layout Python function in Blender to export the UV maps (or: layouts) of all the MESH objects available in a scene.
In this tutorial, we'll see how to fill a container with objects using Blender's Rigid Body simulation.
In this tutorial I want to show you some strange artifacts that I encountered while applying some Textures from Substance Painter in Blender and how to fix them. The rendering engine used here is...
In this tutorial, I will show you how to use the Pixelate Compositing node in Blender to give your renderings a pixelated look, similar to the retro charm of old video games.
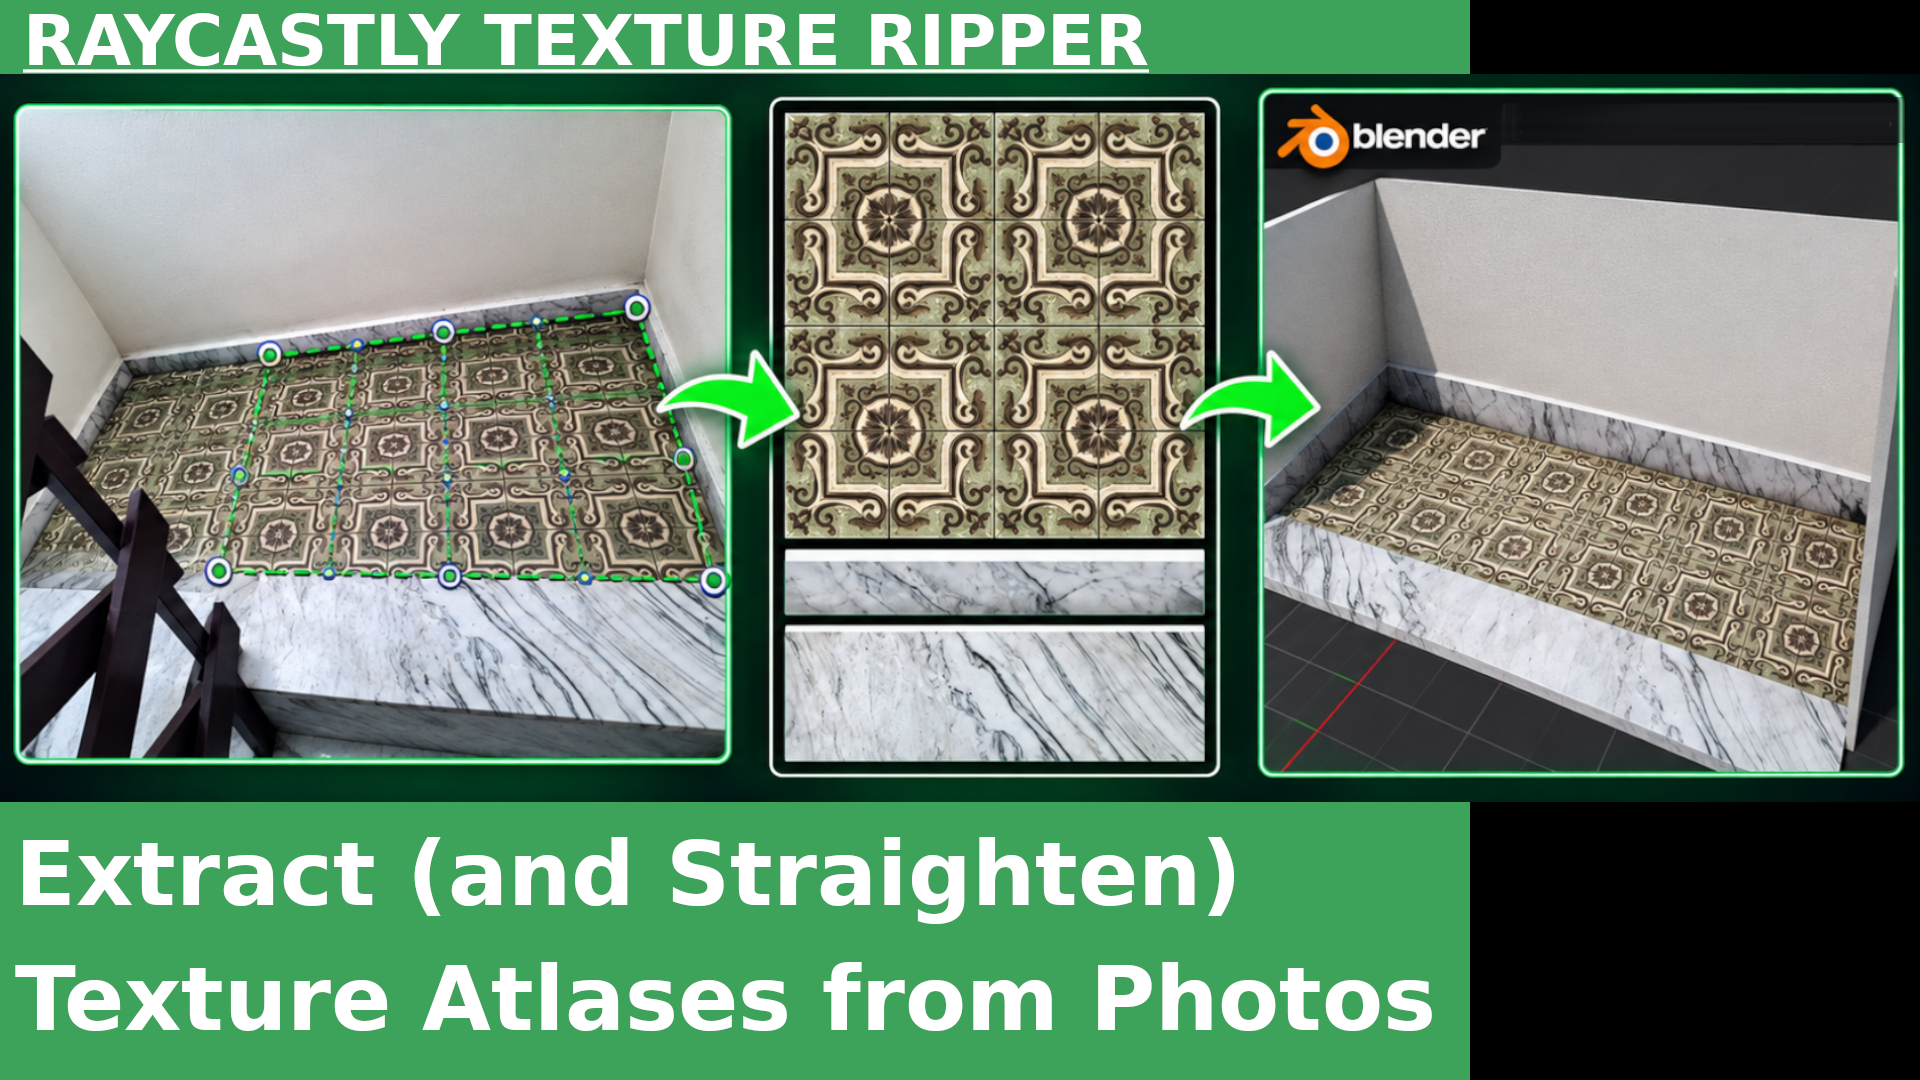
Extract (and Straighten) Texture Atlases from Photos with Raycastly Texture Ripper

How to Fix OpenGL Normal Maps in Unreal Engine 5 | Flip Green Channel Tutorial
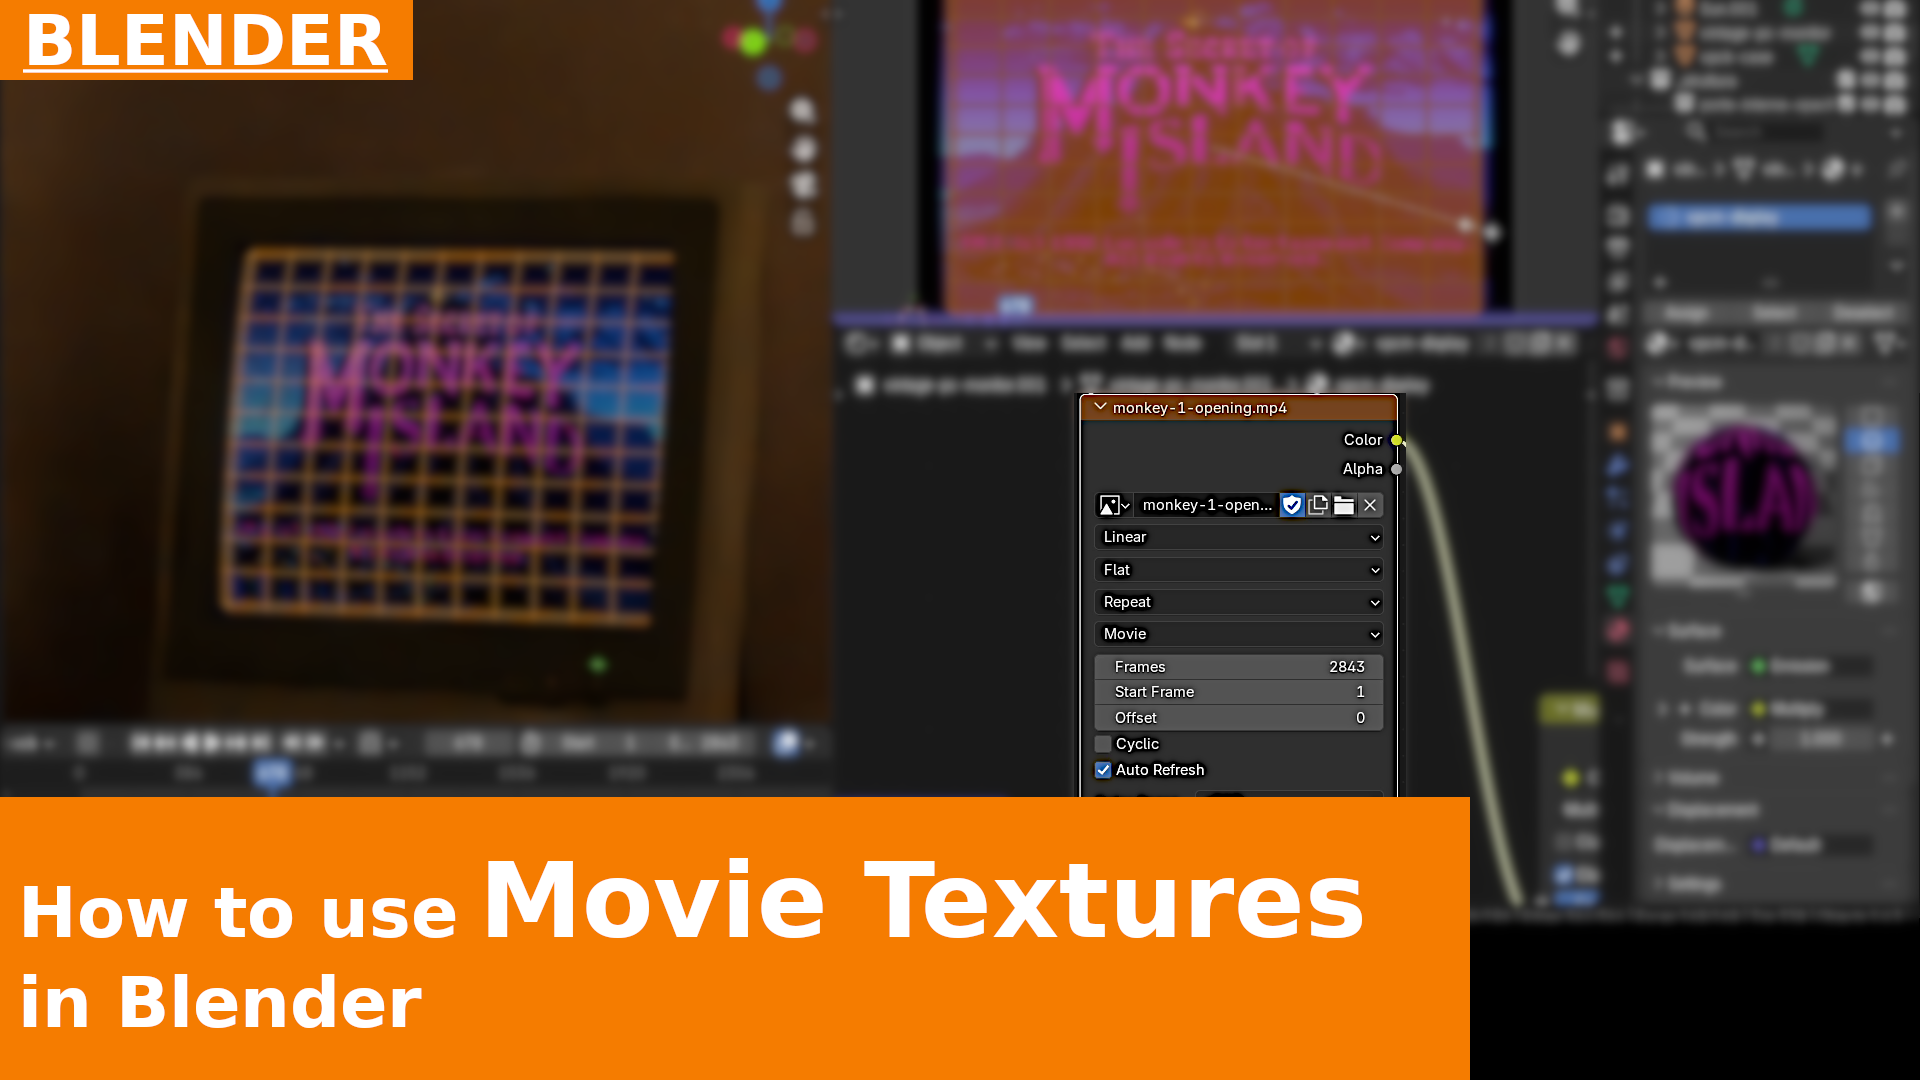
How to Use Movie Textures in Blender | Tutorial

How to Render Texture-Heavy Scenes and Avoid Out of Memory Errors with Unpack and Texture Cache | Blender 5.2 Tutorial

How to Create a Window Glass Material with Thin Wall | Blender 5.2 Tutorial

How to Use Thin Wall in Blender 5.2 Materials

How to Create a CRT Monitor Effect in Blender | Tutorial

How to Open and Close a Tool Box with Constraints (no Armatures) | Blender Tutorial

How to Easily Move the Origin with Affect Only | Blender 5 Tutorial

Extrusions with Screw and Solidify | Blender Tutorial

How to Extend or Shrink a Selection Along Topology in Blender: Select Active

How I Recreated My First 1990s “PC Corner” with Blender and Substance Painter

Unity 2D: How to Make the Player Camera Follow Smoother with Lerp and SmoothDamp

How to Create Twists Along a Curve with Taper and Tilt in Blender

Krita Basics: How to Use the Fill Tool and Fill Shortcuts

Krita, UI basics: How to Increase Icon and Text Size

Three Voxel Remesh Methods in Blender (Sculpt Mode, Remesh Modifier, Geometry Nodes Grids)

How to Align and Project Vertices onto Edges in Blender | Tutorial

How to Use Annotations with the Cell Fracture Tool in Blender 5 | Tutorial

10: Applying the Material in Blender and Conclusion | Turntable Photogrammetry Tutorials series

09: Corrections with Clone, Smudge, and Overlay in Substance Painter | Turntable Photogrammetry Tutorials series

08: Creating the Base Material in Substance Painter | Turntable Photogrammetry Tutorials series

07: Baking Maps from High Poly to Low Poly in Painter | Turntable Photogrammetry Tutorials series

06: Creating the Low Poly Version in Blender | Turntable Photogrammetry Tutorials series

05: Importing and Cleaning the High Poly Version in Blender | Turntable Photogrammetry Tutorials series

04: Reconstructing Geometry in Meshroom | Turntable Photogrammetry Tutorials series

03: Color Key and Color Spill in Blender | Turntable Photogrammetry Tutorials series

02: Creating a New Meshroom Project and Preliminary Notes | Turntable Photogrammetry Tutorials series

01: Environment Setup and Photography | Turntable Photogrammetry Tutorials series

Going Nuts with Photogrammetry: the Turntable Photogrammetry Tutorials series | 00: Overview

Substance Painter: Transparent Materials preview in the 3D Viewport

Substance Painter: Writing Text with Alpha Fonts

Substance Painter: How to Apply Logos and Decorative Details Using Brushes, Materials, and Anchors

Substance Painter - Using a Layer Across Multiple Materials with “Instantiate across Texture Sets”

Substance Painter: Adding a Randomized Pattern to Repetitive Materials

Substance Painter: Using the Light Generator to Create Directional Masks

Substance Painter: Masks with Color Selection and ID Mask from Vertex Colors

Substance Painter - Introduction to Particles (Particle Brushes and Procedural Effects)

Substance Painter: How (and Why) to Create a Material Preset from a Fill Layer

Substance Painter: Three Methods for Creating a Checkerboard Pattern: Images, Masks, and Procedural Maps

Substance Painter: Blurring Layer Masks with the Blur Filter

Substance Painter: Using the Edge Generator and the Invert and Blur Filters for an Object's Edges

Substance Painter: A Blotchy Material with the Dripping Rust Generator

Substance Painter: How to Save a Layer Group Using Create Smart Material

Substance Painter - How to Import and Map a Texture with Transparency and Use It as a Mask

Substance Painter: Raised Seams Using Brushes on Masks and Height Maps

Substance Painter: Changing the Background Lighting Image and Direction

Substance Painter: Two Materials in a Texture Set Using Masks

Substance Painter: New Project; File Formats; Interface; UVs

Substance Painter Basics: Introduction to PBR, Materials, and Textures

Atmospheric Perspective series - 9: Background & Z-Combine; Conclusion

Atmospheric Perspective series - 8: Contrast

Atmospheric Perspective series - 7: Groups

Atmospheric Perspective series - 6: Desaturate

Atmospheric Perspective series - 5: Blue Shifting

Atmospheric Perspective series - 4: Distance Blurring

Atmospheric Perspective series - 3: Normalizing Depth

Atmospheric Perspective series - 2: Clipping; Environment

Atmospheric Perspective series - 1: Introduction

How to Use a Different Background Image from the HDRI Lighting the Scene in Blender 4.5

Blender Compositing: How to Use Dilate / Erode to Fix "Holes" in Color Keying Mattes

Override, Remove All Materials, and Remove All Image Textures: 3 operations on Materials in Blender 4.3

How to Separate Parts of Objects, Set Their Origins, and Parent Them in Blender 4.5 | Beginner Tutorial

How to See Vertex Paint Colors in the 3D Viewport and in Rendering in Blender 4.x

How to Quickly Assign Vertex Colors to Selected Faces in Blender 4.x

Face Sets By Loose Parts and Auto-Masking | Blender Sculpting Tutorial

Photo Matching in Blender, Part 3: Compositing | Blender 4.x Tutorial

Photo Matching in Blender, Part 2: Shadow Catcher | Blender 4.x Tutorial

Photo Matching in Blender, Part 1: How to Position the Camera with fSpy | Blender 4.x Tutorial

Blender Quick Tip: the Q key and the Quick Favorites menu

How to View Z-Depth Distance Values in Blender 4.x

The infamous 'At Least 8 Common Tracks' Error in Blender Motion Tracking

Some tips to improve a rendering in Blender (Materials, Lighting, and Compositing)

How to Record Animations on the Fly with the Realtime Endframe Add-on and Auto Keying in Blender

Two Little-Known Modes of Using Edge Slide (G G) in Blender: Even and Flipped

How to Use the Proportional Resize to Dimension Add-on in Blender 4.3 | Tutorial

Depth of Field with a Single Object Perfectly in Focus Using Compositing in Blender

Animating the Muting of a Compositing Node with Switch | Blender 4.3 Quick Tip

Passepartout, Safe Areas, and Composition Guides of the Camera in Blender

How to Set Up Shortcuts in Blender 4.3

How to Set the Depth of Field for the Camera in Blender (3D Viewport and Rendering)

How to Highlight Edges in the 3D Viewport with the Cavity Option | Blender Interface BASICS

How to Define Attributes for Edges and Use Them in the Bevel Modifier in Blender 4.3

Animating a Glare Streaks Effect in Compositing with Masks and View Layers | Blender 4.x

How to Replace Surfaces in Footage with the Plane Track | Blender Motion Tracking Tutorial

How to Create Custom Masks for Compositing in Blender - Tutorial 2/2

How to Create Custom Masks for Compositing in Blender | Tutorial

The Halation Effect | Blender 4.3 Compositing Tutorial

Blender Quick Tip: Instantly Connect a Compositing Node to a Viewer with CTRL + SHIFT + Click

From Color to Grayscale: Linear vs (Gamma Corrected) sRGB | Blender 4.3 Compositing

Warning: Disable "Auto Run Python Scripts" to protect yourself from malware in Blender files

Center Focus Depth of Field add-on - Automatically focusing at the center of the frame in Blender

How to Change the Selected Object in Sculpt Mode with ALT Q | Blender Tutorial

How to Change the Color of an Object in the 3D Viewport | Blender Tutorial

How to Create a Procedural Progress Bar with Shader Nodes and an Empty | Blender Tutorial

Texture Mapping in Blender: Vertical Gradient with Color Ramp along the Z Axis

How to Add a Black Outline to Objects Using Compositing | Blender 4.3 Tutorial

How to Save Different Versions of the Rendering (Compositing) at Once Using File Output Nodes in Blender 4.3

How to Modify Multiple Object Parameters with ALT + Left Click in Blender 4.3 | Quick-tip Tutorial

Parented Objects and Keyframe Shifting: A Simple Animation in Blender 4.3 | Basic Tutorial

Partly Colored, Partly Grayscale Rendering | A Free Compositing Group for Blender | Tutorial 2 of 2

Partly Colored, Partly Grayscale Rendering | A Free Compositing Group for Blender | Tutorial 1 of 2

Blender Quick Tip | The Extrude to Cursor Tool (CTRL + Right-Click)

BLENDER - How to Start Renderings of Multiple Files from the Command Line Without Opening Blender

Meshroom Quick-Tip: How to Resize Camera Icons and Points

How to Create Copies of an Object Along a Path in Blender Using Array and Curve | Tutorial

How to Deform an Object Along a Path Using the Curve Modifier in Blender 4.3

CryptoMatte for Masks with Motion Blur in Compositing | Blender 4.3 Compositing Basics

Blender Quick Tip - The "Zoom To Mouse Position" and "Lock View" Options

Blender Quick Tip: Cylinder Animation in Pie Chart Style

Cutting, Slicing, and Separating Objects in Blender, Part 2: Boolean and Camera Clipping | Tutorial

Cutting, Slicing, and Separating Objects in Blender, Part 1: Bisect, Split, Rip, Separate | Tutorial

Blender Basics - How to Rotate Control Points of Curves with Tilting

How to Automatically Create Vertices and Edges at Mesh Intersections in Blender | Tutorial

Python Script to Export to FBX with Textures All Blender Files in a Folder

Using Markers to Switch Active Camera During an Animation | Blender 4.2 Tutorial

How to Make Geometry Appear and Disappear on a Curve in Blender with Start and End Mapping | Tutorial

View Layers & Z-Combine tutorial addendum: after burners | Blender 4.1 Compositing

View Layers and Z-Combine in Blender 4.1 | Compositing Basics

Patchy, animated 3D Mist (fog) Mask in Compositing with Procedural Textures in Blender 4.1

Z-Depth vs Mist Render Passes guide | Blender 4.1 Nodes Compositing

BLENDER 4.1 - Compositing: setting Mix to 1 in the Glare Filter to get the effect as a mask

BLENDER - Animating Newton's Cradle with Rigid Bodies and Hinge Constraint

Blender - Collisions, Cloth, and Rigid Bodies: a short animation

BLENDER - Floating Ghost: Cloth simulation animation with a Force Field and Weight Painting

BLENDER - How to Make Rigid Bodies Interact with Cloth Objects

Blender Compositing tutorial - Sun Beams, part 2: Masks, Blur, Color Balance

Blender Compositing tutorial - Sun Beams, part 1: basics

BLENDER - The Classroom, part 2: Post-Production Nodes Compositing

BLENDER - The Classroom, part 1: Volume Scattering in World Output

Blender - Quick Guide to the UV Project Modifier

BLENDER - Checking the Orientation of Normals in the 3D Viewport with Face Orientation

BLENDER - Using Bridge to Connect Sections and Profiles (Lofting, Skinning)

BLENDER - Creating Curved Connections Between Profiles

Blender - UV Map Disappears after Joining Two or More Objects? Here's Why

Blender Quick Tip - Select Boundary Loop and Individual Origins

BLENDER - How to Create a Ghost Silhouette Effect in Blender

BLENDER - Glowing edges (nodes compositing tutorial)

BLENDER - One Material, one Texture, multiple Colors with Object ID

BLENDER - Compositing - How to save and retrieve Render Passes in an EXR file for subsequent post-productions

How to Import Adobe Dimension 3D Models in Blender | Tutorial

BLENDER - Flickering Lights in Blender with the Noise Modifier tutorial

BLENDER - Seams impossible: recovering the UV seams from islands in Blender

BLENDER - A climbing electric arc (Jacob's Ladder)

Particles Along a Path in Blender 4.5 | Tutorial

BLENDER - Basics - How to set and rotate an HDR image as World Background

How to Place One Object on Top of Another in Blender Using the Face Project Snap Tool | Tutorial

Blender 4.1 modeling basics - The Poke Faces + Tris-to-Quads trick for knurling (and more...)

Blender - Modeling basics: BIC pen cap with Bridge Edge Loops

Blender - How to Make Rigid Body and Animations interact (Billiards Break Shot)

Blender - How to Append Compositing Nodes in a Project

BLENDER - Compositing basics: Group parameters & tuning the Vignette effect

Blender modeling BASICS: making holes or extrusions on curved surfaces with LoopTools Circle

The Kuwahara Node in Blender 4

Blender Quick Tip - Changing the interpolation type between keyframes

Blurring the Glare Streaks to enhance the effect - Blender 4.1 Compositing tutorial quick tip

Camera Follow Path and the Switch Direction operator in Blender | Animation Quick Tip

BLENDER - A simple Setup for NPR Rendering of an Electronic Circuit

BLENDER - Creating a Procedural Starry and Cloudy Sky (a tribute to "Mêlée Island" from "The Secret of Monkey Island")

How to remove unused resources in projects with Purge Unused Data in Blender 4.2

Zoom Stopping at a Point and How to Solve It (Frame; Dolly; Fly / Walk) | BLENDER tutorial

Checker Deselecting Edge Rings in Blender 4.2 tutorial

Auto Save, Backup Versions, Save Incremental: Don’t Lose Your Projects in Blender 4.5 | Tutorial

How to Straighten Vertices Between Two Points Using a Custom Orientation in Blender | Tutorial

How to Model a Forged Steel Basket in Blender 5 | Array + Twist Tutorial

Sculpt Mask from Edit Mode Selection in Blender | Workaround Tutorial

The Correct Material for Window Glass in Cycles | Blender Tutorial

Mark Sharp, Mean Crease, and Bevel Weight in Blender | Basic Tutorial

Fire Simulations in Blender 4.5 basics | 0/10: Overview

Substance 3D Painter Basics | How to Highlight Material Details with the Sharpen Filter

UNITY - Look At script: pointing an object towards another; part 2: Slerp

UNITY - Look At script: pointing an object towards another; part 1: Rotate

UNITY - Introduction to Coroutines and "yield WaitForSeconds"

UNITY - Introduction to rotations with Slerp, Quaternions, Time.deltaTime

UNITY - Scripting basics: introduction to Time.deltaTime (for smooth gameplay across devices)

How to Remove Sharpening Artifacts Along UV Seams in Painter | Tutorial

UNITY - How to switch to Materials Legacy mode to manually assign Textures to Materials

UNITY - Basics: Rigid Body and Physics Materials to make objects fall and bounce

UNITY - How to use Adobe Stock 3D models in Unity (thousands available!)

UNITY - AudioSource in Update: play sounds without overlaps tutorial

Unity 6: How to Use an HDRi Panoramic Image as a Skybox Background

How to Use Vertex Colors from Objects Exported from Blender 4.5 in Unity 6 | Tutorial

Retopology with Instant Meshes (basics)

FBX Converter for Importing ASCII FBX Files into Blender 4.3

Dynamic Defocus script in Unity

Unity HDRP Quick Tip - Strange effects in transparent materials at the edges of the frame

How to Export Objects with Vertex Colors or Materials with PBR Textures from Blender 4.5 to Unreal 5 | Tutorial

Unreal Engine 5: Fullscreen and Movement with WASD or Arrow Keys in the Editor | Tutorial

How to Use Specular in Unreal Engine 5 Materials | Tutorial

How to Combine Multiple Objects into One in Unreal Engine 5 using Combine Meshes and Merge Actors

Krita: How to Fix Tablet Lag

Baking a Normal Map: transferring details from a High Poly model to a Low Poly model in Blender

Recreating Camera Perspective from a Photo in Blender with fSpy

BLENDER 4.1 - How to use the Ambient Occlusion pass in Compositing to enhance realism in your renderings

Blender - How to export to USDZ with embedded Textures

Blender Quick Tip - How to export FBX with embedded Materials and Textures

Blender - How to save Glare (Bloom) in files with transparency (PNG, EXR, ...)

How to Create an Offset with Mesh Tools in Blender 5 | Tutorial

Creating and Exporting Actions for an Animated Model | BASICS of Animations in Blender 4.x

BLENDER basics: The Copy Rotation Constraint tutorial (Venetian blinds)

Blender tutorial (BASIC) - How to make wireframe renderings

BLENDER - How to make a simple scene for a turntable animation, tutorial

BLENDER - Using the F-Curve Cycle modifier to create cyclic animations

BLENDER - Red Blood Cells animation (Displace, Emitter particle system, force field)

BPY 3 (Blender 3.x + Python): How to export UV Layouts as images with uv.export_layout

BLENDER - Rigid body simulation: filling a container with (falling) objects

Strange artifacts in Blender (Cycles) due to sRGB vs Non-Color Data Normal Maps

BLENDER - How to create "pixel art" style renderings in Blender with the Pixelate node

Select your language